
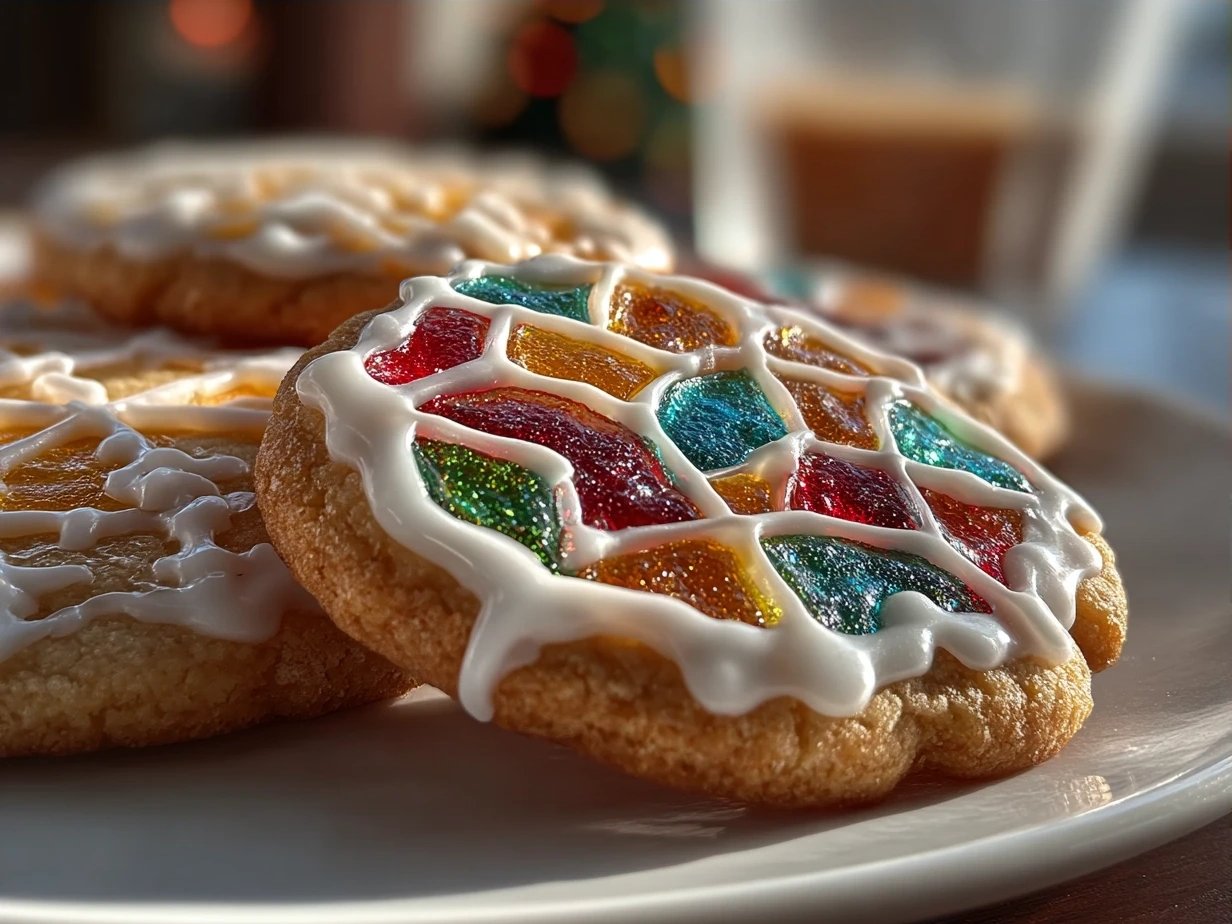
Okay, gather ’round, friends! Let’s make some magic in the kitchen. I’m so excited to share one of my all-time favorite holiday recipes with you: Stained Glass Cookies! These aren’t just any sugar cookies; they’re edible works of art that always bring a smile to everyone’s face. I remember the first time I attempted these. It was Christmas Eve-Eve, the kids were bouncing off the walls, and I thought, “Hey, let’s add another layer of potential disaster to this festive chaos!” Let’s just say the initial results were less “stained glass” and more “abstract melted candy blobs.” The cookies stuck to the baking sheet, the candy ran, and I almost cried into the powdered sugar. But, like with most things in life, a few tweaks and a whole lot of patience later, I finally cracked the code. Now, these Stained Glass Cookies are a tradition, a cherished part of our holiday season, and a testament to the fact that even kitchen mishaps can lead to something beautiful.
I love that these sugar cookies are a project the kids can really get involved with. It’s definitely easier to make than the Peanut Butter Spider Cookies I always do for Halloween, and the process is very similar to the Halloween Crinkle Cookies, but without the chocolate!
These Stained Glass Cookies have become my go-to because they’re surprisingly simple to make (once you know the secrets, of course!), they look absolutely stunning, and they taste delicious. Plus, they’re the perfect way to use up that bag of hard candies that mysteriously appears in every grandma’s purse around the holidays. I promise, even if you’ve had baking fails in the past, you can totally nail this. Come on, let’s get started!
What You’ll Need for This Stained Glass Cookies
Alright, let’s talk ingredients. Here’s what you’ll need to make these dazzling Stained Glass Cookies. I always use real butter – the flavor is just unbeatable for these Christmas cookies!
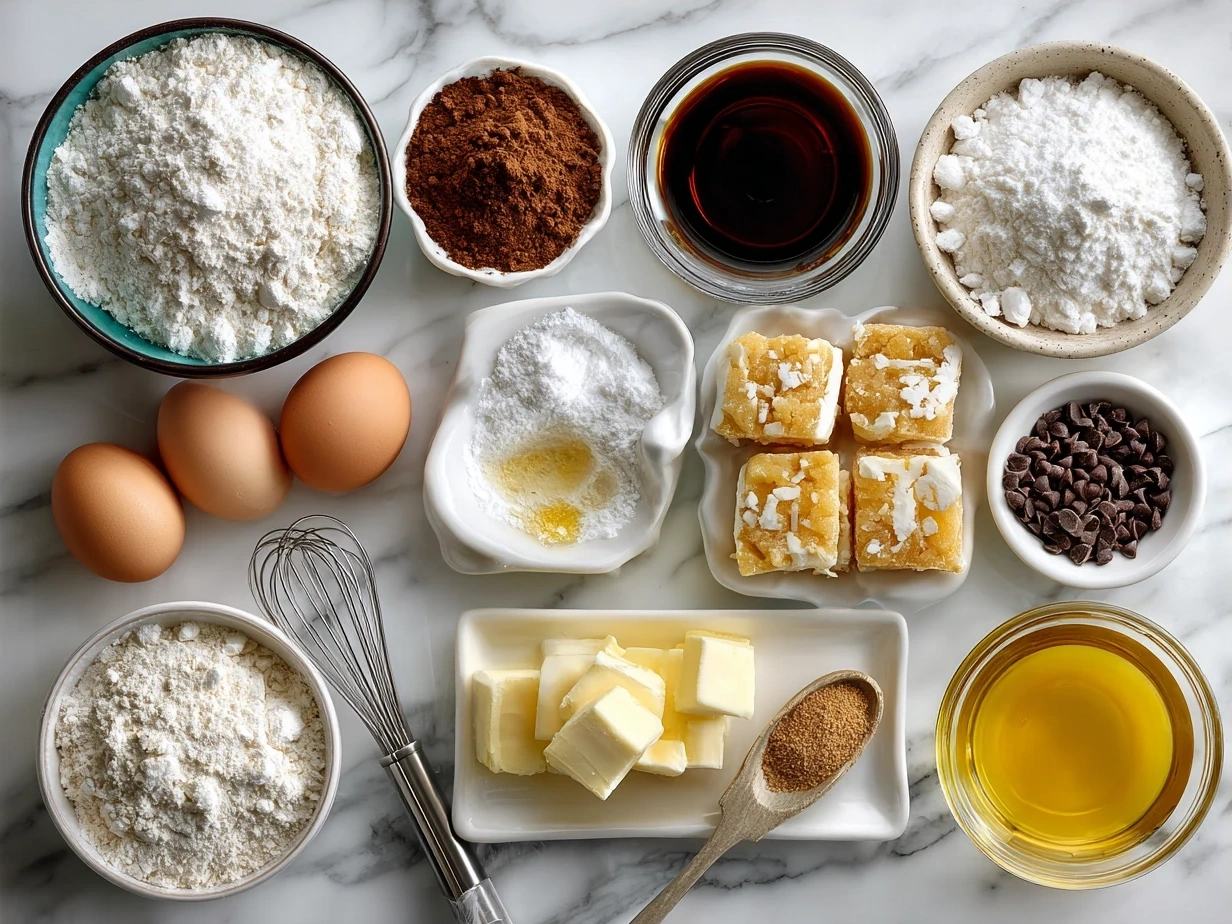
- 1 cup (2 sticks) unsalted butter, softened: Make sure it’s softened, not melted. Trust me, that makes a difference.
- 1 cup granulated sugar: The classic sweetness we all know and love.
- 2 large eggs: Adds richness and helps bind everything together.
- 1 teaspoon vanilla extract: I always use pure vanilla extract; it makes a world of difference.
- 3 cups all-purpose flour: Be sure to measure correctly! Spoon and level is your friend here.
- 1 teaspoon baking powder: Helps the cookies rise and stay nice and soft.
- ½ teaspoon salt: Balances the sweetness and enhances the flavors.
- Assorted hard candies (Jolly Ranchers, Life Savers, etc.): This is where the magic happens! Choose a variety of colors for that beautiful stained glass effect. I find the individual wrapped candies are the easiest to crush.
- Optional: Sanding sugar or sprinkles: For extra sparkle and holiday cheer!
When making Stained Glass Cookies, you can find most of these ingredients at any grocery store. However, if you’re looking for specific hard candy colors (like only red and green for Christmas), you might need to check a candy store or order online. Here’s a Stained Glass Cookies trick I learned: don’t use peppermint candies. The flavor overpowers the cookies, and nobody wants a peppermint stained glass window!
As for cost-saving tips, buying generic brand hard candies can save you a few bucks, and they work just as well. I always stock up on flour and sugar when they’re on sale, too.
Leftover Stained Glass Cookies ingredients, like flour and sugar, should be stored in airtight containers in a cool, dry place. Hard candies should also be kept sealed to prevent them from getting sticky.
Let’s Make This Stained Glass Cookies Together
Okay, here’s where the fun begins! Let’s walk through the steps to making these gorgeous Stained Glass Cookies together. Don’t worry, I’ll be right here with you, sharing all my tips and tricks.
- Cream the butter and sugar: In a large bowl, beat the softened butter and granulated sugar together with an electric mixer until light and fluffy. This usually takes about 3-5 minutes.
- Add eggs and vanilla: Beat in the eggs one at a time, then stir in the vanilla extract.
- Combine dry ingredients: In a separate bowl, whisk together the flour, baking powder, and salt.
- Gradually add dry ingredients to wet ingredients: Slowly add the dry ingredients to the wet ingredients, mixing until just combined. Be careful not to overmix!
- Chill the dough: Wrap the dough in plastic wrap and chill in the refrigerator for at least 30 minutes. This helps the dough firm up and prevents the cookies from spreading too much in the oven. I learned the hard way with Stained Glass Cookies that skipping this step is a recipe for disaster!
- Preheat the oven and prepare baking sheets: Preheat your oven to 375°F (190°C). Line baking sheets with parchment paper or silicone baking mats.
- Roll out the dough: On a lightly floured surface, roll out the dough to about ¼ inch thickness.
- Cut out cookie shapes: Use cookie cutters to cut out your desired shapes. I love using stars, hearts, and Christmas trees for holiday cookies.
- Cut out the centers: Use a smaller cookie cutter or a knife to cut out a shape in the center of each cookie. This is where the “stained glass” will go!
- Crush the hard candies: Place the hard candies in a resealable bag and crush them into small pieces using a rolling pin or a meat mallet. I find this to be a great stress reliever! Stained glass cookies with melted Jolly Rancher candy. I tend to just use a mallet for this.
- Fill the centers with crushed candy: Carefully fill the cut-out centers of the cookies with the crushed hard candies. Make sure the candy is evenly distributed and reaches the edges of the cut-out.
- Bake: Bake for 6-8 minutes, or until the cookies are lightly golden and the candy is melted and smooth.
- Cool completely: Let the cookies cool on the baking sheets for a few minutes before transferring them to a wire rack to cool completely. The candy will harden as it cools, creating the “stained glass” effect.
While the Stained Glass Cookies are baking, the kitchen should smell like vanilla and sweet candy – pure holiday bliss! Don’t worry if your Stained Glass Cookies aren’t perfect the first time; mine certainly weren’t! It’s all about experimenting and having fun. I learned that it can be hard to get the cooking time right, so keep an eye on those cookies! Stained glass cookie recipe from the 1970s?
In my kitchen, Stained Glass Cookies usually takes about 20 minutes of prep time and 6-8 minutes of baking time. While the cookies are cooling, I like to clean up the kitchen and maybe sneak a few pieces of candy. I also play some Christmas music while these holiday cookies are baking.
How I Love to Serve This Stained Glass Cookies
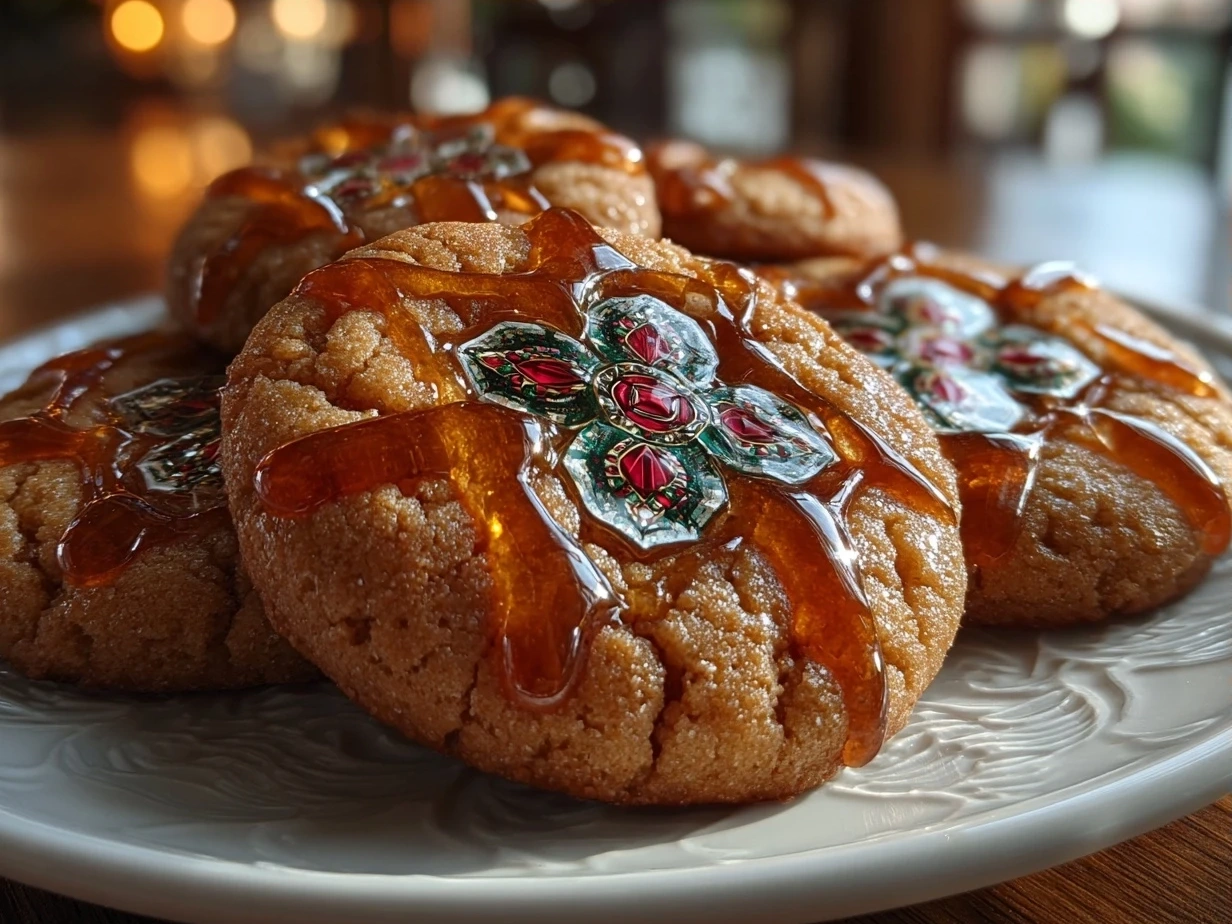
Now for the best part: serving these beauties! My family loves this Stained Glass Cookies when I present them on a festive platter, all sparkly and colorful. They’re the perfect Christmas cookies!
I often pair these Stained Glass Cookies with a warm cup of hot chocolate or a glass of milk. The sweetness of the cookies goes perfectly with a creamy, comforting drink. For more adult gatherings, a glass of sparkling wine or a dessert wine would also be a lovely accompaniment.
This Stained Glass Cookies is perfect for Christmas parties, holiday gatherings, or even just a cozy night in with the family. They also make wonderful gifts! I love packaging them in cellophane bags tied with ribbons.
For presentation, I like to arrange the cookies on a tiered stand or a festive platter. You can also sprinkle them with extra sanding sugar or edible glitter for an extra touch of sparkle.
If you have extra Stained Glass Cookies, you can store them in an airtight container at room temperature for up to a week. Although, in my house, they never last that long! I love that this recipe is similar to Crumbl Pecan Pie Cookies in that it produces large quantities of cookies that are great for serving at a large gathering!
I’ve tried a few seasonal Stained Glass Cookies variations. For Valentine’s Day, I use heart-shaped cutters and red and pink candies. For Easter, I use pastel-colored candies and bunny-shaped cutters. The possibilities are endless!
Friends always ask for this Stained Glass Cookies recipe. They’re always so impressed by how beautiful and delicious they are. And the best part is, they’re actually quite easy to make! I always point them to these Stained Glass Sugar Cookies – Sprinkle Bakes, so they have another great recipe source.
Your Stained Glass Cookies Questions Answered
I get asked a lot about my recipe for Stained Glass Cookies, so here are some of the most common questions I receive:
- Can I use different types of hard candies? Absolutely! I’ve used Jolly Ranchers, Life Savers, and even some off-brand candies. Just make sure they’re all hard candies that melt well. You know what I do when my Stained Glass Cookies have different types of candy? I just name the cookies after the candies used in them!
- What if my candy doesn’t melt evenly? This can happen if the candy pieces are too large or if your oven temperature isn’t consistent. Try crushing the candies into smaller pieces and rotating the baking sheets halfway through baking. I’ve also noticed the type of baking sheet makes a huge difference. Dark pans tend to burn the edges of the sugar cookies more easily, so I always use light-colored baking sheets.
- Can I make the dough ahead of time? Yes! You can make the dough up to 2 days in advance and store it in the refrigerator. Just make sure to wrap it tightly in plastic wrap. When you’re ready to bake, let the dough sit at room temperature for about 15-20 minutes to soften slightly before rolling it out. This is a lifesaver when I’m short on time during the holidays.
- What if my cookies spread too much in the oven? This usually happens if the dough is too warm or if you’ve overmixed it. Make sure to chill the dough thoroughly before baking, and avoid overmixing. Adding a tablespoon or two of extra flour can also help.
- Can I use different cookie cutters? Of course! Get creative and use any cookie cutters you like. Just make sure the center cut-out is small enough to hold the melted candy. My family prefers using different shapes for each cookie, so we end up with some stars, some trees, and even some snowmen.
- How do I prevent the candy from sticking to the baking sheet? Lining your baking sheets with parchment paper or silicone baking mats is the best way to prevent sticking. I also lightly grease the parchment paper with cooking spray for extra insurance.
- What if I don’t have time to make the dough from scratch? While I always prefer homemade dough, you can use store-bought sugar cookie dough in a pinch. Just make sure to chill it well before rolling it out and filling it with candy. I’ve had blog readers tell me that the store-bought dough can be inconsistent, so keep an eye on the Christmas cookies while they’re baking.
My Final Thoughts on This Stained Glass Cookies
These Stained Glass Cookies are more than just a recipe; they’re a tradition, a memory, and a little bit of holiday magic. I hope you’ll give them a try and create your own special memories with them. These holiday cookies always make me smile.
My Stained Glass Cookies Pro Tips:
- Don’t overbake: Overbaked cookies will be dry and brittle.
- Use a variety of candy colors: This will create the most beautiful stained glass effect.
- Let the cookies cool completely before handling: The candy is very hot when it comes out of the oven, so be patient!
- Chocolate Stained Glass Cookies: Add cocoa powder to the dough for a chocolatey twist.
- Citrus Stained Glass Cookies: Add lemon or orange zest to the dough for a bright, citrusy flavor.
- Spice Stained Glass Cookies: Add cinnamon, nutmeg, or ginger to the dough for a warm, spiced flavor.
My son loves the chocolate version, while my daughter prefers the citrus ones. My husband, on the other hand, is a purist and loves the classic recipe.
I encourage you to make this Stained Glass Cookies recipe your own. Experiment with different flavors, shapes, and colors. Have fun with it, and don’t be afraid to get creative! I hope you enjoy the process of making these beautiful and delicious cookies as much as I do. Happy baking! Give these sugar cookies a try; you’ll love them!
\n \n Print
Stained Glass Cookies
These Stained Glass Cookies are beautiful and delicious, perfect for the holidays! The colorful melted candies create a stunning effect that everyone will love.
- Prep Time: 30 minutes
- Cook Time: 10 minutes
- Total Time: 40 minutes
- Yield: 24 cookies
- Category: Dessert
- Method: Baked
- Cuisine: American
Ingredients
- 3 cups all-purpose flour
- 1 teaspoon baking powder
- 1/2 teaspoon salt
- 1 cup (2 sticks) unsalted butter, softened
- 1 1/2 cups granulated sugar
- 2 large eggs
- 1 teaspoon vanilla extract
- Assorted hard candies (such as Jolly Ranchers), crushed
Instructions
- Preheat oven to 375°F (190°C). Line baking sheets with parchment paper.
- In a medium bowl, whisk together flour, baking powder, and salt.
- In a large bowl, cream together butter and sugar until light and fluffy. Beat in eggs one at a time, then stir in vanilla.
- Gradually add the dry ingredients to the wet ingredients, mixing until just combined.
- Roll out dough to 1/4-inch thickness on a lightly floured surface. Use cookie cutters to cut out desired shapes. Use a smaller cookie cutter to cut out a hole in the center of each cookie.
- Place cookies on prepared baking sheets. Fill the center hole of each cookie with crushed hard candies.
- Bake for 8-10 minutes, or until edges are lightly golden and candy is melted.
- Let cookies cool completely on baking sheets before transferring to a wire rack.
Notes
For a festive touch, use different colored candies in each cookie. You can also add a touch of almond extract to the dough for a different flavor.