
Okay, gather ’round, my friends! Let’s get ready to whip up some seriously spooky and delicious Halloween Crinkle Cookies. I can practically smell the chocolate and vanilla wafting through the kitchen already. There’s just something about these festive Halloween treats that takes me right back to being a kid, trick-or-treating with my siblings and coming home to a mountain of candy. My mom always made special Halloween cookies, and while these weren’t exactly her recipe, they definitely capture that same feeling of Halloween magic.
I remember the first time I tried to make these Halloween Crinkle Cookies. What a disaster! The dough was too sticky, the cookies spread out like pancakes, and the powdered sugar just melted right in. I almost gave up, but then I realized the key was to chill the dough properly – a lesson I learned the hard way! Now, making these easy Halloween cookies is a yearly tradition with my own kids. It’s messy, it’s fun, and the results are always devoured in minutes.
Trust me, even if you’re a baking newbie, you can nail this recipe. My cooking philosophy is all about embracing imperfections and enjoying the process, and these Halloween Crinkle Cookies are the perfect way to do just that. They fit right into my busy life – I can make the dough a day or two in advance, and then bake them off whenever we have a few free minutes. I want to encourage you all to dive in, get your hands dirty, and create some memories with these Halloween Crinkle Cookies. I think you will enjoy my Loaded Cream Cheese Halloween Brownies too!
What You’ll Need for This Halloween Crinkle Cookies
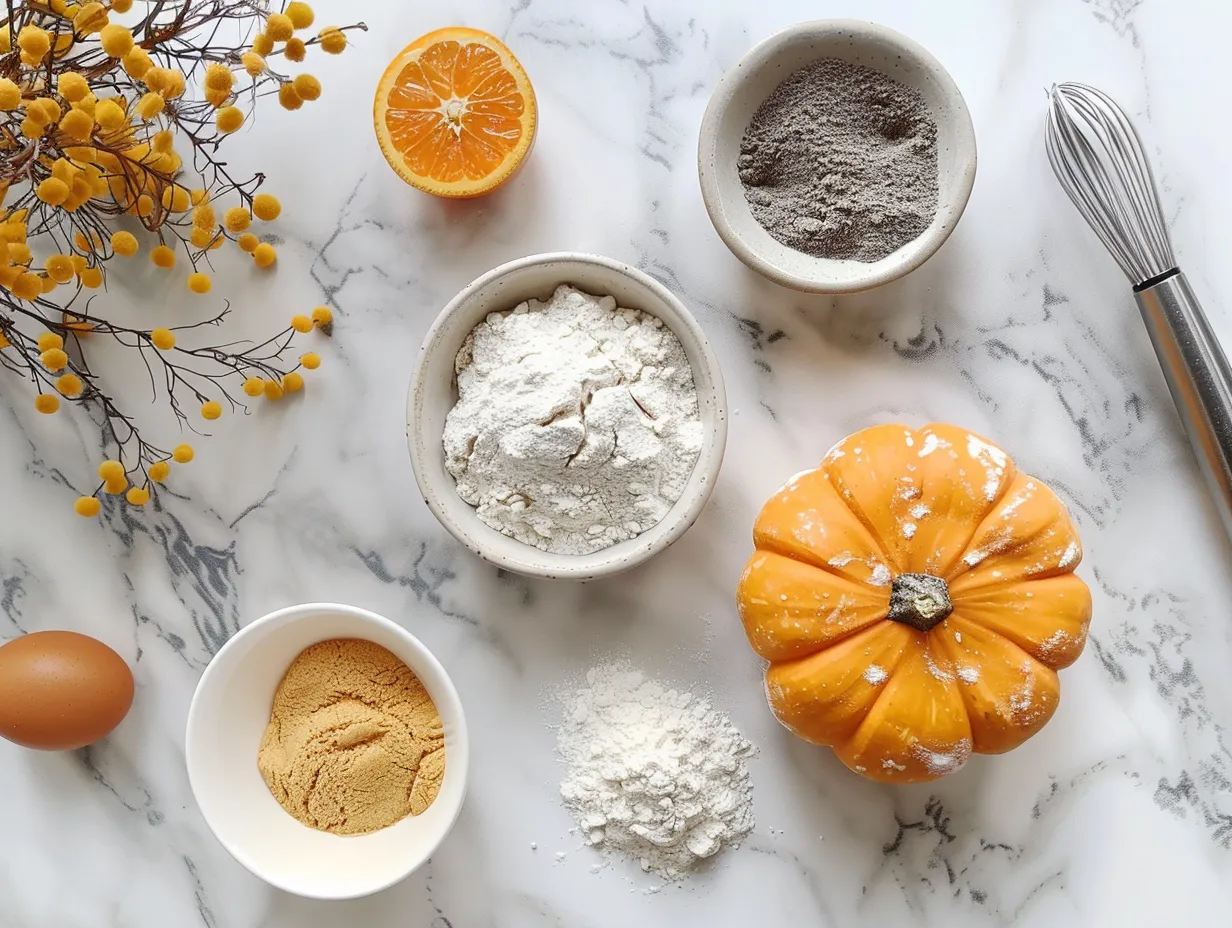
Alright, let’s talk ingredients for these easy Halloween cookies. Here’s what you’ll need, all measured out and ready to go:
- 1 cup (2 sticks) unsalted butter, softened: I always use a good-quality butter for my Halloween Crinkle Cookies. It makes a difference in the flavor and texture.
- 1 ½ cups granulated sugar: This gives the cookies their sweetness and helps them crinkle perfectly.
- 2 large eggs: Make sure they’re at room temperature for the best results.
- 1 teaspoon vanilla extract: Pure vanilla extract is the way to go for these Halloween Crinkle Cookies!
- 2 cups all-purpose flour: Don’t pack the flour when measuring.
- ¾ cup unsweetened cocoa powder: I prefer Dutch-processed cocoa for a richer, darker color and flavor in my chocolate crinkle cookies.
- 2 teaspoons baking powder: This helps the cookies rise and become nice and fluffy.
- ½ teaspoon salt: Balances out the sweetness and enhances the other flavors.
- ½ cup powdered sugar, for coating: This is what gives the cookies their signature crinkled look. Don’t skimp on this!
Shopping Tip: When making easy Halloween cookies, you can find Dutch-processed cocoa powder at most well-stocked grocery stores or online. I usually buy a big container of it because I use it in so many recipes.
Here’s a trick I learned for these Halloween Crinkle Cookies: If you don’t have unsalted butter on hand, you can use salted butter, just reduce the amount of salt in the recipe by ¼ teaspoon. You can buy almost all the ingredients in bulk too when making festive Halloween treats, which is a major cost saver.
Ingredient Prep Shortcut: For busy families, I recommend measuring out all your dry ingredients in advance. Store them in an airtight container until you’re ready to bake your Halloween Crinkle Cookies.
Storage Tip: Store any leftover cocoa powder or baking powder in airtight containers in a cool, dark place to keep them fresh for longer. And honestly, if you have leftover Halloween Crinkle Cookies, you are doing something wrong!
Let’s Make This Halloween Crinkle Cookies Together
Okay, my friends, let’s dive into making these Halloween Crinkle Cookies together. I promise, it’s easier than it looks!
- Cream together the butter and sugar: In a large bowl (or the bowl of your stand mixer), cream together the softened butter and granulated sugar until light and fluffy. This usually takes about 3-5 minutes. I love the smell of butter and sugar mixing. It reminds me of all the holiday baking my mom used to do.
- Add the eggs and vanilla: Beat in the eggs one at a time, then stir in the vanilla extract. Make sure everything is well combined.
- Combine the dry ingredients: In a separate bowl, whisk together the flour, cocoa powder, baking powder, and salt. This ensures that all the dry ingredients are evenly distributed.
- Gradually add the dry ingredients to the wet ingredients: Add the dry ingredients to the wet ingredients in small increments, mixing until just combined. Be careful not to overmix the dough, or your Halloween Crinkle Cookies will be tough.
- Chill the dough: Cover the bowl with plastic wrap and chill the dough in the refrigerator for at least 2 hours, or preferably overnight. This is a crucial step! Chilling the dough prevents the cookies from spreading too much and helps them develop those beautiful crinkles. I learned the hard way with Halloween Crinkle Cookies that skipping this step leads to flat, sad cookies.
- Preheat the oven: Preheat your oven to 350°F (175°C). Line baking sheets with parchment paper. I find this is much easier than trying to get the Halloween Crinkle Cookies off the baking sheets without breaking.
- Shape the cookies: Roll the chilled dough into 1-inch balls. This is where the kids love to help!
- Coat in powdered sugar: Generously roll each ball in powdered sugar, making sure it’s completely coated. This is what creates the signature crinkled effect.
- Bake: Place the cookies on the prepared baking sheets, leaving about 2 inches between each cookie. Bake for 10-12 minutes, or until the edges are set but the centers are still slightly soft. Don’t worry if your Halloween Crinkle Cookies look a little underbaked – they’ll continue to set up as they cool. In my kitchen, these festive Halloween treats usually takes about 11 minutes to cook.
- Cool: Let the cookies cool on the baking sheets for a few minutes before transferring them to a wire rack to cool completely.
While the Halloween Crinkle Cookies are baking, I usually tidy up the kitchen and get a head start on dinner. Or, if I’m feeling ambitious, I’ll start another batch of cookies! Your Halloween Crinkle Cookies should smell like chocolate and vanilla heaven.
Serving Tip: I learned that if the powdered sugar seems to melt into the cookies, roll them in powdered sugar again after they’ve cooled for a few minutes.
How I Love to Serve This Halloween Crinkle Cookies
My family loves these easy Halloween cookies when I serve them with a big glass of cold milk or a scoop of vanilla ice cream. They’re also delicious with a cup of hot cocoa on a chilly fall evening.
This Halloween Crinkle Cookies recipe is perfect for Halloween parties, bake sales, or just a fun afternoon of baking with the kids. I also love to package them up in cute little bags and give them as gifts to friends and neighbors.
Presentation Tips: For a festive touch, you can use Halloween-themed sprinkles or edible glitter to decorate your Halloween Crinkle Cookies. Or, you can add a drop of food coloring to the powdered sugar to create colorful crinkles.
Leftover Ideas: If you have extra Halloween Crinkle Cookies (which is rare in my house!), you can crumble them up and use them as a topping for ice cream or yogurt. Or, you can use them to make a delicious cookie crust for a pie or cheesecake. If you’re looking for another festive Halloween treats recipe, you can check out these peanut butter spider cookies.
Seasonal Variations: In the fall, I sometimes add a teaspoon of pumpkin pie spice to the dough for a warm, cozy flavor. You could even add chopped pecans or walnuts for a nutty crunch.
Guest Reactions: Friends always ask for this festive Halloween treats recipe whenever I make them. They’re always impressed by the crinkled look and the rich chocolate flavor. For another Halloween cookie recipe, see if you like Halloween Crinkle Cookies from xoxoBella.
Your Halloween Crinkle Cookies Questions Answered
Alright, let’s tackle some of the most common questions I get about these easy Halloween cookies.
Q: My dough is too sticky. What should I do?
A: You know what I do when my Halloween Crinkle Cookies dough is too sticky? Add a tablespoon or two of flour at a time until it comes together into a manageable ball. Make sure you chill the dough for at least 2 hours, or preferably overnight. That is key!
Q: My cookies spread out too much. Why?
A: This usually happens when the dough isn’t chilled long enough. Chilling the dough helps the butter solidify, which prevents the cookies from spreading too much in the oven. Also, make sure your oven is at the correct temperature. If it’s too low, the cookies will spread before they have a chance to set.
Q: My powdered sugar melted into the cookies. How can I prevent this?
A: This is a common problem, and it’s usually caused by the cookies being too warm when you coat them in powdered sugar. Make sure the cookies are completely cooled before rolling them in the sugar. I actually learned this from the website Yummi Haus, and they have a Bloodshot Eyeball Red Velvet Crinkle Cookies recipe.
Q: Can I use a different type of flour?
A: I haven’t tried it myself, but I’ve heard that you can use gluten-free all-purpose flour blend. Just be sure to follow the package directions carefully. My family seems to love gluten-free foods when I can get the taste and texture right.
Q: Can I make these cookies ahead of time?
A: Absolutely! The dough can be made up to 2 days in advance and stored in the refrigerator. Just bring it to room temperature for a few minutes before rolling it into balls. You can also bake the cookies ahead of time and store them in an airtight container at room temperature for up to 3 days.
Q: Can I freeze the dough or the baked cookies?
A: Yes, you can freeze the dough for up to 2 months. Just wrap it tightly in plastic wrap and then place it in a freezer bag. To freeze the baked cookies, let them cool completely and then place them in a freezer-safe container.
Q: Can I add chocolate chips to the dough?
A: Of course! That is my favorite way to modify the recipe! Fold in about a cup of chocolate chips (milk chocolate, dark chocolate, or semi-sweet) to the dough. For a Halloween twist, you could use Halloween-themed sprinkles instead of chocolate chips.
My Final Thoughts on This Halloween Crinkle Cookies
These Halloween Crinkle Cookies hold a special place in my heart because they remind me of all the fun memories I’ve made with my family over the years. They’re easy to make, they’re delicious, and they’re always a crowd-pleaser.
My Halloween Crinkle Cookies Pro Tips:
- Don’t skip the chilling time! It’s crucial for preventing the cookies from spreading.
- Use good-quality cocoa powder for the best flavor and color.
- Be generous with the powdered sugar for that signature crinkled look.
Variations:
- Peppermint Crinkle Cookies: Add ½ teaspoon of peppermint extract to the dough and top with crushed peppermint candies after baking.
- Orange Crinkle Cookies: Add the zest of one orange to the dough for a citrusy twist.
- Espresso Crinkle Cookies: Add 1 tablespoon of instant espresso powder to the dough for a coffee-flavored kick.
My son loves the peppermint version, while my daughter prefers the classic chocolate flavor. I encourage you to make these festive Halloween treats your own and experiment with different flavors and variations. I think this Halloween Crinkle Cookies recipe is similar to this one from The Anthony Kitchen.
I hope you enjoy making these easy Halloween cookies as much as I do. Remember, baking is all about having fun and creating memories. So, don’t be afraid to get messy, experiment with different flavors, and enjoy the process. I know you’ll create something truly special. I hope you and your family have a safe and happy Halloween! I hope you love these Halloween Crinkle Cookies! If you like these Halloween Crinkle Cookies, you should check out my Halloween Crack recipe too!
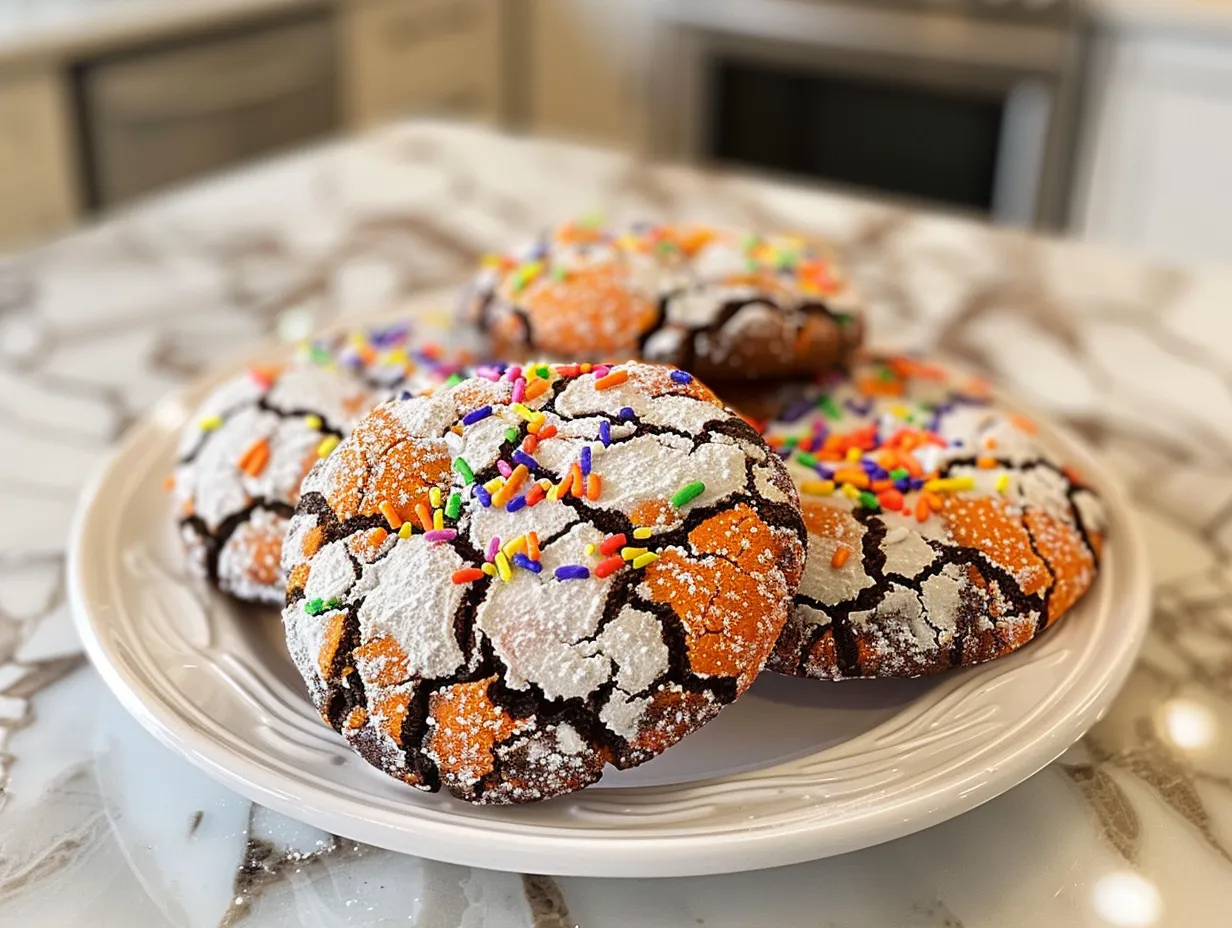
Halloween Crinkle Cookies
These Halloween Crinkle Cookies are soft, chewy, and bursting with chocolate flavor. Rolled in powdered sugar before baking, they crackle and create a spooky, festive treat perfect for the holiday!
- Prep Time: 20 minutes
- Cook Time: 12 minutes
- Total Time: 2 hours 32 minutes
- Yield: 24 cookies
- Category: Dessert
- Method: Baked
- Cuisine: American
Ingredients
- 1 cup (2 sticks) unsalted butter, softened
- 1 1/2 cups granulated sugar
- 2 large eggs
- 1 teaspoon vanilla extract
- 2 cups all-purpose flour
- 3/4 cup unsweetened cocoa powder
- 2 teaspoons baking powder
- 1/4 teaspoon salt
- 1 cup powdered sugar, for rolling
- Orange and black sprinkles (optional)
Instructions
- In a large bowl, cream together the softened butter and granulated sugar until light and fluffy.
- Beat in the eggs one at a time, then stir in the vanilla extract.
- In a separate bowl, whisk together the flour, cocoa powder, baking powder, and salt.
- Gradually add the dry ingredients to the wet ingredients, mixing until just combined. Do not overmix.
- Cover the dough and chill in the refrigerator for at least 2 hours, or preferably overnight.
- Preheat your oven to 350°F (175°C).
- Place the powdered sugar in a shallow bowl.
- Roll the chilled dough into 1-inch balls. Roll each ball in the powdered sugar, coating completely. You can optionally add sprinkles at this stage.
- Place the sugared cookie dough balls on a baking sheet lined with parchment paper.
- Bake for 10-12 minutes, or until the edges are set and the centers are slightly soft.
- Let the cookies cool on the baking sheet for a few minutes before transferring them to a wire rack to cool completely.
Notes
For a richer chocolate flavor, use dark cocoa powder. Store the cooled cookies in an airtight container at room temperature for up to 3 days.