
Okay, let’s dive into making some spooky and delicious Peanut Butter Spider Cookies!
I still remember the first time I made these Peanut Butter Spider Cookies. It was for my son, Leo’s, class Halloween party. I wanted to bring something homemade, something that wasn’t just another store-bought cupcake. I envisioned these adorable, slightly spooky, but mostly cute spider cookies. The reality? Let’s just say the first batch looked more like melted blobs with googly eyes glued on haphazardly. The chocolate legs were a sticky mess, and the peanut butter cookies themselves were flatter than pancakes!
But, oh, the taste! Even in their monstrous form, the kids devoured them. That’s when I knew I was onto something. I spent the next few years tweaking the recipe, learning from my mistakes (and there were many!), until I finally perfected what I now call my foolproof Peanut Butter Spider Cookies recipe. Now, it’s a tradition. Every October, Leo and I spend an afternoon baking these Peanut Butter Spider Cookies together. It’s messy, it’s chaotic, but it’s pure joy. It’s a delightful way to celebrate Halloween! These cookies remind me of my Butternut Squash Soup recipe because it is a recipe you can create with your kids.
This recipe is perfect for busy families like mine. It’s quick, easy, and uses ingredients you probably already have in your pantry. Plus, the kids can get involved in decorating – which, let’s be honest, is the best part! It’s so fun to get the little ones involved in the baking process.
My biggest “aha” moment came when I realized that chilling the dough before baking was the key to preventing those dreaded flat cookies. It’s a simple step, but it makes all the difference. I think many people want to make this spider cookies recipe because it is so simple.
So, if you’re looking for a fun, festive, and utterly delicious treat for Halloween, you’ve come to the right place. Don’t be intimidated by the “spider” part; these Peanut Butter Spider Cookies are surprisingly easy to make. I promise, even if they don’t look perfect (and let’s face it, mine rarely do!), they’ll taste amazing.
Ready to get baking? Let’s do this!
What You’ll Need for This Easy Cookie Recipe
Alright, let’s gather our ingredients! Here’s what you need to make my Peanut Butter Spider Cookies:
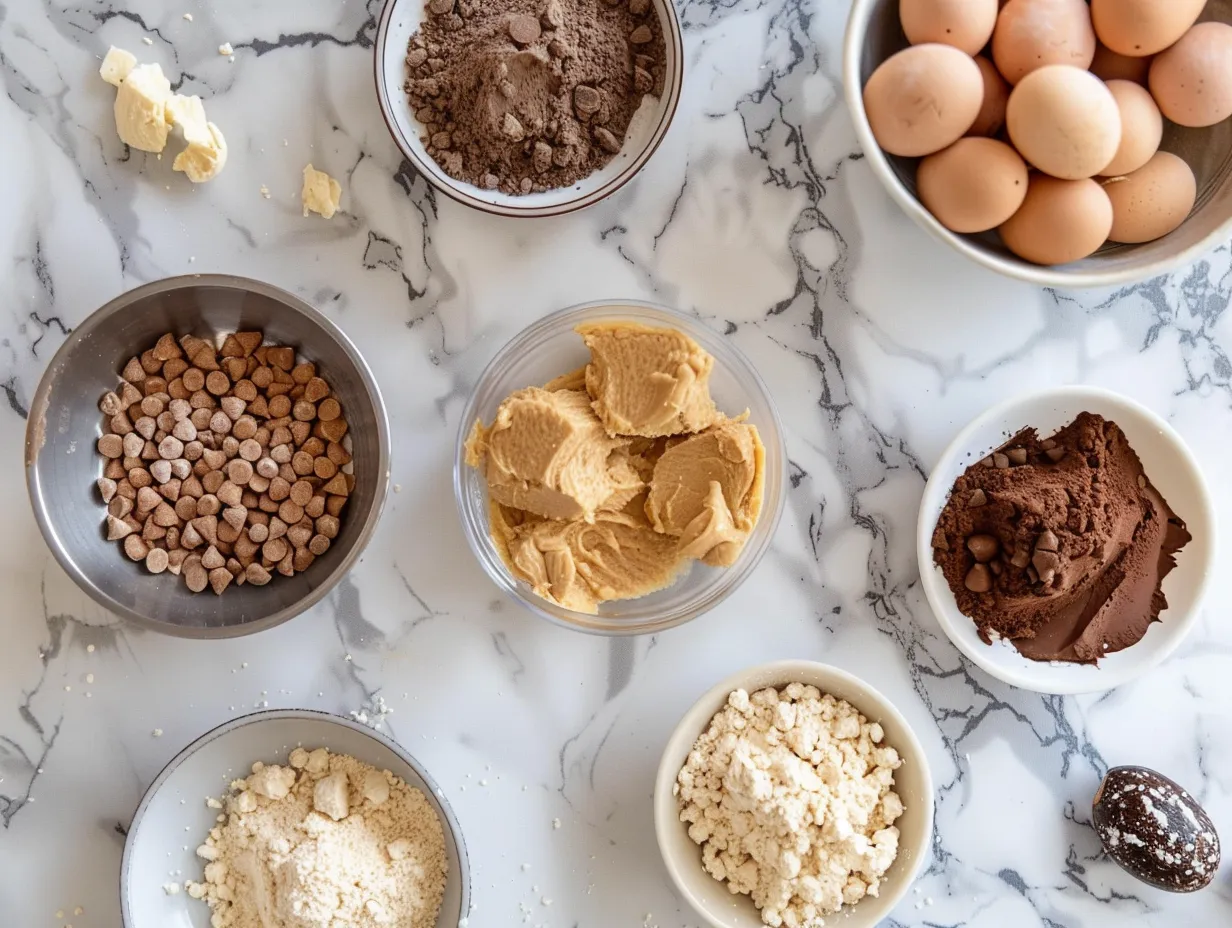
- 1 cup (2 sticks) unsalted butter, softened: I always use unsalted butter in my baking recipes so I can control the amount of salt. Make sure it’s softened, not melted, or your cookies will spread too much.
- 1 cup creamy peanut butter: I prefer using a standard creamy peanut butter, like Jif or Skippy, for these Peanut Butter Spider Cookies. Natural peanut butter tends to be too oily and can affect the texture of the cookies.
- 1 cup granulated sugar: For sweetness!
- 1 cup packed brown sugar: Brown sugar adds a nice, chewy texture and a hint of molasses flavor to the peanut butter cookies.
- 2 large eggs: Eggs bind the ingredients together and add richness.
- 2 teaspoons vanilla extract: I always use pure vanilla extract; it makes a world of difference!
- 3 cups all-purpose flour: Make sure to measure your flour correctly! Spoon it into your measuring cup and level it off with a knife. Too much flour will result in dry, crumbly cookies.
- 1 teaspoon baking soda: This helps the cookies rise and become nice and fluffy.
- 1/2 teaspoon baking powder: Adds a little extra lift.
- 1/2 teaspoon salt: Balances the sweetness and enhances the flavors.
- Chocolate frosting: Store bought or homemade is fine.
- Licorice strings: To create the spider legs.
- Candy eyes: Because every spider needs eyes!
Here’s a Peanut Butter Spider Cookies trick I learned: If you find your peanut butter is a little dry, add a tablespoon of vegetable oil. This will help your peanut butter maintain a smooth consistency and will add needed moisture for your easy cookie recipe.
When making Peanut Butter Spider Cookies, you can find licorice strings at most grocery stores, especially around Halloween. If you can’t find licorice, you can use pretzel sticks dipped in chocolate.
For the eggs, I’ve found that buying organic eggs doesn’t change the overall flavor of the cookies. So if you are trying to save money, stick to buying normal eggs when making Peanut Butter Spider Cookies.
Leftover peanut butter, granulated sugar, and brown sugar should be stored in airtight containers. I use glass mason jars!
Let’s Make This Peanut Butter Spider Cookies Together
Okay, friend, let’s get to the fun part! Here’s how we’re going to make these adorable Peanut Butter Spider Cookies together. Don’t worry, I’ll be with you every step of the way.
Step-by-Step Instructions
- Cream together the butter, peanut butter, and sugars: In a large bowl, cream together the softened butter, peanut butter, granulated sugar, and brown sugar until light and fluffy. You can use a stand mixer or an electric hand mixer. I usually use my KitchenAid stand mixer because it’s easier, but a hand mixer works just fine. This usually takes about 3-5 minutes.
- Beat in the eggs and vanilla: Beat in the eggs one at a time, then stir in the vanilla extract. Make sure everything is well combined.
- Combine the dry ingredients: In a separate bowl, whisk together the flour, baking soda, baking powder, and salt. This ensures that the baking soda and baking powder are evenly distributed throughout the flour.
- Gradually add the dry ingredients to the wet ingredients: Gradually add the dry ingredients to the wet ingredients, mixing until just combined. Be careful not to overmix the dough, or your cookies will be tough.
- Chill the dough: This is the most important step! Wrap the dough in plastic wrap and chill it in the refrigerator for at least 30 minutes. This will prevent the cookies from spreading too much in the oven. I learned the hard way with these Peanut Butter Spider Cookies that chilling the dough is non-negotiable!
- Preheat the oven and prepare the baking sheet: Preheat the oven to 375°F (190°C). Line a baking sheet with parchment paper.
- Roll the dough into balls: Roll the chilled dough into 1-inch balls and place them on the prepared baking sheet, leaving about 2 inches between each ball.
- Flatten the dough: Use a fork to flatten the dough balls in a crisscross pattern. This is a classic peanut butter cookie technique!
- Bake the cookies: Bake for 8-10 minutes, or until the edges are lightly golden brown. Don’t overbake them, or they will be dry. In my kitchen, Peanut Butter Spider Cookies usually take about 9 minutes. I always set a timer so I don’t forget.
- Cool the cookies: Let the cookies cool on the baking sheet for a few minutes before transferring them to a wire rack to cool completely.
- Decorate the cookies: Once the cookies are completely cool, it’s time to decorate them! Frost the tops of the cookies with chocolate frosting. Cut the licorice strings into small pieces and arrange them around the edges of the cookies to create the spider legs. Attach the candy eyes to the frosting.
- Enjoy! These chocolate spider cookies are best enjoyed fresh.
While the Peanut Butter Spider Cookies are baking, I usually clean up the kitchen and get the frosting and decorations ready. I also like to put on some Halloween music to get into the spooky spirit! Your Peanut Butter Spider Cookies should smell like warm peanut butter and chocolate. It’s a delightful smell!
Don’t worry if your Peanut Butter Spider Cookies aren’t perfectly round or if the legs aren’t perfectly straight. That’s part of their charm! Besides, the kids will love them no matter what. If you want some different decoration ideas, check out this website Easy Peanut Butter Spider Cookies l The First Year Blog for some inspiration.
How I Love to Serve This Peanut Butter Spider Cookies
Okay, now that we’ve baked these adorable Peanut Butter Spider Cookies, let’s talk about how to serve them!
My family loves these Peanut Butter Spider Cookies when I pack them in their lunchboxes for a special Halloween treat. They’re also perfect for after-school snacks, parties, and of course, trick-or-treating!
I usually serve these Peanut Butter Spider Cookies with a cold glass of milk or a warm cup of hot chocolate. They also pair well with apple cider or pumpkin spice lattes.
For a fun presentation, you can arrange the Peanut Butter Spider Cookies on a platter and decorate it with Halloween-themed decorations, such as plastic spiders, cobwebs, and mini pumpkins. The options are endless.
This Peanut Butter Spider Cookies recipe is perfect for Halloween parties, school events, or just a fun weekend baking project with the kids. It is such an easy cookie recipe!
If you have extra Peanut Butter Spider Cookies, you can store them in an airtight container at room temperature for up to 3 days. You can also freeze them for longer storage. Just make sure to thaw them completely before serving.
For a seasonal twist, you can use different colored frosting and sprinkles to decorate the cookies for other holidays. For Christmas, you can use red and green frosting and sprinkles. For Easter, you can use pastel-colored frosting and sprinkles. I have to be honest, I have never tried this!
Friends always ask for this Peanut Butter Spider Cookies recipe whenever I bring them to parties. They’re always a hit! If your friends want the recipe, check out Peanut Butter Spider Cookies Recipe. It has some great insight!
If you really want to spice up the cookies, you can serve them with some ice cream. That is a fun way to turn this into a dessert recipe!
Your Peanut Butter Spider Cookies Questions Answered
I know you probably have some questions about making these Peanut Butter Spider Cookies, so I’ve compiled a list of the most frequently asked questions (and their answers!) to help you out.
- Can I use natural peanut butter for these cookies?
- While you can use natural peanut butter, I don’t recommend it. Natural peanut butter tends to be more oily, which can affect the texture of the cookies. The cookies may spread more and be less chewy.
- Can I use a different type of flour?
- I haven’t tried using other types of flour, but I imagine you could substitute all-purpose flour with a gluten-free blend. You may need to adjust the amount of liquid in the recipe to achieve the right consistency.
- Why are my cookies spreading too much?
- There are a few reasons why your cookies might be spreading too much. First, make sure you’re using softened, not melted, butter. Second, chilling the dough is crucial for preventing spreading. Third, don’t overmix the dough. Overmixing can develop the gluten in the flour, which can cause the cookies to spread.
- Can I freeze the cookie dough?
- Yes, you can freeze the cookie dough! Wrap it tightly in plastic wrap and store it in the freezer for up to 3 months. When you’re ready to bake the cookies, thaw the dough in the refrigerator overnight and then proceed with the recipe.
- Can I make these cookies ahead of time?
- Yes, you can make these cookies ahead of time. Store them in an airtight container at room temperature for up to 3 days, or freeze them for longer storage.
- What if I don’t have licorice strings?
- If you don’t have licorice strings, you can use pretzel sticks dipped in chocolate to create the spider legs. Or, you can simply omit the legs altogether! The cookies will still be delicious.
- Can I use different colored candy eyes?
- Absolutely! Get creative with your candy eyes. You can use different colors, sizes, or even edible glitter to make your spiders unique. Halloween cookies are meant to be scary and fun, so let your creativity shine!
You know what I do when my Peanut Butter Spider Cookies spread too much? I just call them “spider pancakes” and tell the kids they’re extra special! For more inspiration, visit Peanut Butter Spider Cookies – If You Give a Blonde a Kitchen. It is a great resource for spider cookies recipe information!
My Final Thoughts on This Peanut Butter Spider Cookies
These Peanut Butter Spider Cookies hold a special place in my heart because they represent so many happy memories with my family. From those first disastrous batches to our annual Halloween baking tradition, these cookies have become a symbol of fun, togetherness, and deliciousness. I especially like them because it is an easy cookie recipe!
Pro Tips for Perfect Cookies
- Don’t skip the chilling step! It’s crucial for preventing the cookies from spreading.
- Use a cookie scoop to ensure that all the cookies are the same size.
- Get creative with the decorations! Let your kids help decorate the cookies and make them their own.
Here are a few variations I’ve tried with my family:
- Chocolate Chip Peanut Butter Spider Cookies: Add chocolate chips to the dough for an extra chocolatey treat.
- Oatmeal Peanut Butter Spider Cookies: Add oatmeal to the dough for a chewy and hearty cookie.
- Double Chocolate Peanut Butter Spider Cookies: Use a chocolate peanut butter cookie base.
Leo loves the chocolate chip version, while Mia prefers the classic Peanut Butter Spider Cookies with extra candy eyes.
I hope you’ll try this Peanut Butter Spider Cookies recipe and make it your own. Don’t be afraid to experiment with different flavors, decorations, and variations. The most important thing is to have fun and enjoy the process.
I hope that when you make these, your cookies turn out better than my first batch! If your kids love this easy cookie recipe, they’ll go crazy for my Butternut Squash Soup recipe! These Peanut Butter Spider Cookies are a fun way to spice up your Halloween festivities.
Happy baking, my friend! I can’t wait to hear how your Peanut Butter Spider Cookies turn out!
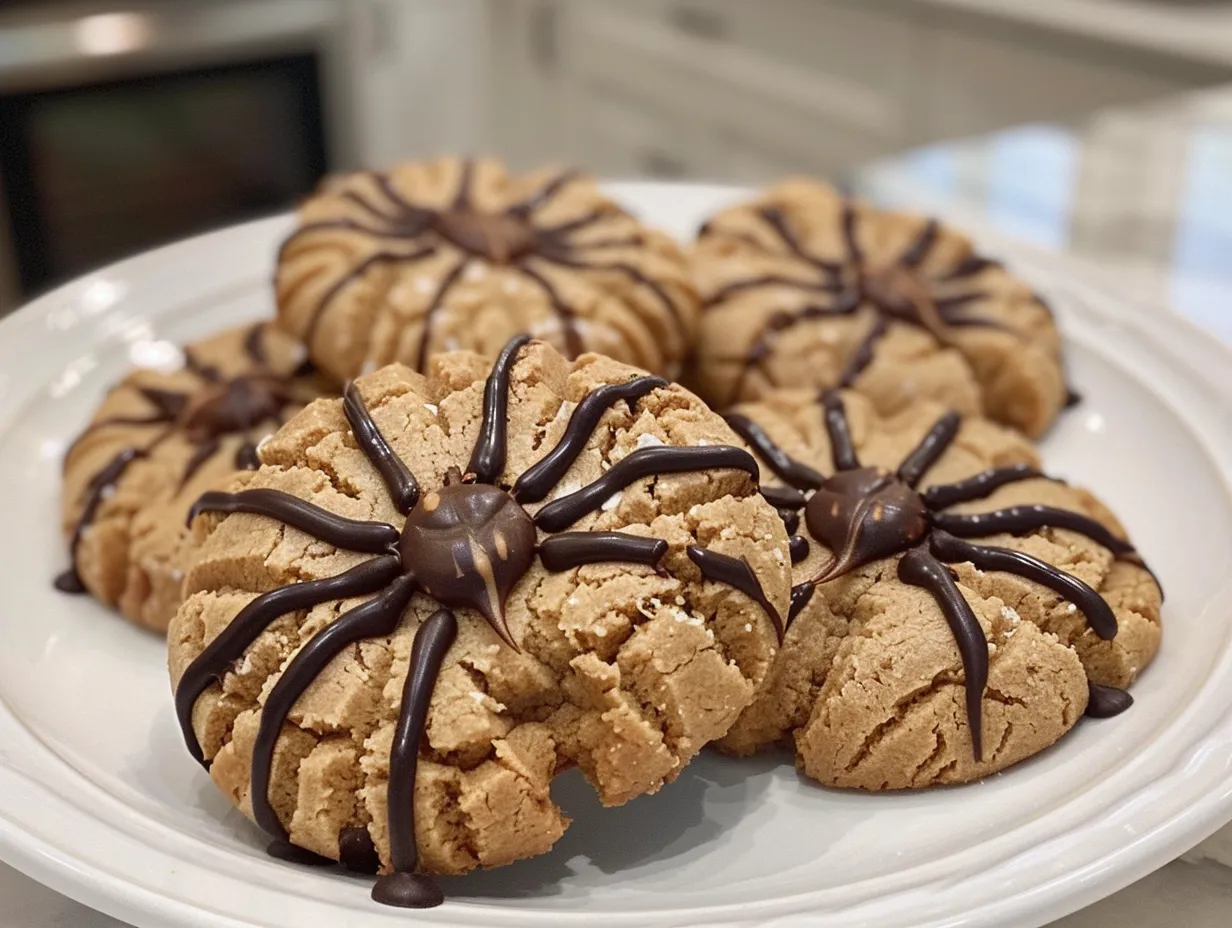
Peanut Butter Spider Cookies
These adorable Peanut Butter Spider Cookies are a fun and festive treat for Halloween! Made with soft peanut butter cookies and decorated with chocolate spiders, they’re sure to be a hit with kids and adults alike.
- Prep Time: 20 minutes
- Cook Time: 10 minutes
- Total Time: 30 minutes
- Yield: 24 cookies
- Category: Dessert
- Method: Baked
- Cuisine: American
Ingredients
- 1 cup (2 sticks) unsalted butter, softened
- 1 cup granulated sugar
- 1 cup packed brown sugar
- 2 large eggs
- 1 teaspoon vanilla extract
- 1 cup creamy peanut butter
- 2 1/2 cups all-purpose flour
- 1 teaspoon baking soda
- 1/2 teaspoon baking powder
- 1/4 teaspoon salt
- 1 cup semi-sweet chocolate chips
- 1/4 cup shortening
- Pretzel sticks, broken in half
- Candy eyes
Instructions
- Preheat oven to 375°F (190°C).
- In a large bowl, cream together the butter, granulated sugar, and brown sugar until light and fluffy.
- Beat in the eggs one at a time, then stir in the vanilla extract and peanut butter.
- In a separate bowl, whisk together the flour, baking soda, baking powder, and salt.
- Gradually add the dry ingredients to the wet ingredients, mixing until just combined.
- Roll the dough into 1-inch balls and place them on a baking sheet lined with parchment paper.
- Bake for 8-10 minutes, or until the edges are lightly golden brown.
- Let cool on the baking sheet for a few minutes before transferring to a wire rack to cool completely.
- While the cookies are cooling, melt the chocolate chips and shortening together in a microwave-safe bowl in 30-second intervals, stirring in between, until smooth.
- Dip the tops of the cookies in the melted chocolate and place them back on the parchment paper.
- Immediately insert 4 pretzel stick halves into each cookie to create spider legs.
- Attach candy eyes to the chocolate with a dab of extra melted chocolate.
- Let the chocolate set completely before serving.
Notes
For a richer flavor, use dark chocolate chips instead of semi-sweet. Store in an airtight container at room temperature for up to 3 days.