
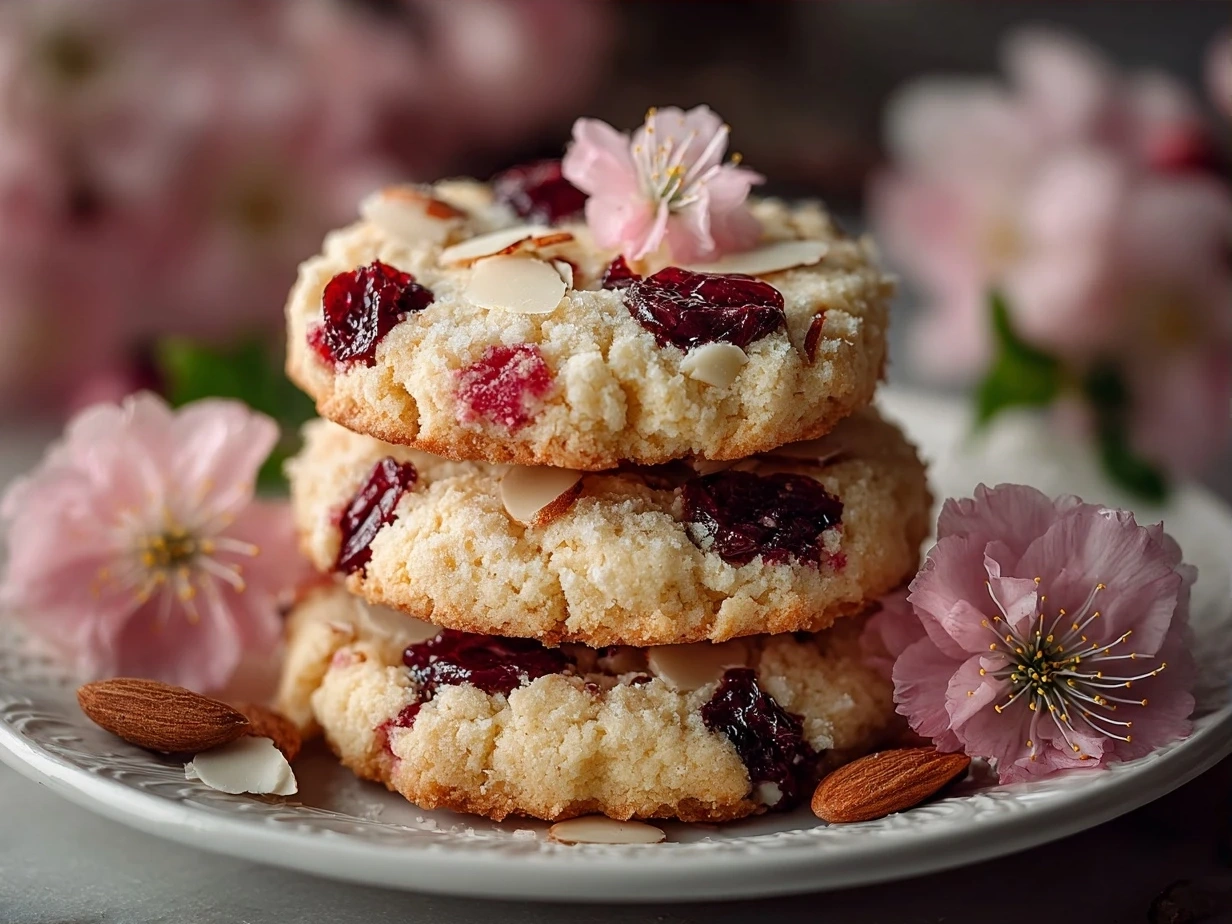
I still remember the first time I baked Cherry Blossom Cookies — it was a sunny spring afternoon, and the air in my kitchen was filled with the delicate fragrance of cherry blossoms coming to life. The soft pastel pink hue of the sakura-inspired dough nestled perfectly on my baking tray, promising a bite of spring itself. These cherry blossom flavor cookies were an instant hit with my family, becoming our little tradition for welcoming the new season.
There’s something truly magical about baking Cherry Blossom Cookies that feels almost like capturing a fleeting moment of natural beauty. Our busy family schedule often leaves little time for elaborate baking projects, but this recipe fits just right into our rhythm—simple enough for a weekday treat, yet elegant enough for a Sunday gathering. I’ll admit, my first few attempts at these Japanese cherry blossom recipe-inspired flower-shaped sugar cookies didn’t quite go as planned. I can’t tell you how many times my dough stuck stubbornly to the rolling pin or how my sakura cookie cutouts looked more like abstract art than delicate spring flower cookies. But with every batch, I learned little tricks that made these cookies perfect for my family—soft yet crisp edges, subtle cherry blossom flavor cookies that don’t overwhelm, and charming shapes that could brighten anyone’s day.
These Cherry Blossom Cookies remind me a bit of the almond-cherry cookies I shared on my blog before, but with their own distinct sakura charm that feels so fresh and springy. If you’ve ever searched for a Japanese sakura cookies recipe that balances tradition with straightforward home baking, I think you’ll find this one feels like a warm hug. I invite you to bake alongside me, to bring a touch of cherry blossom magic to your kitchen, and to feel that cozy joy when your cookie tray comes straight from oven to heart.
And by the way, if you’re curious about some of the other fun flavors on Delilita, have a peek at my peanut butter spider cookies or Halloween crinkle cookies for some year-round inspiration. Those also are super family-friendly and very forgiving recipes!
What You’ll Need for This Cherry Blossom Cookies
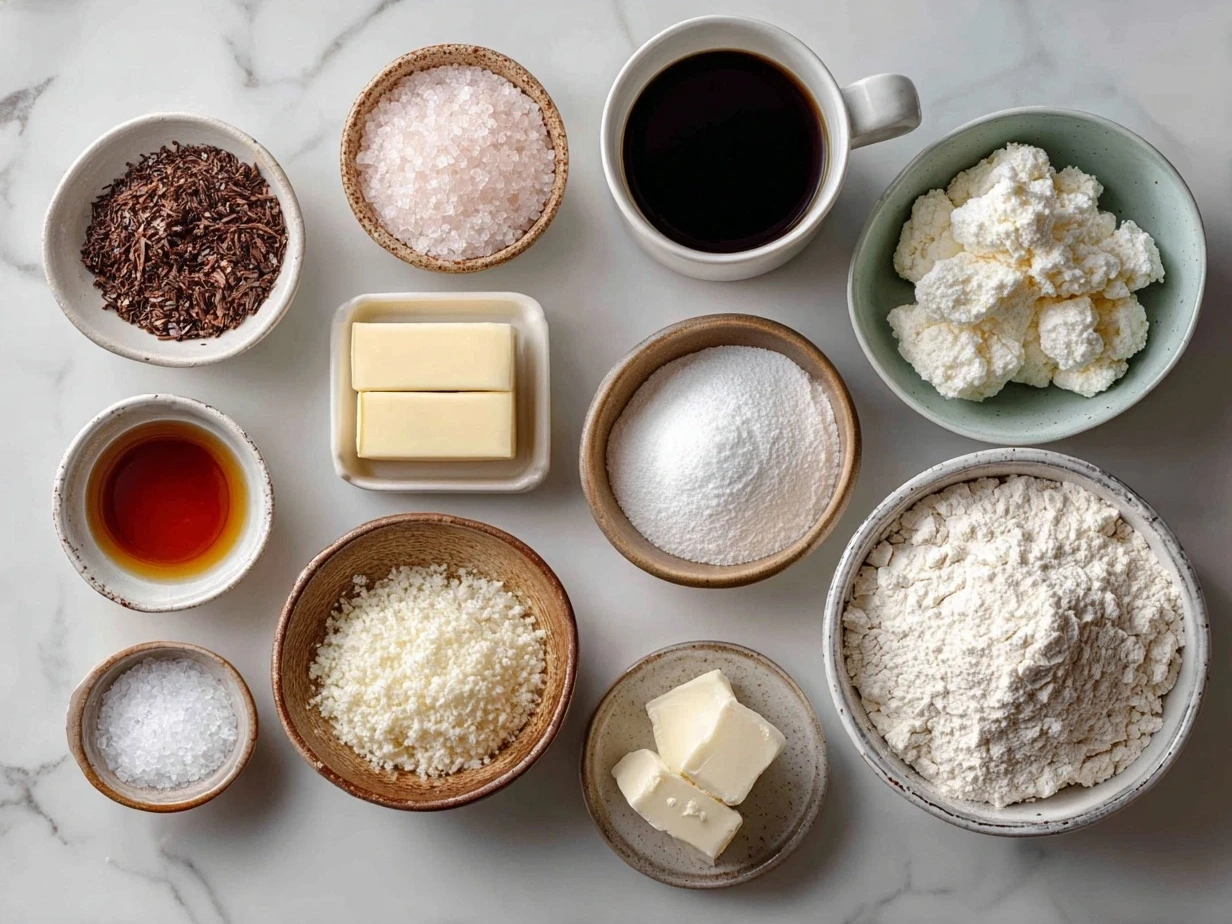
Here’s the lineup of ingredients for these Cherry Blossom Cookies, all measured for fuss-free making:
- 2 ½ cups all-purpose flour – I always recommend using a good quality, unbleached flour for the best texture in your cherry blossom flavor cookies.
- 1 teaspoon baking powder
- ½ teaspoon salt
- ¾ cup unsalted butter, softened – I prefer real butter for its richness, but you can use a good-quality margarine if needed.
- 1 cup granulated sugar – For these sakura cookies, pure white sugar keeps the color crisp and clean.
- 1 large egg
- 1 teaspoon vanilla extract – Adds a cozy warmth that balances the floral notes.
- 1 teaspoon cherry blossom extract or sakura essence – This is the secret ingredient that gives these flower-shaped sugar cookies their authentic cherry blossom flavor cookies.
- Pink gel food coloring, optional – To deepen the spring flower cookies’ hue if you want that pretty pastel pink look.
Now, a little ingredient tip: When making Cherry Blossom Cookies, cherry blossom extract can sometimes be tricky to find in regular grocery stores. I usually grab mine from a specialty Asian market or order online. Here’s a great Cherry blossom shortbread cookies with sakura powder where someone shared tips on sourcing authentic sakura powder, which is a lovely alternative or addition. Also, using gel food coloring versus liquid means fewer surprises and no dough over-softening during mixing.
One kitchen trick I learned for these Cherry Blossom Cookies is to let the softened butter come to the perfect spreadable state rather than melting it—that way your dough won’t be too greasy or sticky, and your cookies keep their flower shape beautifully. For busy families, you can even soften butter quickly by grating it—it saves time on those rushed afternoons when you’re craving sakura-inspired sweets without the wait.
If you buy ingredients in bulk for your seasonal spring flower cookies baking, you can store leftover flour and sugar in airtight containers, keeping your baking pantry ready for the next Cherry Blossom Cookies adventure or some of my almond cherry cookies recipe waiting in the wings.
And hey, if you want to see how to tweak ingredients or get ideas for making this recipe your own, the Japanese sakura cookies recipe over at the Wedding Cookie Table Community is a lovely resource that my readers often mention!
Let’s Make This Cherry Blossom Cookies Together
Alright, friend, grab your apron and let’s get these Cherry Blossom Cookies going. I’ll walk you through every step like we’re baking side by side.
- Preheat your oven to 350°F (175°C). Line a baking sheet with parchment paper — this is key to avoid sticky messes and to keep your flower-shaped sugar cookies intact.
- In a medium bowl, whisk the flour, baking powder, and salt. Mixing these dry ingredients now means your Cherry Blossom Cookies will have the perfect rise without any bitter spots.
- In your mixer or with a hand whisk, cream the softened butter and sugar together until light and fluffy. This took me a while to get just right! When creamed properly, the batter blooms with a lovely texture that makes the cherry blossom flavor cookies all the more inviting.
- Add the egg, vanilla extract, and cherry blossom extract to the butter mixture and beat again until combined. The extract is where these cookies sing—the essence of spring and sakura’s delicate flare.
- Gradually add in your dry ingredients and mix just until the dough comes together. Don’t overmix—you want tender cherry blossom flavor cookies, not tough ones! If the dough feels a bit too sticky (we’ve all been there with Cherry Blossom Cookies), chill it in the fridge for 20-30 minutes. This step also helps keep the beautiful flower shapes crisp and precise.
- Roll out the dough on a lightly floured surface to about ¼-inch thickness. This is where you can get creative with your cookie cutters—flower shapes, sakura petals, or even round disks work great for sakura cookies.
- Cut out your Cherry Blossom Cookies and place them on the baking sheet about an inch apart. If you want to add a little sparkle, sprinkle some granulated sugar right before baking.
- Bake for 10 to 12 minutes, or until the edges just begin to turn golden. Your kitchen will smell like a spring garden in full bloom—a sign that your cherry blossom flavor cookies are almost ready! Whenever I bake these cookies, I usually prep a warm cup of tea to sip while they bake — it’s my little secret to stay calm and enjoy the process.
- Remove the cookies and let them cool on the baking sheet for 5 minutes before transferring to a wire rack. This resting time lets the Cherry Blossom Cookies firm up just right so you can handle them without breaking those charming edges.
Bonus tip: If your dough got a little too soft while shaping, pop the tray into the fridge for 10 minutes before baking. This little Cherry Blossom Cookies shortcut has saved me more times than I can count.
For more ideas on perfecting technique and baking tips, my friends over at Buttermilk by Sam have a fantastic step-by-step for Cherry Blossom Cookies that complements this recipe perfectly.
How I Love to Serve This Cherry Blossom Cookies
Once those Cherry Blossom Cookies are baked and cooled, the fun of sharing begins. My family usually enjoys these sakura cookies with a cup of hot green tea or a warm latte—the floral notes in the cherry blossom flavor cookies really come alive when paired with a simple, comforting drink. I often pack a batch for school snack boxes or surprise my husband with them tucked inside his lunch.
These Cherry Blossom Cookies are also wonderful to serve at springtime gatherings or tea parties. For presentation, I like to arrange them on a pretty plate layered with delicate doilies, sometimes artistically sprinkled with edible cherry blossoms or pink sugar sprinkles for that extra touch. They go beautifully alongside fresh fruit bowls or light salads—so if you’re hosting a brunch, these flower-shaped sugar cookies add a sweet, whimsical vibe to the table.
If you find you have leftover Cherry Blossom Cookies, they keep well in an airtight container for several days, making a perfect grab-and-go snack. Leftovers also make delightful crumbs for topping yogurt or ice cream, adding a seasonal spring flower cookies touch.
My friends always ask for this Cherry Blossom Cookies recipe when the cherry trees bloom around here. It’s like a little tradition that brings everyone back for one sweeter bite, reminding me a lot of the cozy almond cherry cookies I’ve shared before that also pair beautifully with fresh berries.
Your Cherry Blossom Cookies Questions Answered
Q: Can I substitute cherry blossom extract?
A: Totally understandable if you can’t find it! I’ve replaced it with a few drops of almond extract mixed with a tiny bit of rosewater to mimic that floral, slightly sweet vibe. While it’s not exactly the same as cherry blossom flavor cookies, it works well in a pinch, and my readers often tell me this little hack keeps them coming back for more Cherry Blossom Cookies.
Q: How do I keep the flower shapes from spreading too much?
A: Great question! The key I discovered after some trial and error is chilling your dough before rolling and again after cutting the cookies. It really helps maintain the crisp edges on your flower-shaped sugar cookies. Don’t rush the chilling steps, as skipping them caused me runnier sakura cookies in the past.
Q: My Cherry Blossom Cookies are too soft; how can I fix that?
A: If your cookies are chewy when you were aiming for crisp, try baking them a minute or two longer and make sure your oven runs at the correct temperature. Sometimes ovens can vary! For those who prefer a softer sakura cookie, you can pull them out sooner. It’s all about your family’s preference—my niece loves hers soft and chewy, while I’m all about that delicate crisp edge.
Q: Can I make these Cherry Blossom Cookies vegan?
A: I’ve experimented with swapping butter for coconut oil and using flaxseed “eggs” in this recipe. The texture changes slightly, and the cherry blossom flavor cookies can lose a bit of that buttery richness, but it’s a lovely adaptation for vegan friends. Some readers have reported great success with this for spring flower cookies gifts.
Q: How do I store leftover Cherry Blossom Cookies?
A: Keep them in an airtight container, separated by parchment paper if stacking. Stored this way, they stay fresh for up to a week. For longer storage, freeze the baked cookies in a resealable bag and thaw them gently before serving.
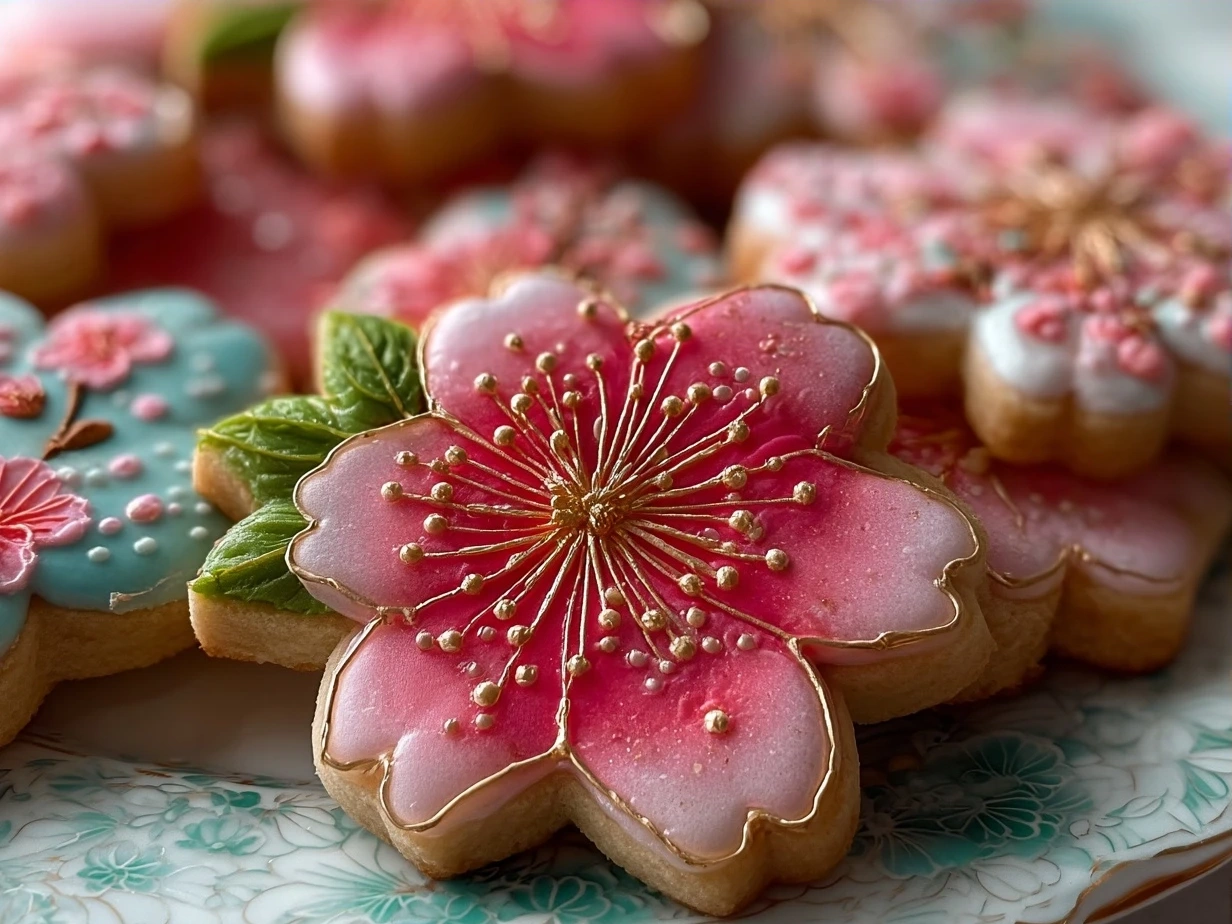
Q: Can I decorate these cookies?
A: Absolutely! Royal icing or a light glaze works beautifully on Cherry Blossom Cookies and brings out those floral shapes. I personally like keeping the decorating minimal to let the cherry blossom flavor cookies shine through, but this is a great way to make them extra special for celebrations.
Want to dive into more answers about Cherry Blossom Cookies and related recipes? Check out my conversations and tips on the Delilita Facebook group where home bakers share their sweet sakura cookies and more.
My Final Thoughts on This Cherry Blossom Cookies
These Cherry Blossom Cookies hold a warm spot in my heart because they celebrate the simple magic of spring unfolding, right in our kitchen. They are more than just spring flower cookies—they’re a little tradition, a sensory memory, and a promise of sweetness even in the busiest days.
My Cherry Blossom Cookies Pro Tips:
- Always chill the dough before rolling for the flakiest, most beautiful flower-shaped sugar cookies.
- Use gel food coloring sparingly for a soft pastel touch without risking a runny dough.
- Don’t skip the cherry blossom extract (or a good substitute!)—this is what truly makes these cookies feel like sakura cookies.
We’ve tried a few fun variations together—like adding crushed freeze-dried cherries for a natural rosy burst, swapping vanilla for almond to deepen the flavor, and even making mini sandwich cookies with cherry blossom jam in the middle. My daughter loves the sandwich version the most, while my husband goes for the classic crunchy style.
If this Cherry Blossom Cookies recipe inspires you to bring a little sakura sweetness to your home, I hope you make it your own and find moments of joy in each bite. Cooking is about sharing, learning, and sometimes laughing over little baking blunders. So go ahead, roll up your sleeves, and let these cherry blossom flavor cookies fill your kitchen with the soft whispers of spring.
For more warming family favorites to try, don’t miss my almond cherry cookies, peanut butter spider cookies, or Halloween crinkle cookies—each with their own story and twist that I think you’ll love.
Happy baking, amiga! May your Cherry Blossom Cookies be as sweet and bright as a spring day.
— Liliana from Delilita
Cherry Blossom Cookies
Delicate and charming Cherry Blossom Cookies feature a buttery base adorned with bright cherry centers, perfect for springtime treats or festive occasions.
- Prep Time: 15 minutes
- Cook Time: 15 minutes
- Total Time: 30 minutes
- Yield: 24 cookies
- Category: Dessert
- Method: Baked
- Cuisine: American
Ingredients
- 1 cup unsalted butter, softened
- 3/4 cup granulated sugar
- 1 large egg
- 1 teaspoon vanilla extract
- 2 1/4 cups all-purpose flour
- 1/2 teaspoon baking powder
- 1/4 teaspoon salt
- 24 maraschino cherries, drained and halved
- Optional: pink food coloring for dough tint
Instructions
- Preheat oven to 350°F (175°C). Line baking sheets with parchment paper.
- In a large bowl, cream together the softened butter and sugar until light and fluffy.
- Beat in the egg and vanilla extract until well combined.
- In a separate bowl, whisk together the flour, baking powder, and salt.
- Gradually add the dry ingredients to the wet ingredients, mixing until just combined.
- If desired, add a few drops of pink food coloring and gently mix to tint dough.
- Roll dough into 1-inch balls and place on prepared baking sheets about 2 inches apart.
- Press one cherry half gently into the center of each dough ball, cut side down.
- Bake for 12-15 minutes or until edges are lightly golden.
- Remove from oven and let cookies cool on baking sheet for 5 minutes, then transfer to wire racks to cool completely.
Notes
For a festive touch, drizzle melted white chocolate over cooled cookies or sprinkle with powdered sugar before serving.