
Okay, here we go! I’m so excited to share this recipe with you. It’s a goodie!
What You’ll Need for This Twisted Christmas Cookies
Alright, let’s gather our ingredients. Here’s what you’ll need to make these delightful Twisted Christmas Cookies. I’ve made sure to include my preferred brands and little tips that I’ve learned along the way to make the whole process easier.
- 3 cups all-purpose flour: I always use unbleached flour for my Twisted Christmas Cookies. It gives them a slightly nutty flavor and a tender crumb.
- 1 teaspoon baking powder: This helps the cookies rise and gives them a light, airy texture.
- ½ teaspoon salt: Just a pinch to balance out the sweetness.
- 1 cup (2 sticks) unsalted butter, softened: Make sure your butter is truly soft, but not melted. This is key for a smooth dough.
- 1 ½ cups granulated sugar: For sweetness, of course!
- 2 large eggs: These bind the dough together and add richness.
- 1 teaspoon vanilla extract: A good quality vanilla extract makes all the difference.
- ½ teaspoon almond extract: This is my secret ingredient! It adds a subtle, nutty flavor that complements the peppermint perfectly. If you love peanut butter cookies, check out my recipe for peanut butter spider cookies.
- ½ teaspoon peppermint extract: For that festive candy cane flavor! Be careful not to add too much, as it can be overpowering.
- Red food coloring: Gel food coloring works best, as it won’t change the consistency of the dough.
- Sanding sugar (optional): For a little extra sparkle!

When making these Twisted Christmas Cookies, you can find the gel food coloring at most craft stores or online. I prefer to buy my extracts in bulk, as I use them so often in my baking.
Here’s a Twisted Christmas Cookies trick I learned from my grandma: if your butter isn’t softening quickly enough, cut it into small cubes and let it sit at room temperature for about 15 minutes. It will soften much faster.
For busy families, you can save time by using pre-softened butter and measuring out all your ingredients ahead of time. This is called “mise en place” and it makes the whole baking process so much smoother. I also like to make my sugar cookie dough a day in advance and then chill it overnight. This allows it to properly rest and makes rolling it out so much easier.
You can save money by buying store-brand extracts and food coloring. They work just as well as the name brands.
Leftover extracts and food coloring should be stored in a cool, dark place. Softened butter needs to be used immediately or kept in the fridge for another use! And if you happen to have leftover dough from your amazing Twisted Christmas Cookies, you can wrap it tightly in plastic wrap and store it in the refrigerator for up to 3 days or in the freezer for up to 2 months.
Let’s Make This Twisted Christmas Cookies Together
Okay, friend, let’s get to the fun part! I’m going to walk you through making these beautiful Twisted Christmas Cookies, step by step. Don’t worry if you’re not a seasoned baker – this recipe is very forgiving. Think of this as our time to have fun and if a cookie breaks, that is just one we have to taste to make sure it is good.
- Prepare the Dough: In a large bowl, whisk together the flour, baking powder, and salt. This ensures that the baking powder and salt are evenly distributed throughout the dough.
- Cream the Butter and Sugar: In a separate bowl, cream together the softened butter and sugar until light and fluffy. This usually takes about 3-5 minutes with an electric mixer. Scrape down the sides of the bowl as needed.
- Add the Eggs and Extracts: Beat in the eggs one at a time, then stir in the vanilla extract and almond extract. The almond extract really elevates the taste of these Christmas cookie twists.
- Combine Wet and Dry Ingredients: Gradually add the dry ingredients to the wet ingredients, mixing until just combined. Be careful not to overmix, as this can result in tough cookies.
- Divide the Dough: Divide the dough in half. In one half, add the peppermint extract and red food coloring. Mix until the color is evenly distributed. You should have one half of the dough that is white and one half that is red and pepperminty.
- Chill the Dough: Wrap each half of the dough in plastic wrap and refrigerate for at least 1 hour, or preferably overnight. This is crucial for preventing the cookies from spreading in the oven. I learned the hard way with Twisted Christmas Cookies that chilling is non-negotiable!
- Preheat and Prepare: Preheat your oven to 375°F (190°C). Line baking sheets with parchment paper.
- Roll and Cut: On a lightly floured surface, roll out each half of the dough to about ¼ inch thickness. Cut each dough into long, thin strips (about ½ inch wide and 4 inches long).
- Twist the Dough: Take one red strip and one white strip. Twist them together to form a candy cane shape. Pinch the ends together to seal. For more tips on how to roll out perfect candy cane cookies, check out this useful tips for rolling out candy cane cookies.
- Bake: Place the Braided Christmas cookies onto the prepared baking sheets, leaving about 1 inch between each cookie. Sprinkle with sanding sugar, if desired.
- Bake: Bake for 8-10 minutes, or until the edges are lightly golden brown. In my kitchen, these Twisted Christmas Cookies usually takes about 9 minutes to bake perfectly.
- Cool: Let the cookies cool on the baking sheets for a few minutes before transferring them to a wire rack to cool completely.
- Don’t worry if your Twisted Christmas Cookies aren’t perfectly shaped. The imperfections add to their charm!
- If the dough becomes too soft while you’re working with it, pop it back into the refrigerator for a few minutes to firm up.
- While the Twisted Christmas Cookies are baking, I like to tidy up my kitchen and prepare a cup of hot cocoa to enjoy with the finished cookies.
- Your Twisted Christmas Cookies should smell like peppermint and warm vanilla.
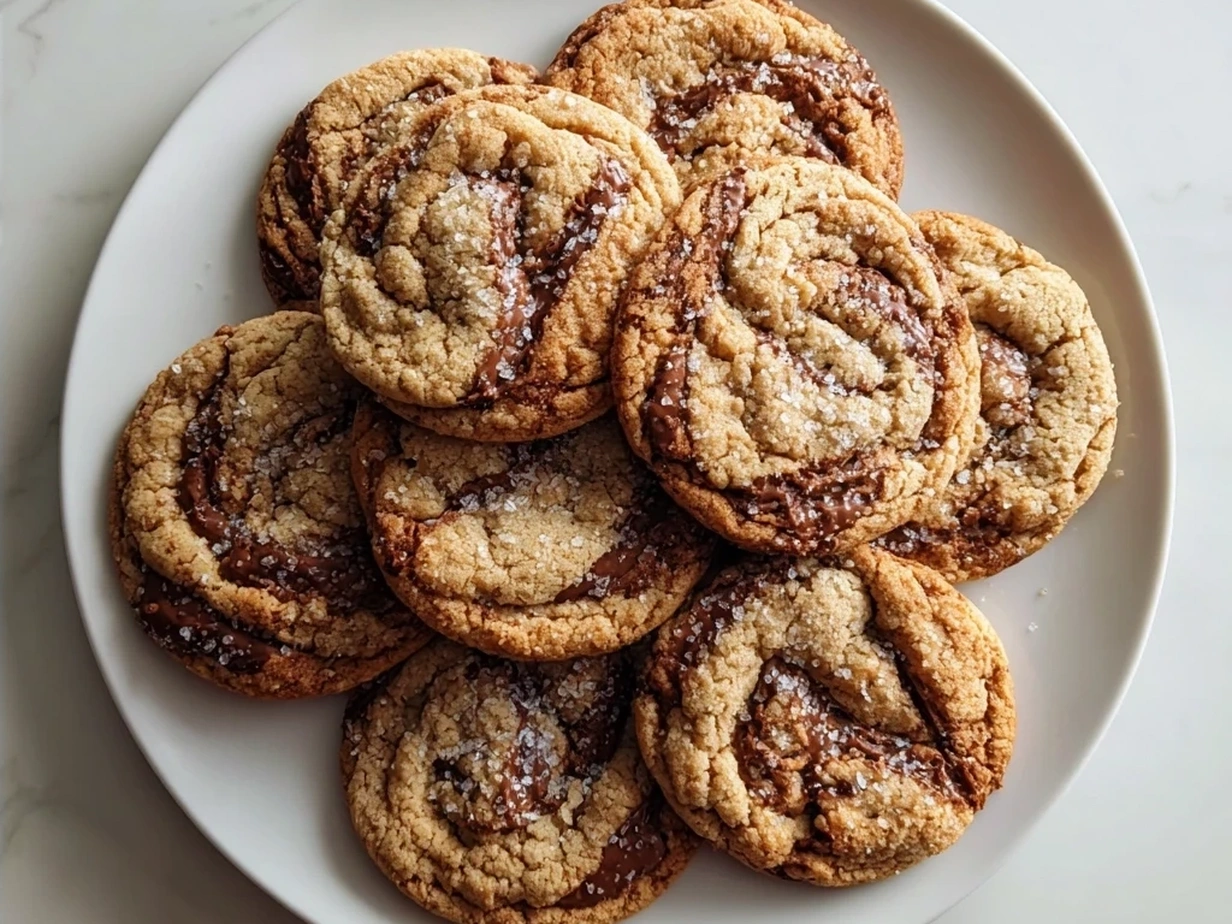
How I Love to Serve This Twisted Christmas Cookies
Now that you’ve baked these gorgeous Twisted Christmas Cookies, let’s talk about how to serve them. Presentation is key, my friend, and these cookies deserve to be showcased!
My family loves this Twisted Christmas Cookies when I arrange them on a festive platter, alongside other holiday treats like gingerbread men and fudge. They add a pop of color and a touch of whimsy to any dessert spread. I’ve also found some fantastic candy cane cookies recipes online as well! You can check them out if you are interested: Twist Candy Cane Cookies | If You Give a Blonde a Kitchen.
These Twisted Christmas Cookies pair perfectly with a warm glass of milk, hot cocoa, or even a cup of coffee. The sweetness of the cookies balances out the bitterness of the coffee beautifully.
This Twisted Christmas Cookies is perfect for Christmas parties, cookie exchanges, or as a special treat for Santa on Christmas Eve. They also make a wonderful homemade gift for friends and neighbors.
- Arrange the cookies on a tiered dessert stand for a dramatic effect.
- Tie a ribbon around a stack of cookies and give them as a gift.
- Serve the cookies on a festive plate with a sprig of holly.
If you have extra Twisted Christmas Cookies (which is rare in my house!), you can crush them up and use them as a topping for ice cream or yogurt. You can also use them in a trifle or other layered dessert.
I’ve also experimented with different flavors and colors. For example, you could use green food coloring and mint extract for a festive green and white version. Or, you could add a touch of lemon zest to the dough for a bright, citrusy flavor.
Friends always ask for this Twisted Christmas Cookies recipe whenever I bring them to a party. They’re always impressed by the beautiful twist shape and the delicious flavor.
Your Twisted Christmas Cookies Questions Answered
Okay, let’s tackle some of the questions I get asked most often about these Twisted Christmas Cookies. I’ve been making these for years, so I’ve definitely learned a thing or two along the way. If you are interested in other cookies, check out my recipe for halloween crinkle cookies.
A: This is the most common problem with these Twisted Christmas Cookies. The key is to chill the dough for at least an hour, or preferably overnight. The cold dough will hold its shape better in the oven. Also, make sure your oven is at the correct temperature and that you’re not overfilling the baking sheets.
A: Absolutely! Feel free to experiment with different extracts, such as vanilla, almond, or lemon. Just be sure to adjust the amount to your taste.
A: Yes, you can make the dough up to 3 days in advance and store it in the refrigerator. Just make sure to wrap it tightly in plastic wrap to prevent it from drying out.
A: Add a little more flour to the dough, a tablespoon at a time, until it’s easier to handle. Also, make sure your work surface is lightly floured. You know what I do when my Twisted Christmas Cookies dough is too sticky? I stick the dough in the freezer for 10-15 minutes!
A: Yes, you can freeze the baked cookies for up to 2 months. Just make sure to store them in an airtight container to prevent them from drying out.
A: Liquid food coloring will work, but it may change the consistency of the dough slightly. Use it sparingly and add a little more flour if the dough becomes too wet.
A: Absolutely! Sprinkles add a festive touch to these Twisted Christmas Cookies. Just press them gently into the dough before baking. One reader suggestion I got was about adding powdered sugar, it gives the Christmas cookie twists a snowy effect!
My Final Thoughts on This Twisted Christmas Cookies
My friends, I hope you’re as excited about these Twisted Christmas Cookies as I am. They’re more than just a recipe; they’re a tradition, a memory in the making, a little piece of Christmas magic. This recipe holds a special place in my heart because it reminds me of those precious moments spent baking with my kids.
- Chill the dough! I know I’ve said it before, but it’s worth repeating. Chilled dough is the key to perfect Braided Christmas cookies.
- Don’t overbake! These cookies are best when they’re soft and chewy, not crispy.
- Get creative with the twists! There are so many different ways to twist the dough, so have fun experimenting.
- Chocolate Peppermint: Add cocoa powder to the dough for a chocolatey twist.
- Lemon Glazed: Add lemon zest to the dough and drizzle with a lemon glaze after baking.
- Spiced: Add cinnamon, nutmeg, and cloves to the dough for a warm, spiced flavor.
My son loves the chocolate peppermint version, while my daughter prefers the classic candy cane flavor. I usually make a batch of each to keep everyone happy!
I encourage you to make this Twisted Christmas Cookies recipe your own. Add your own personal touch, experiment with different flavors and colors, and most importantly, have fun!
I hope you have a wonderful time making these cookies and creating lasting memories with your loved ones. Happy baking! If you enjoy this recipe, you should also try my Crumbl Pecan Pie Cookies. These Peppermint twisted cookies are a family favorite.

\n \n Print
Twisted Christmas Cookies

These festive Twisted Christmas Cookies are a delightful addition to your holiday baking. They’re easy to make, fun to decorate, and perfect for sharing with family and friends.
- Prep Time: 30 minutes
- Cook Time: 10 minutes
- Total Time: 40 minutes
- Yield: 24 cookies
- Category: Dessert
- Method: Baked
- Cuisine: American
Ingredients
- 2 3/4 cups all-purpose flour
- 1 teaspoon baking powder
- 1/2 teaspoon baking soda
- 1/4 teaspoon salt
- 1 cup (2 sticks) unsalted butter, softened
- 1 1/2 cups granulated sugar
- 2 large eggs
- 1 teaspoon vanilla extract
- Assorted sprinkles and sanding sugar for decorating
- Optional: Food coloring
Instructions
- In a medium bowl, whisk together flour, baking powder, baking soda, and salt.
- In a large bowl, cream together butter and sugar until light and fluffy. Beat in eggs one at a time, then stir in vanilla extract.
- Gradually add the dry ingredients to the wet ingredients, mixing until just combined. If using food coloring, divide the dough and mix in the desired colors.
- Wrap the dough in plastic wrap and chill for at least 1 hour.
- Preheat oven to 375°F (190°C).
- On a lightly floured surface, roll out the dough to about 1/4 inch thickness. Cut into strips, twist two strips together, and shape into a candy cane or other festive shape.
- Place cookies on ungreased baking sheets.
- Bake for 8-10 minutes, or until edges are lightly golden.
- Let cookies cool on baking sheets for a few minutes before transferring to a wire rack to cool completely.
- Decorate with sprinkles and sanding sugar.
Notes
For extra flavor, add a pinch of almond extract or lemon zest to the dough. Get creative with your decorations and use different colored sprinkles or icing.