
Okay, grab your aprons, friends! Let’s get into the kitchen and whip up something truly special. Today, we’re making Apple Cider Whoopie Pies. I can almost smell that warm, spiced apple cider aroma wafting through your kitchens already, can’t you?
I remember the first time I tried to make these. It was a total disaster! The “cookies” spread all over the baking sheet, and the cream cheese filling was…well, let’s just say it wasn’t photogenic. I nearly gave up! But the flavor…oh, that incredible apple cider flavor! It was just too good to abandon. After a lot of tweaking (and a few more baking fails!), I finally perfected this recipe for Apple Cider Whoopie Pies, and now it’s a family favorite.
My kids practically beg for these every fall. Seriously, they prefer these Apple Cider Whoopie Pies over store-bought cookies any day. And you know what? I feel good about giving them something homemade, packed with that cozy autumn flavor. Plus, making these is such a fun family activity, especially on a chilly afternoon.
What I love most about this Apple Cider Whoopie Pies recipe is how it fits into my life. I’m always juggling a million things, but these are surprisingly easy to make. I can even get the batter ready the night before and bake them off the next day. Talk about a lifesaver!
So, are you ready to join me on this Apple Cider Whoopie Pies adventure? Trust me, it’s easier than you think, and the results are absolutely worth it. Let’s get baking!
What You’ll Need for This Apple Cider Whoopie Pies
Alright, before we get our hands floury, let’s gather our ingredients. Here’s what you’ll need to make these amazing Apple Cider Whoopie Pies:

- 2 1/2 cups all-purpose flour: I always use unbleached flour for my Apple Cider Whoopie Pies to get a slightly nutty flavor.
- 1 teaspoon baking soda: Make sure your baking soda is fresh! It makes a huge difference in the rise and texture of the “cookies”.
- 1 teaspoon ground cinnamon: I sometimes add a pinch more, because, well, I love cinnamon!
- 1/2 teaspoon ground nutmeg: Nutmeg adds such a warm, cozy flavor to these Apple Cider Whoopie Pies.
- 1/4 teaspoon ground cloves: Just a pinch! Cloves can be overpowering, but they add a lovely depth of flavor.
- 1/2 teaspoon salt: Salt balances the sweetness and enhances all the other flavors.
- 1 cup (2 sticks) unsalted butter, softened: Make sure your butter is truly softened, not melted. It should be soft enough to press a finger into easily.
- 1 1/2 cups granulated sugar: You can use regular granulated sugar or try using brown sugar for a slightly caramel-y flavor.
- 2 large eggs: I always use room-temperature eggs for baking. They incorporate more easily and help create a smoother batter.
- 1 cup apple cider, reduced to 1/4 cup: This is the key to that intense apple cider flavor! I’ll show you how to reduce it in the next section. When making these Apple Cider Whoopie Pies I like to use a local Apple Cider for the best flavor.
- 1 teaspoon vanilla extract: Pure vanilla extract is always best, but imitation vanilla works in a pinch.
- For the Cream Cheese Filling:
- 8 ounces cream cheese, softened: Again, make sure your cream cheese is softened for a smooth, lump-free filling.
- 1/2 cup (1 stick) unsalted butter, softened: Just like with the cookie batter, softened butter is key!
- 3 cups powdered sugar: Sift your powdered sugar to avoid any lumps in the filling.
- 1 teaspoon vanilla extract: A little extra vanilla never hurts!
- Optional Decorations:
- Sprinkles: I love adding Fall sprinkles to really sell the apple cider cookie theme.
- Caramel Drizzle: To take the apple flavored desserts up a notch!
When buying ingredients for Apple Cider Whoopie Pies, I usually get my spices in bulk from the local natural foods store – it’s way cheaper! Here’s an Apple Cider Whoopie Pies trick I learned from my grandma: always buy your butter when it’s on sale and freeze it. It saves so much money! If you have any leftover apple cider, consider making an apple cider sangria.
Let’s Make This Apple Cider Whoopie Pies Together
Okay, now for the fun part! Let’s get these Apple Cider Whoopie Pies baking. Don’t worry, I’ll walk you through every step.
- Reduce the Apple Cider: Pour 1 cup of apple cider into a small saucepan. Bring it to a simmer over medium heat and let it cook until it reduces to about 1/4 cup. This will take about 15-20 minutes. The reduced cider will have a more concentrated apple flavor, which is exactly what we want for our Apple Cider Whoopie Pies. Set aside to cool completely.
- Preheat and Prep: Preheat your oven to 350°F (175°C). Line two baking sheets with parchment paper. Trust me, this makes cleanup so much easier.
- Combine Dry Ingredients: In a medium bowl, whisk together the flour, baking soda, cinnamon, nutmeg, cloves, and salt. Whisking helps to evenly distribute the spices and baking soda.
- Cream Butter and Sugar: In a large bowl, cream together the softened butter and sugar until light and fluffy. This usually takes about 3-5 minutes with an electric mixer. Make sure to scrape down the sides of the bowl a few times to ensure everything is evenly combined.
- Add Eggs and Vanilla: Beat in the eggs one at a time, then stir in the vanilla extract. Don’t worry if the mixture looks a little curdled at this point. It will all come together when we add the dry ingredients.
- Alternate Wet and Dry Ingredients: Gradually add the dry ingredients to the wet ingredients, alternating with the reduced apple cider, beginning and ending with the dry ingredients. Mix until just combined. Be careful not to overmix, as this can result in tough cookies. The batter will be thick.
- Drop by Spoonfuls: Drop rounded tablespoons of batter onto the prepared baking sheets, leaving about 2 inches between each Apple Cider Whoopie Pies.
- Bake: Bake for 10-12 minutes, or until the edges are lightly golden brown and a toothpick inserted into the center comes out clean. In my kitchen, these Apple Cider Whoopie Pies usually take exactly 11 minutes.
- Cool: Let the cookies cool on the baking sheets for a few minutes before transferring them to a wire rack to cool completely.
- Make the Cream Cheese Filling: While the cookies are cooling, make the filling. In a large bowl, beat together the softened cream cheese and butter until smooth and creamy.
- Add Powdered Sugar and Vanilla: Gradually add the powdered sugar, beating until smooth. Stir in the vanilla extract.
- Assemble the Whoopie Pies: Once the cookies are completely cool, spread a generous amount of cream cheese filling on the flat side of one cookie and top with another cookie, flat side down. Gently press the two cookies together to sandwich the filling in between.
While the Apple Cider Whoopie Pies are baking, I usually tidy up the kitchen a bit and put on some music. It makes the whole process more enjoyable! I learned the hard way with Apple Cider Whoopie Pies that it’s essential to let the cookies cool completely before filling them. Otherwise, the filling will melt and you’ll have a sticky mess. And no one wants that!
Want to try a different spin? Check out this Apple cider whoopie pie recipe with cream cheese frosting.
How I Love to Serve This Apple Cider Whoopie Pies
Now for the best part – enjoying our delicious Apple Cider Whoopie Pies!
My family loves these Apple Cider Whoopie Pies when I pack them in their lunchboxes for a special treat. They always come home with empty containers and big smiles. These are the perfect apple flavored desserts, especially during the fall season!
These Apple Cider Whoopie Pies are perfect for fall gatherings, bake sales, or even just a cozy night in with a cup of hot cocoa. I also love to bring them to potlucks – they’re always a hit! For a really festive presentation, I like to arrange the Apple Cider Whoopie Pies on a pretty platter and sprinkle them with a little extra cinnamon or powdered sugar. Sometimes, I even drizzle them with caramel sauce for an extra touch of sweetness. My kids love this Halloween Whoopie Pies treat.
If you have any extra Apple Cider Whoopie Pies (which is rare in my house!), they can be stored in an airtight container in the refrigerator for up to 3 days. I actually think they taste even better the next day, after the flavors have had a chance to meld together. You can also freeze them for up to a month. Just wrap them individually in plastic wrap before freezing.
I’ve also experimented with different fillings. Sometimes I’ll use a maple cream cheese filling, which is delicious with the apple cider flavor. Another variation is to add a little apple pie spice to the cream cheese filling for an extra kick of warmth. Friends always ask for this Apple Cider Whoopie Pies recipe, and I’m always happy to share it!
Your Apple Cider Whoopie Pies Questions Answered
I know you might have some questions about making these Apple Cider Whoopie Pies, so I’ve compiled a list of the most common ones I get asked.
- Why did my whoopie pies spread too thin?This is a common problem! It usually happens when the butter is too soft or melted. Make sure your butter is softened but still firm. Also, make sure you’re not overmixing the batter, as this can develop the gluten in the flour and cause the cookies to spread. You know what I do when my Apple Cider Whoopie Pies spread too much? I chill the batter for 30 minutes before baking. This helps them hold their shape better.
- Can I use apple pie filling instead of reducing apple cider?While you could try, I don’t recommend it. The reduced apple cider gives these cookies a much more intense apple flavor. Apple pie filling is also much wetter, which could affect the texture of the cookies.
- My cream cheese filling is too runny. What did I do wrong?This usually happens when the cream cheese or butter is too warm. Make sure both are softened but still cool to the touch. You can also try adding a little more powdered sugar to thicken the filling.
- Can I make these ahead of time?Absolutely! The cookies can be made a day or two in advance and stored in an airtight container at room temperature. The filling can also be made ahead of time and stored in the refrigerator. Just be sure to wait until the cookies are completely cool before filling them.
- Can I freeze these Apple Cider Whoopie Pies?Yes, you can! Wrap them individually in plastic wrap and freeze them for up to a month. Let them thaw in the refrigerator before serving.
- What if I don’t have apple cider?While apple cider is the key ingredient, you could try using apple juice in a pinch. However, the flavor won’t be as intense. If using apple juice, I would recommend adding a little apple pie spice to the batter to boost the flavor.
- Can I use a different kind of flour?I haven’t tried it myself, but I’ve heard that you can use gluten-free flour in this recipe. Just be sure to use a blend that’s designed for baking. Feedback from readers suggests almond flour can work well, but the texture will be slightly different.
Want even more delicious apple goodness? You should also check out my Caramel Apple Cheesecake Dip recipe here.
My Final Thoughts on This Apple Cider Whoopie Pies
These Apple Cider Whoopie Pies are more than just a dessert to me; they’re a little slice of fall happiness. Every time I bake them, I’m reminded of cozy evenings, family gatherings, and the simple joy of sharing something delicious with the people I love. These are truly the perfect apple cider cookies for the fall season!
I hope this recipe brings as much joy to your kitchen as it has to mine. Don’t be afraid to experiment and make it your own. After all, that’s what cooking is all about! Check out these other Apple Cider Whoopie Pies by Parsley and Icing.
My Apple Cider Whoopie Pies Pro Tips:
- Don’t overbake: Overbaked cookies will be dry and crumbly.
- Chill the dough: If you find your cookies are spreading too much, chill the dough for 30 minutes before baking.
- Use a cookie scoop: This will help ensure that your cookies are all the same size.
Here are a few variations you might want to try:
- Maple Cream Cheese Filling: Add a tablespoon of maple syrup to the cream cheese filling for a delicious twist. My husband loves this version!
- Apple Pie Spice: Add a teaspoon of apple pie spice to the batter for an extra kick of warmth. The kids usually prefer this recipe.
- Caramel Drizzle: Drizzle the finished whoopie pies with caramel sauce for an extra touch of sweetness. I’m all about these fall dessert recipes.

So go ahead, give these Apple Cider Whoopie Pies a try. I have a feeling they’ll become a new family favorite in your house, too. Happy baking, friends!
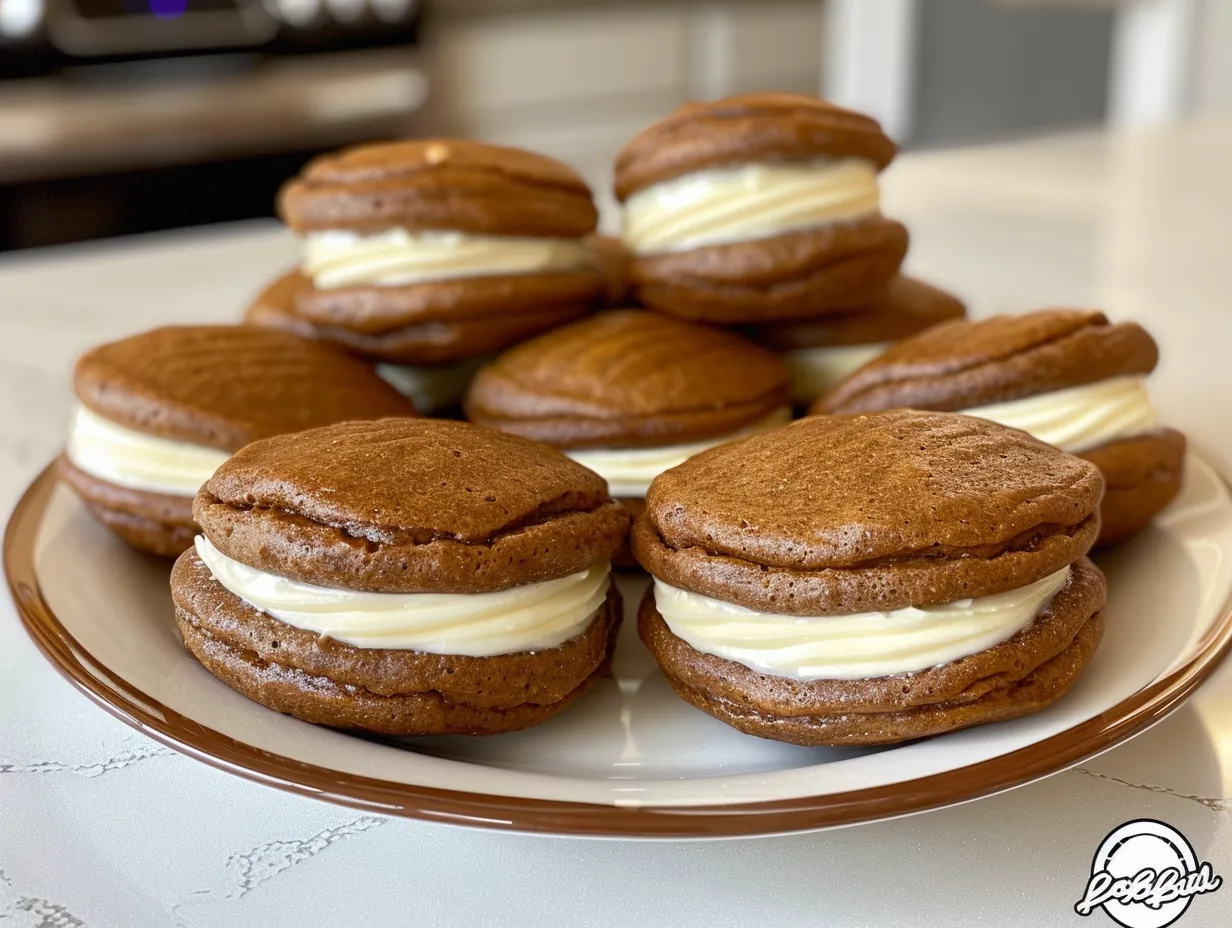
Apple Cider Whoopie Pies

These Apple Cider Whoopie Pies are soft, spiced cake rounds filled with a creamy, dreamy apple cider buttercream. They’re the perfect fall treat!
- Prep Time: 25 minutes
- Cook Time: 10 minutes
- Total Time: 35 minutes
- Yield: 12 whoopie pies
- Category: Dessert
- Method: Baked
- Cuisine: American
Ingredients
Scale
- For the Cakes:
- 2 1/2 cups all-purpose flour
- 1 teaspoon baking soda
- 1 teaspoon ground cinnamon
- 1/2 teaspoon ground nutmeg
- 1/4 teaspoon ground cloves
- 1/2 teaspoon salt
- 1 cup (2 sticks) unsalted butter, softened
- 1 1/2 cups granulated sugar
- 2 large eggs
- 1 teaspoon vanilla extract
- 1 cup apple cider, reduced to 1/4 cup
- For the Apple Cider Buttercream:
- 1 cup (2 sticks) unsalted butter, softened
- 4 cups powdered sugar
- 1/4 cup apple cider, reduced to 2 tablespoons
- 1 teaspoon vanilla extract
- 1/4 teaspoon salt
Instructions
- Make the Cakes: Preheat oven to 375°F (190°C). Line baking sheets with parchment paper.
- In a medium bowl, whisk together flour, baking soda, cinnamon, nutmeg, cloves, and salt.
- In a large bowl, cream together butter and sugar until light and fluffy. Beat in eggs one at a time, then stir in vanilla extract.
- Gradually add the dry ingredients to the wet ingredients, alternating with the reduced apple cider, beginning and ending with the dry ingredients. Mix until just combined.
- Drop rounded tablespoons of batter onto the prepared baking sheets, leaving space between each cookie.
- Bake for 8-10 minutes, or until the edges are lightly golden. Let cool on the baking sheets for a few minutes before transferring to a wire rack to cool completely.
- Make the Apple Cider Buttercream: In a large bowl, cream together butter and powdered sugar until light and fluffy.
- Beat in the reduced apple cider, vanilla extract, and salt until smooth.
- Assemble the Whoopie Pies: Match the cake rounds by size. Pipe or spread a generous amount of buttercream onto the flat side of one cake round. Top with another cake round, flat side down.
- Repeat with the remaining cake rounds and buttercream.
- Serve immediately or store in an airtight container in the refrigerator.
Notes
For extra flavor, add a pinch of ground ginger to the cake batter. These are best enjoyed within 2-3 days.