
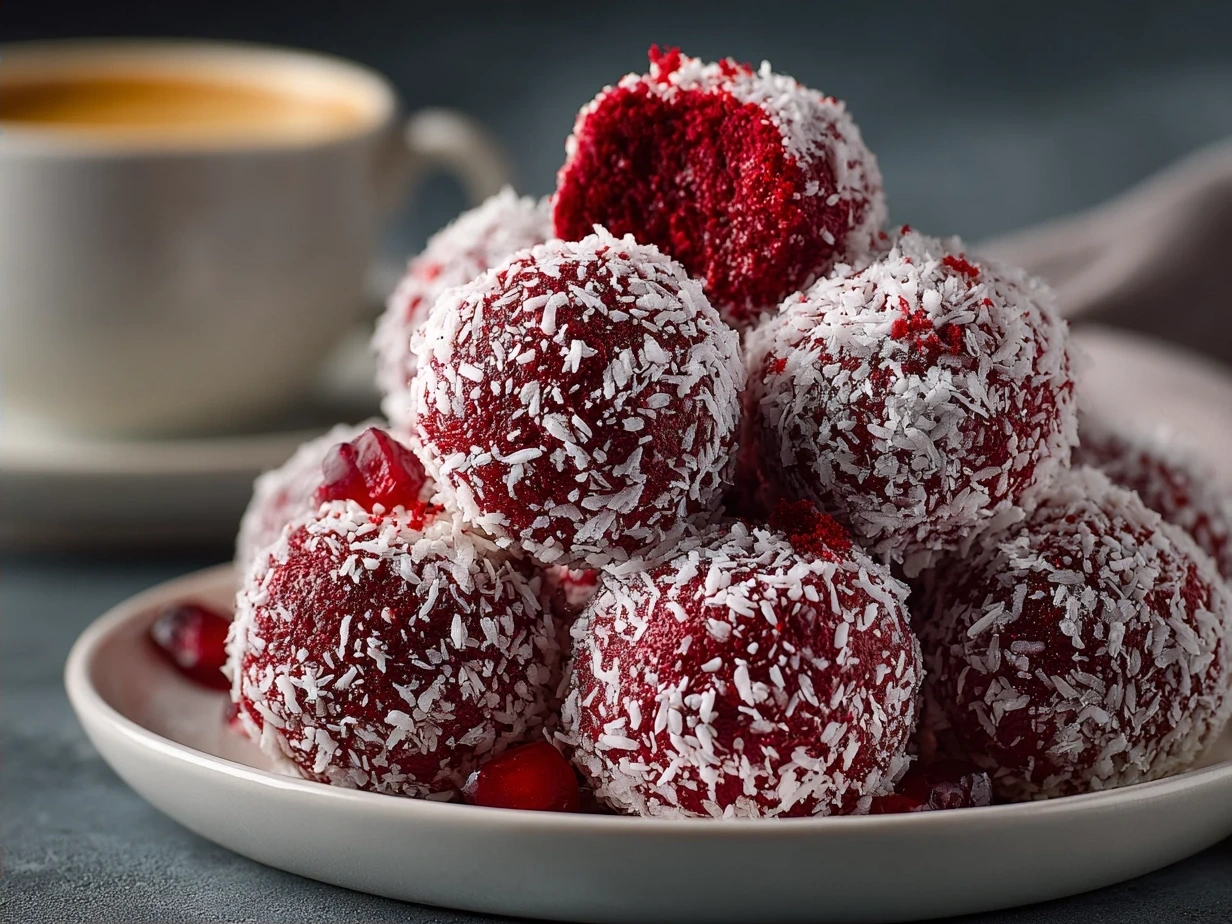
You know, the first time I made these No-Bake Red Velvet Snowball Truffles, I was actually in the middle of a holiday whirlwind. My kitchen was buzzing, kids running around, and I desperately needed something quick, festive, and absolutely delicious. The moment I rolled those soft, creamy red velvet truffles into powdered sugar—transforming them into perfect, snowy little balls—I swear I heard a choir of angels sing. It instantly became a family favorite for us, especially because these No-Bake Red Velvet Snowball Truffles bring that classic red velvet cake vibe with zero oven time, which is a win for any busy household.
There was definitely an “aha” moment when I realized this wasn’t just another red velvet cake balls recipe. The snowball touch, that sweet, snowy coating, makes these truffles feel like magic on your tongue—perfectly melt-in-your-mouth with a little hint of cocoa and cream cheese combined. It’s the kind of easy red velvet sweets that I love making right before a holiday gathering—or honestly, whenever I want a bite of something festive and fun without much fuss.
If you’ve ever struggled with red velvet truffles that turned out too dry or crumbly, I feel you. I’ve been there, rolling my eyes at the messy hands and lumpy balls that refused to stay together. That’s why these No-Bake Red Velvet Snowball Truffles came about—they’re forgiving, straightforward, and don’t need baking. Plus, with the holiday season coming up, they’re perfect holiday truffles for any occasion. I usually keep a batch in the fridge to pull out when unexpected guests drop by or when the kids want a sweet treat after homework.
I first found this recipe tucked away from a friend’s holiday cookie exchange, and after a few tweaks and a lot of taste testing, these No-Bake Red Velvet Snowball Truffles became my go-to for easy red velvet sweets. My cooking philosophy has always been about keeping things simple and joyful, especially with kids and busy schedules in the mix. So if you’re ready to make a batch of these melt-away wonders that feel like a cozy hug on a chilly day, stick with me—I promise it will be worth every single bite.
Oh, and if you love easy no bake desserts like this, you might want to check out my other favorite treats like these No-Bake Pumpkin Cheesecake Balls – they’re just as comforting and perfect for any season.
What You’ll Need for This No-Bake Red Velvet Snowball Truffles
Before we dive in, let me share what I always gather for these No-Bake Red Velvet Snowball Truffles. I like to stick with ingredients that give that real red velvet cake taste without complicated steps or hard-to-find stuff.
Here’s my trusted list, all measured out so you don’t have to guess:
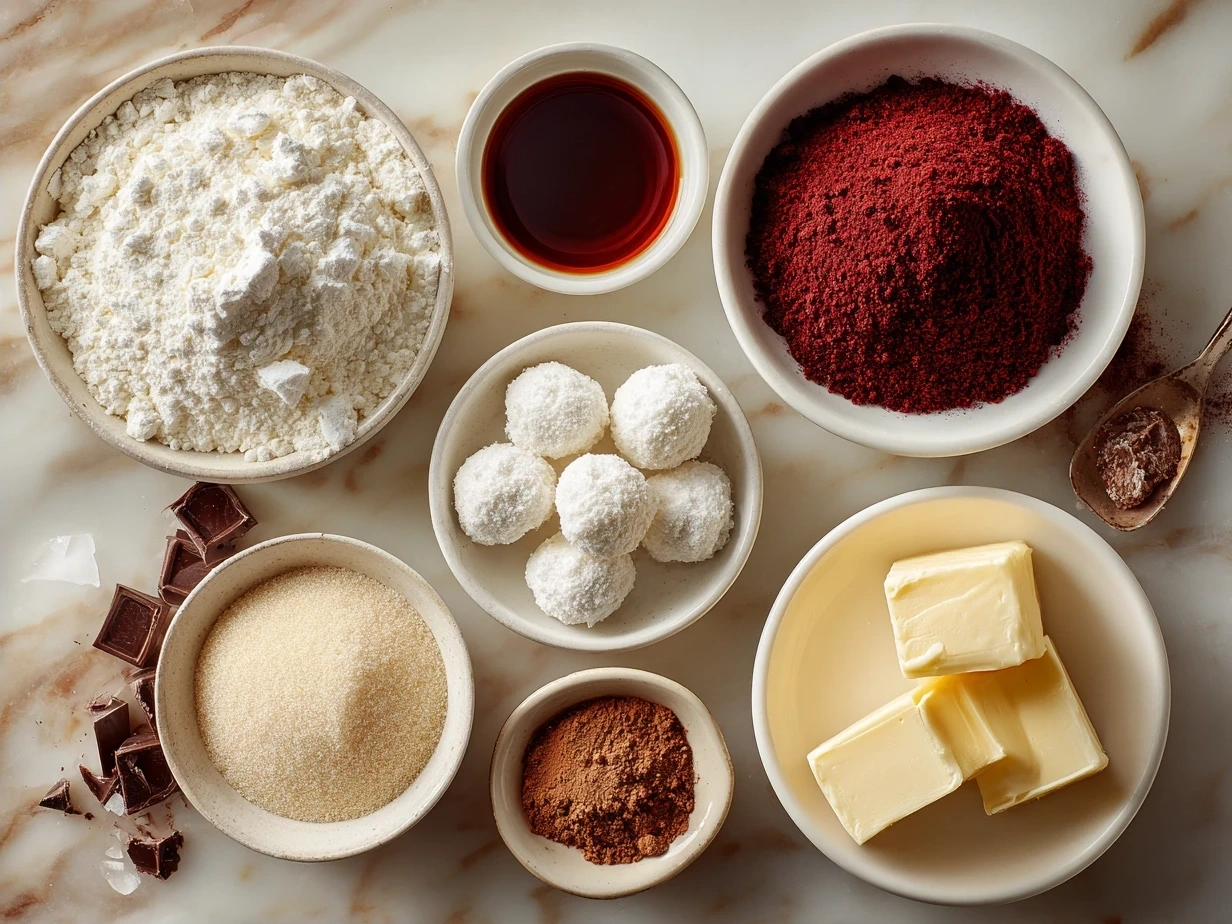
- 1 box (about 15 oz) of red velvet cake mix (dry)
- 8 oz cream cheese, softened (I always use full-fat for the creamiest red velvet truffles)
- 1/2 cup unsalted butter, softened
- 1 teaspoon vanilla extract
- 2 cups powdered sugar (plus extra for rolling)
- Optional pinch of salt to balance flavors
When making No-Bake Red Velvet Snowball Truffles, you can find the red velvet cake mix usually on any grocery store’s baking aisle, especially around the holidays. I’ve learned to stock up when they go on sale because it stores well for months—perfect for last-minute dessert plans. Also, cream cheese is best when it’s room temperature; this helps the truffles come together smoothly without lumps.
Here’s a little No-Bake Red Velvet Snowball Truffles trick I learned: beat the cream cheese and butter really well before mixing in the cake mix. It helps the chocolate cake crumbs bind for that perfect smooth consistency. For busy families, you can pre-sift your powdered sugar and have that ready in a separate bowl to speed up the rolling process.
For budget-friendly baking, I often substitute unsalted butter with European-style butter if I want a richer taste, but the regular brands work perfectly here. Leftover powdered sugar or cake mix I store in airtight containers so nothing goes to waste—this way, I’m ready when the urge for these No-Bake Red Velvet Snowball Truffles hits again during a cozy night in.
If you like these ingredient tips, here’s a great place to see additional holiday truffles ideas and tips for no bake desserts: 25 Christmas Ball and Truffle Recipes – Lord Byron’s Kitchen.
Let’s Make This No-Bake Red Velvet Snowball Truffles Together
Alright, roll up your sleeves! These No-Bake Red Velvet Snowball Truffles come together like a dream, and I’ll be with you every step — I’ve made plenty of batches and learned the hard way how to get them just right.
- Mix the softened cream cheese and butter in a large bowl until it’s silky smooth. Don’t rush this step; you want no clumps—this is the creamy base that makes these truffles stand out from other red velvet cake balls.
- Add vanilla extract and a pinch of salt (if using). The salt tones down the sweetness a bit and helps the flavors pop.
- Gradually add the red velvet cake mix to the cream cheese mixture and stir gently until everything is just combined. Don’t over mix! Your No-Bake Red Velvet Snowball Truffles dough should look moist but firm enough to roll.
- Start rolling the mixture into small balls, about one inch in diameter. Don’t worry if your No-Bake Red Velvet Snowball Truffles aren’t perfectly round at first—practice makes perfect, and they’ll still taste amazing.
- Roll the balls in powdered sugar until they’re completely coated. This is where the “snowball” magic happens. Make sure they’re nicely dusted because this sugar coating adds the final touch of sweetness and keeps the truffles from sticking together.
- Place the finished No-Bake Red Velvet Snowball Truffles on a parchment-lined tray and pop them into the fridge for at least 2 hours to firm up. If you’re impatient like me, freezing for 30 minutes does help speed things along without sacrificing that melt-in-your-mouth texture.
I usually whip up these No-Bake Red Velvet Snowball Truffles while catching up on my favorite show or folding laundry—multi-tasking at its finest! After a couple of hours, they’re ready: soft, smooth, and bursting with that familiar red velvet flavor we all adore.
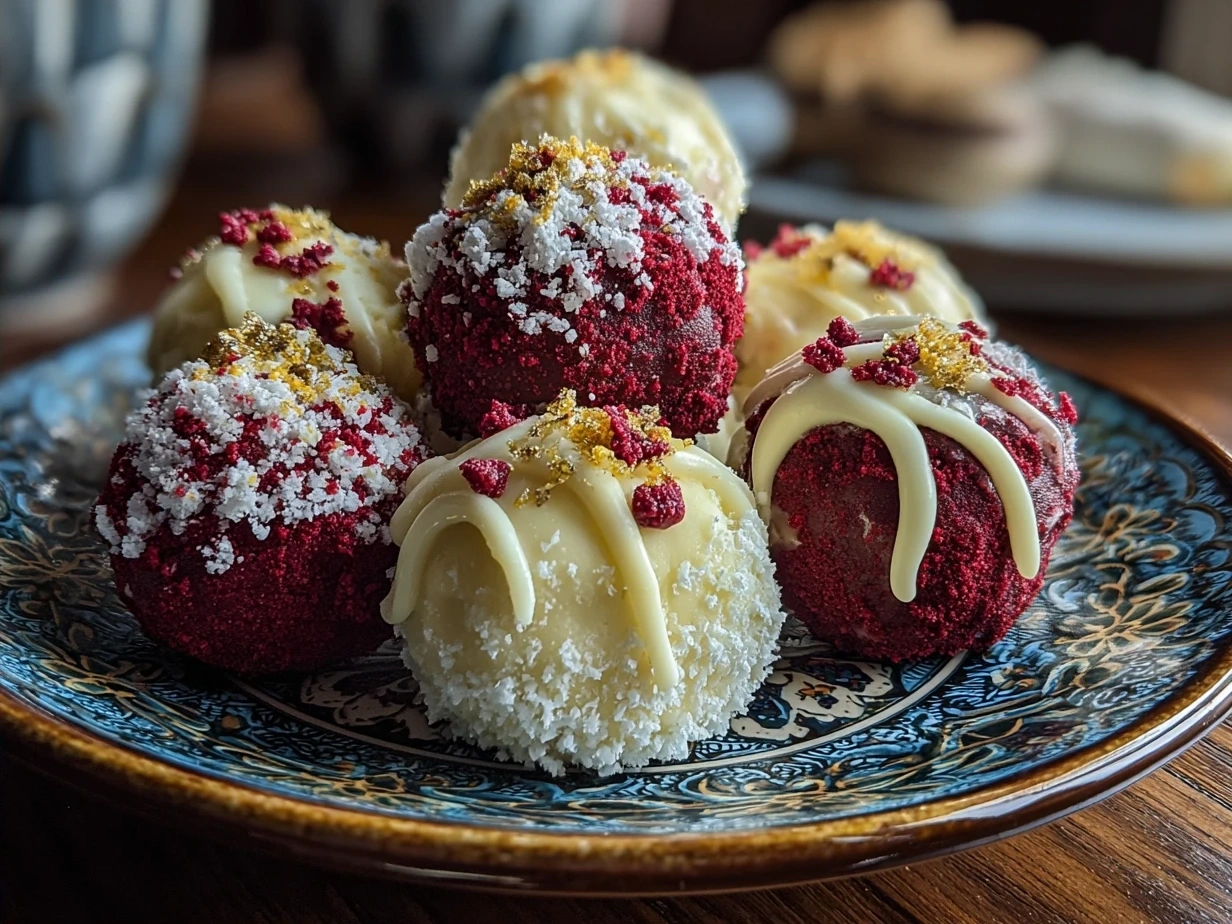
If you want a little spin on texture, sometimes I sprinkle a tiny bit of cocoa powder with the powdered sugar or add a few drops of peppermint extract during mixing for a festive twist. Seasoned bakers should also check out proper cake ball techniques here for troubleshooting: From no-bake fudge and truffles to spiced cakes and chewy cookies ….
And remember, patience is key. If your No-Bake Red Velvet Snowball Truffles feel soft at first, give them extra chilling time—trust me, it’s worth the wait.
How I Love to Serve This No-Bake Red Velvet Snowball Truffles
Now, I’ll admit, these No-Bake Red Velvet Snowball Truffles have become a centerpiece in my holiday treat tray. My family loves these snowy delights when I serve them alongside warm vanilla chai or a rich cup of coffee. There’s just something comforting about the way these truffles balance sweetness and creaminess that makes them irresistible.
For me, pairing these red velvet cake balls with lightly salted nuts or simple fruit slices works beautifully—adds a little fresh bite to the soft texture. During the holidays, I like adding peppermint bark or chocolate-dipped pretzels around my serving tray as lovely complementary holiday truffles.
I usually make these No-Bake Red Velvet Snowball Truffles for Christmas parties, cookie swaps, and last-minute potlucks because they’re so easy to pop in a container and go. Plus, guests are always impressed by the look and taste of these charming, snowy spheres. One time, a friend even said these were the best red velvet sweets she’d ever tried, which totally made my day!
If you find yourself with leftovers, which doesn’t happen often in my house, try breaking them up and using them as topping for ice cream or mixing into whipped cream for a quick festive parfait. For seasonal fun, I’ve experimented with swapping the vanilla extract for almond or coffee flavors, creating fun variations of these No-Bake Red Velvet Snowball Truffles.
If you’d like ideas on tasty sides to go with red velvet truffles, you might enjoy my cozy soup suggestion like this Loaded Baked Potato Soup—it’s a great warm-up companion for any holiday dessert table.
Your No-Bake Red Velvet Snowball Truffles Questions Answered
I get so many questions about making these No-Bake Red Velvet Snowball Truffles—it’s like everyone’s craving a little snowball magic at home! Here’s a few of the most common ones I hear from friends and blog readers, along with some honest answers from my kitchen adventures:
Q: Can I make these truffles ahead of time?
Absolutely! You can make No-Bake Red Velvet Snowball Truffles up to a week in advance. Store them in an airtight container in the fridge or freeze for longer storage. I’ve found that freezing helps maintain the perfect texture and you can thaw them in the fridge overnight.
Q: My truffles turned out crumbly, what did I do wrong?
That’s usually because the cream cheese and butter weren’t mixed well enough or the cake mix was too dry. I learned the hard way with No-Bake Red Velvet Snowball Truffles that beating your cream cheese and butter until smooth is essential. If it still feels crumbly, add just a teaspoon of milk to help bring the mixture together.
Q: Can I use homemade red velvet cake crumbs instead of the box mix?
For sure! You can bake a red velvet cake, crumble it finely, and follow the same steps. Just make sure your crumbs are dry but not stale for the best No-Bake Red Velvet Snowball Truffles results. Some readers love the homemade crumb version because it tastes extra fresh and less sweet.
Q: What’s the best way to roll the truffles without making a mess?
You know what I do? I keep a small bowl of powdered sugar nearby and roll the balls one at a time, shaking off excess. I wipe down my hands periodically with a damp cloth to keep them from sticking. And don’t rush! It’s a bit messy but so worth it.
Q: Can I add extras like nuts or chocolate chips?
Yes, though I usually keep these No-Bake Red Velvet Snowball Truffles classic, adding finely chopped nuts or mini chocolate chips can add texture. Just fold them in gently before rolling.
Q: Are these truffles good for kids?
Totally kid-friendly and safe since there’s no raw egg or baking involved. My kids love helping me make these, especially rolling and coating each snowball with powdered sugar. It’s a fun holiday activity.
Q: What’s the shelf life for these truffles?
Stored properly in the fridge, they last about a week. If you freeze them, they can go up to a month, but they’re usually eaten before then. They make great little gifts too!
If you want to see other reader questions and how they customized their holiday truffles, check this great community post on red velvet cake balls and No-Bake Red Velvet Snowball Truffles here: Have you made cake balls before? This red velvet version is one of ….
My Final Thoughts on This No-Bake Red Velvet Snowball Truffles
Honestly, these No-Bake Red Velvet Snowball Truffles have a special place in my heart and on my dessert table. They’re the recipe I reach for when I want to impress without the fuss, and they’ve brought so many smiles and happy moments to my family gatherings. Each snowy bite feels like a little celebration.
My No-Bake Red Velvet Snowball Truffles Pro Tips:
- Always soften your cream cheese and butter fully for the smoothest mixture.
- Chill your No-Bake Red Velvet Snowball Truffles for at least 2 hours to set properly.
- Don’t skip the powdered sugar roll—it’s key to that snowball look and extra sweetness!
I’ve also tried a few variations with my family—using white chocolate chips folded in for extra creaminess, dusting with a mix of powdered sugar and cocoa, or adding a splash of almond extract. My teenagers like the white chocolate twist best, while my husband swears by the classic version sprinkled in good old powdered sugar.
If you make these No-Bake Red Velvet Snowball Truffles your own, don’t be shy about playing with flavors or colors for different holidays! The recipe is forgiving and fun, like a blank canvas. My hope is that you find as much joy making these easy red velvet sweets as I do, and that they become a staple in your family’s festive treats.
For more simple desserts to enjoy alongside your No-Bake Red Velvet Snowball Truffles, I highly recommend trying these Baked Pumpkin Seeds — a crunchy snack that’s both healthy and addicting.
Thanks for hanging out with me in the kitchen—can’t wait to hear how your No-Bake Red Velvet Snowball Truffles turn out!
If you’re after all the warmth and cozy happiness that holiday truffles can bring, these No-Bake Red Velvet Snowball Truffles might just become your new favorite go-to. Trust me, there’s nothing quite like sharing these easy red velvet sweets with loved ones around the table. Happy rolling, friend!
No-Bake Red Velvet Snowball Truffles
Delight in these no-bake red velvet snowball truffles, featuring a creamy cream cheese center coated in velvety cocoa and powdered sugar for a festive, melt-in-your-mouth treat.
- Prep Time: 15 minutes
- Cook Time: 0 minutes
- Total Time: 1 hour 15 minutes
- Yield: 24 servings
- Category: Dessert
- Method: No-Cook
- Cuisine: American
Ingredients
- 1 box red velvet cake mix (about 15.25 oz)
- 1/2 cup vegetable oil
- 3/4 cup cream cheese, softened
- 1 1/2 cups powdered sugar, divided
- 1/4 cup unsweetened cocoa powder
- 1 teaspoon vanilla extract
Instructions
- In a large bowl, combine the red velvet cake mix, vegetable oil, and vanilla extract until a moist batter forms.
- Roll the mixture into 1-inch balls and place them on a parchment-lined baking sheet.
- Chill the cake balls in the refrigerator for 30 minutes until firm.
- In a separate bowl, beat the softened cream cheese until smooth.
- Gently mix the chilled cake balls into the cream cheese until fully combined.
- Roll the mixture into small truffles, roughly 1 inch in diameter.
- In one bowl, combine 1 cup powdered sugar and cocoa powder; in another bowl, put the remaining 1/2 cup powdered sugar.
- Roll half of the truffles in the cocoa powder mixture and the other half in powdered sugar to create a snowball effect.
- Place the coated truffles on a tray and refrigerate for at least 1 hour before serving.
Notes
For extra festive flair, sprinkle some red or white edible glitter on the truffles before serving or dip them in melted white chocolate.