

My Beloved French Silk Pie Recipe
Okay, let’s get chatting about my absolute favorite dessert, a French silk pie recipe that’s been a staple in my family for, well, longer than I can remember!
I can almost smell it now – that rich, decadent chocolate aroma wafting through the kitchen as I carefully whisk the filling. You know, there’s something so therapeutic about making a French silk pie recipe. It’s like a little act of love you pour into every step.
My earliest memory of this French silk pie recipe is watching my grandma in her tiny kitchen, humming along to some old Italian song as she whipped up the meringue topping. I was probably about five, perched on a stool, mesmerized by the way the fluffy white peaks formed. She always let me lick the beaters (don’t tell anyone!). It was pure magic, and that magic is why I still make this French silk pie recipe today.
Of course, my own journey with this French silk pie recipe wasn’t always smooth sailing. I remember one Thanksgiving where I completely forgot to add the sugar! The resulting pie was…let’s just say it was an interesting experience for my family. But hey, we all learn from our mistakes, right? And that’s how I perfected my own version of this classic French silk pie recipe.
What I love most about this French silk pie recipe is how versatile it is. It’s elegant enough for a dinner party but also comforting enough for a weeknight treat. Plus, it’s surprisingly easy to make, which is a major bonus for this busy mom! I always tell my kids that my French silk pie recipe is like a warm hug on a plate and they gobble it up.
It fits perfectly into our hectic lives because you can make the crust and filling ahead of time. Then, just before serving, whip up the cream and garnish it with chocolate shavings. It’s so simple! I truly consider this the best French silk pie recipe.
I first started working on perfecting this French silk pie recipe about 15 years ago. I wanted something that captured my Grandma’s spirit and taste but was a little bit easier to make. Since then, I have tweaked and adjusted until I landed on this absolute perfection.
My cooking philosophy is all about creating delicious, homemade food that nourishes both the body and soul. I believe that cooking should be joyful and accessible, and that everyone can create amazing meals with a little bit of practice and a whole lot of love.
So, grab your apron, and let’s get started! I promise, you’ll absolutely love this French silk pie recipe! I can’t wait to hear what you think.
What You’ll Need for This French silk pie recipe
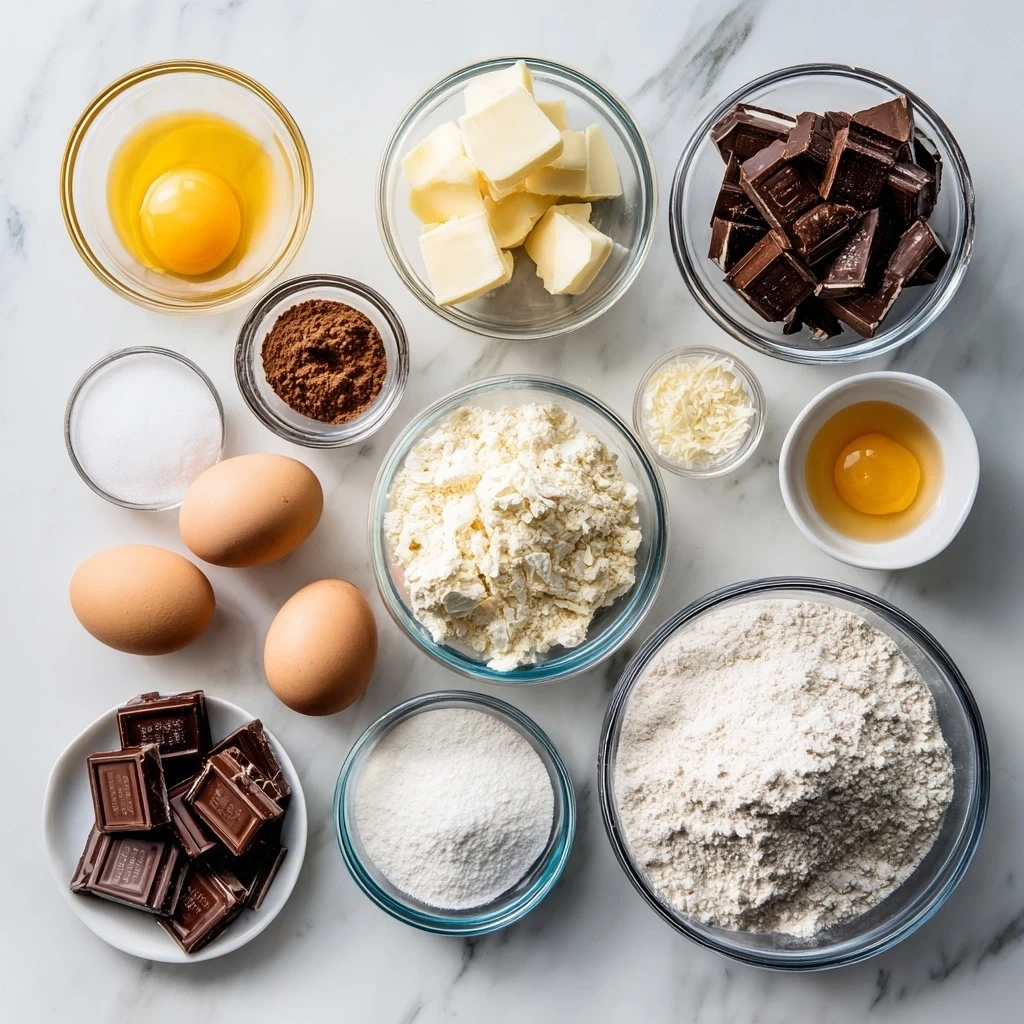
Alright, let’s talk about what you’ll need to whip up this amazing French silk pie recipe. Here’s a list of everything, with my little Delilita twists:
- 1 ½ cups chocolate wafer crumbs: I always use Nabisco Famous Chocolate Wafers for my French silk pie recipe. They have the perfect chocolate flavor and create a wonderfully crisp crust.
- 6 tablespoons unsalted butter, melted: Make sure it’s completely melted for the best crust consistency.
- 4 ounces bittersweet chocolate, melted: I prefer Ghirardelli or Guittard, but any good quality bittersweet chocolate will do.
- 1 cup (2 sticks) unsalted butter, softened: This is crucial for a smooth and creamy filling. Make sure it’s softened, not melted!
- 1 ½ cups granulated sugar: Don’t skimp on the sugar; it’s essential for the texture and flavor of this French silk pie recipe.
- 1 teaspoon vanilla extract: I use pure vanilla extract, always. It makes a world of difference!
- ¼ teaspoon salt: Just a pinch to balance the sweetness.
- 4 large eggs: Make sure they’re fresh!
- 1 cup heavy cream: For the whipped topping, of course!
- ¼ cup powdered sugar: To sweeten the whipped cream.
- Chocolate shavings, for garnish: Optional, but highly recommended for that extra touch of elegance.
When making this French silk pie recipe, you can usually find everything you need at your local grocery store. But, for the best chocolate, I recommend checking out a specialty chocolate shop if you have one nearby.
Here’s a trick I learned from my grandma for this French silk pie recipe: refrigerate your mixing bowl and beaters before whipping the cream. It helps the cream whip up faster and stay nice and fluffy.
For a quicker version of this French silk pie recipe, you could use a pre-made chocolate crumb crust. It’s a great shortcut for busy weeknights! And if you are looking for a super easy dessert that you can take to a potluck, you should check out my recipe for S’mores Hand Pies!
To save money, buy chocolate wafers in bulk if you make this French silk pie recipe often. They keep well in an airtight container. Store leftover heavy cream in the refrigerator for up to a week.
Now that we have all the ingredients for French silk pie recipe prepped, let’s get started.
Let’s Make This French silk pie recipe Together
Okay, friend, let’s get down to the nitty-gritty and make this French silk pie recipe together! Don’t worry, I’ll guide you every step of the way.
- Make the Crust: In a medium bowl, combine the chocolate wafer crumbs and melted butter. Press the mixture into the bottom and up the sides of a 9-inch pie plate. I like to use the bottom of a measuring cup to really press it in firmly.
- Bake the Crust: Bake in a preheated oven at 350°F (175°C) for 8-10 minutes. Let it cool completely before adding the filling. I learned the hard way that if you don’t let it cool, you will melt the chocolate silk pie!
- Make the Filling: In a large bowl, beat the softened butter and sugar together until light and fluffy. This usually takes about 3-5 minutes with an electric mixer.
- Add Chocolate & Vanilla: Gradually beat in the melted chocolate, vanilla extract, and salt until well combined.
- Incorporate Eggs: Add the eggs one at a time, beating well after each addition. Don’t worry if your French silk pie recipe filling looks a little curdled at this point. It will all come together in the end!
- Beat for Fluffiness: Now, this is the crucial step for the best French silk pie recipe! Beat the filling on high speed for a full 5 minutes. This incorporates air into the mixture and creates that signature light and airy texture.
- Pour into Crust: Pour the chocolate filling into the cooled crust and spread evenly.
- Chill: Cover the pie with plastic wrap and chill in the refrigerator for at least 4 hours, or preferably overnight. This allows the filling to set properly.
- Make the Whipped Cream: In a chilled bowl, beat the heavy cream and powdered sugar until stiff peaks form.
- Garnish & Serve: Spread the whipped cream over the pie and garnish with chocolate shavings.
In my kitchen, this French silk pie recipe usually takes about 30 minutes of active prep time, plus the chilling time. While the French silk pie recipe is chilling, I usually catch up on my favorite TV show or start prepping for dinner. Your French silk pie recipe should smell like rich, decadent chocolate heaven!
Here’s a little tip for you: I found this recipe that is similar to my French silk pie recipe and doesn’t use raw eggs! Check out this easy French silk pie method from The Recipe Rebel
And if you mess up the pie crust, don’t worry. Just get a pre-made one from the grocery store. It will taste just as good! If you want a super easy no bake French silk pie, this may be a great option for you.
Now that you know how to make the pie, let’s talk about serving.
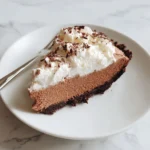
How I Love to Serve This French silk pie recipe
Oh, serving this French silk pie recipe is where the real fun begins! It’s not just about the taste; it’s about the presentation and the whole experience.
My family loves this French silk pie recipe when I serve it with a scoop of vanilla ice cream. The cold ice cream against the rich, chocolatey pie is just divine. It’s also amazing with a dollop of fresh raspberries or strawberries. I think the acidity of the fruit complements the sweetness of the chocolate beautifully.
This French silk pie recipe is perfect for special occasions like birthdays, holidays, or even just a simple Sunday dinner. It’s always a crowd-pleaser, and everyone raves about it.
For presentation, I like to sprinkle extra chocolate shavings on top of the whipped cream just before serving. You could also add a few fresh berries or even a drizzle of chocolate sauce.
If you have extra French silk pie recipe, you can store it in the refrigerator for up to 3 days. Just make sure to cover it tightly with plastic wrap to prevent it from drying out. Although in my house, there is rarely any leftover French silk pie recipe!
For a seasonal twist, you could try adding a hint of peppermint extract to the whipped cream during the holidays. Or, in the summertime, you could top the pie with fresh peaches or blueberries.
Friends always ask for this French silk pie recipe whenever I make it. They say it’s the best chocolate silk pie they’ve ever had! And honestly, I think they’re right. I mean, after all, it’s the best French silk pie recipe.
If your kids love this, they’ll go crazy for my Broccoli Cheese Casserole!
Here is an easy French silk pie recipe from Sally’s Baking.
Now, let’s get to some common questions.
Your French silk pie recipe Questions Answered
Okay, let’s tackle some of the most common questions I get about this French silk pie recipe. I’ve definitely learned a few things over the years, so hopefully, my answers will help you avoid some of the pitfalls I’ve experienced!
Q: My French silk pie recipe filling looks curdled after adding the eggs. What did I do wrong?
A: Don’t panic! This is totally normal. The key is to beat the filling on high speed for a full 5 minutes after adding the eggs. This will emulsify the mixture and create that smooth, silky texture you’re looking for. I’ve found that this easy french silk pie isn’t as pretty if I don’t beat it for the proper amount of time.
Q: Can I use a different type of chocolate for the filling?
A: Absolutely! While I prefer bittersweet chocolate, you can use semi-sweet or even milk chocolate if you prefer. Just keep in mind that the sweetness level will change, so you may need to adjust the amount of sugar accordingly.
Q: Can I make this French silk pie recipe ahead of time?
A: Yes, definitely! In fact, I highly recommend it. The filling needs at least 4 hours to chill and set properly. You can make the crust and filling up to 2 days in advance. Just wait to add the whipped cream until just before serving.
Q: My whipped cream always seems to deflate. What can I do to prevent this?
A: Make sure your bowl and beaters are chilled before whipping the cream. Also, don’t overwhip the cream, or it will turn grainy. Stop beating as soon as stiff peaks form. I always try to keep my kitchen cool when making this best french silk pie recipe so that the whipped cream stays stable.
Q: Can I freeze this French silk pie recipe?
A: I don’t recommend freezing the entire pie, as the texture of the filling and whipped cream may change. However, you can freeze individual slices for up to a month. Wrap them tightly in plastic wrap and then in foil.
Q: Can I make this French silk pie recipe with a graham cracker crust instead?
A: Absolutely! A graham cracker crust would be a delicious alternative. Simply substitute graham cracker crumbs for the chocolate wafer crumbs in the crust recipe.
Q: Is there a substitute for the raw eggs in this classic French silk pie?
A: I understand your concern about raw eggs. While my recipe uses fresh, high-quality eggs, you can find versions of this pie that cook the eggs for added safety.
One of my readers suggested using pasteurized eggs to make this the best french silk pie.
Hopefully, these answers have helped clear up any questions you may have about this French silk pie recipe. And hey, even if you mess up a little, it will still taste delicious!
For more sanity-saving dinner ideas, check out my Beef and Bowtie Pasta recipe.
One of the best ways to make a dessert is to use high-quality chocolate like in this French Chocolate Silk Pie Recipe from Handle the Heat.
And now, let’s get to my final thoughts.
My Final Thoughts on This French silk pie recipe
This French silk pie recipe isn’t just a dessert to me; it’s a connection to my past, a symbol of family, and a reminder that even the simplest things can bring so much joy. Every time I make it, I think of my grandma in her tiny kitchen, and it fills my heart with warmth.
Here are a few of my French silk pie recipe Pro Tips:
- Use high-quality chocolate: It makes a world of difference in the flavor of the filling.
- Don’t skip the 5-minute beating: This is crucial for that light and airy texture.
- Chill the pie thoroughly: It needs at least 4 hours to set properly.
Over the years, I’ve experimented with a few different variations of this French silk pie recipe. One of my favorites is adding a layer of salted caramel to the bottom of the crust. It adds a delicious salty-sweet contrast to the chocolate. Another variation is using a different extract, such as peppermint or almond, to flavor the filling. I have even made this as a no bake French silk pie when I was in a pinch!
My husband loves the classic version of this French silk pie recipe, while my kids are big fans of the salted caramel version.
My hope is that this French silk pie recipe brings as much joy to your family as it has to mine. Don’t be afraid to experiment and make it your own. Add your own personal touches, and most importantly, have fun!
Remember, cooking is all about love and sharing, so embrace the process and create something delicious that you can enjoy with your loved ones.
So go ahead, give this French silk pie recipe a try. I promise, you won’t regret it!
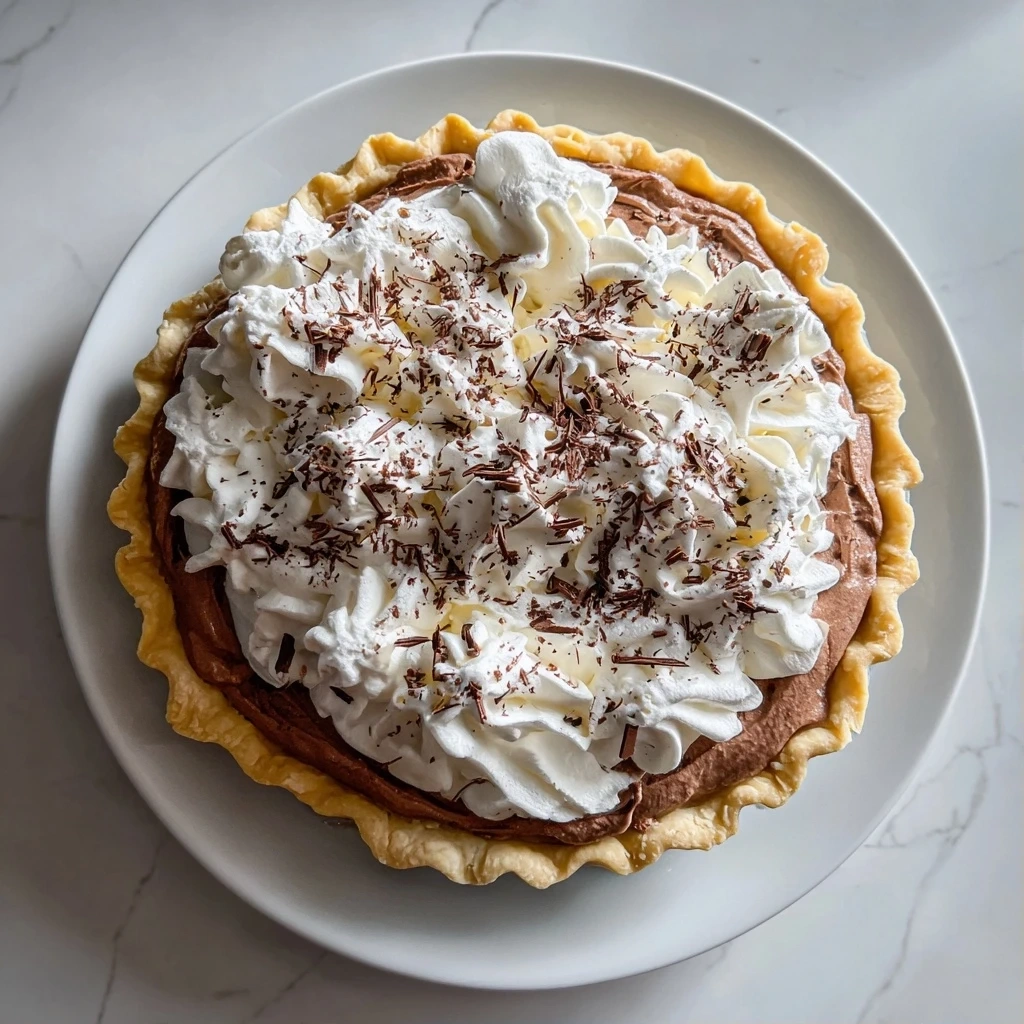
French silk pie recipe
Indulge in the creamy decadence of French Silk Pie. This classic dessert features a buttery chocolate crust filled with a light and airy chocolate mousse, topped with whipped cream and chocolate shavings.
- Prep Time: 20 minutes
- Cook Time: 10 minutes
- Total Time: 4 hours 30 minutes
- Yield: 8 servings
- Category: Dessert
- Method: No-Cook
- Cuisine: American
Ingredients
- For the Chocolate Crust:
- 1 1/2 cups chocolate wafer crumbs
- 6 tablespoons unsalted butter, melted
- 2 tablespoons granulated sugar
- For the Filling:
- 1 1/2 cups granulated sugar
- 1/2 cup unsalted butter, softened
- 3 large eggs
- 6 ounces semi-sweet chocolate, melted and cooled
- 1 teaspoon vanilla extract
- 1/4 teaspoon salt
- 1 cup heavy cream, whipped, for topping
- Chocolate shavings, for garnish
Instructions
- Make the Crust: Preheat oven to 350°F (175°C). In a medium bowl, combine chocolate wafer crumbs, melted butter, and sugar. Press mixture into the bottom and up the sides of a 9-inch pie plate.
- Bake for 8-10 minutes. Let cool completely.
- Make the Filling: In a large bowl, cream together sugar and butter until light and fluffy.
- Beat in eggs one at a time, beating well after each addition.
- Gradually beat in melted chocolate, vanilla extract, and salt.
- Pour filling into cooled crust. Refrigerate for at least 4 hours, or preferably overnight, to allow the filling to set.
- Before serving, top with whipped cream and chocolate shavings.
Notes
For an extra touch, dust the top of the whipped cream with cocoa powder before serving.