
There’s something truly magical about my first encounter with the No Bake Classic Woolworth Cheesecake—a simple, nostalgic treat that has since become a beloved staple in my kitchen. I still remember the buttery aroma of graham cracker crust mixing with the silky, cream cheese filling as it slowly set in the refrigerator. That effortless combination of tangy and sweet was exactly what my family needed after a hectic week of busy schedules, school runs, and daily chaos.
I stumbled upon this No Bake Classic Woolworth Cheesecake recipe during one of those moments when I desperately needed a dessert that was as fuss-free as possible but still comforting and crowd-pleasing. Over the years, it has become our go-to because it’s just so reliable, quick, and hits that perfect flavor balance every single time. It’s a classic no bake cheesecake that truly ticks all the boxes: no oven required, creamy texture, and a nostalgic feel that often reminds me of those old Woolworth’s days.
I have to confess—when I first tried making a no bake cheesecake before discovering this exact recipe, I had my fair share of kitchen slip-ups. You know, the dreaded “why isn’t it setting?” panics? But with this No Bake Classic Woolworth Cheesecake, I found an easy cheesecake with cream cheese that held its shape beautifully, no matter what. For busy families like mine, having a no bake cheesecake recipe that’s both forgiving and simple is a total lifesaver. It fits perfectly into our weekend routine or last-minute dinner parties.
One of my favorite things about this classic Woolworth cheesecake dessert is how it brings everyone together. Whether it’s a casual get-together or a quiet family evening, I love knowing that a delicious, creamy dessert is waiting in the fridge without me having to stand over the oven. If you’re curious to try a simple no bake dessert that’s genuinely satisfying—and that can become a family favorite too—I hope you’ll join me on this sweet adventure. Plus, if you want to see more ways I enjoy no bake cheesecakes, you might want to peek at this No Bake Pumpkin Cheesecake recipe for more inspiration.
What You’ll Need for This No Bake Classic Woolworth Cheesecake
When it comes to preparing the perfect No Bake Classic Woolworth Cheesecake, I always make sure to have fresh, high-quality ingredients on hand. Over the years, I’ve learned that the right ingredients make all the difference for that creamy, smooth texture and rich flavor we all love. Here’s my go-to list for this classic no bake cheesecake:
- 250g (about 2 cups) of crushed graham crackers or digestive biscuits: I always use digestive biscuits for my No Bake Classic Woolworth Cheesecake because they give a slightly sweet but neutral base.
- 125g unsalted butter, melted: It binds the crust and adds that lovely buttery richness.
- 300g cream cheese, softened: This is the heart of the easy cheesecake with cream cheese filling—always opt for full-fat cream cheese for the best texture.
- 1 cup powdered sugar: For the perfect balance of sweetness without any graininess.
- 300ml thickened cream (or heavy cream): I find whipping this just right is key for that fluffy and airy filling.
- 1 teaspoon vanilla extract: A small but crucial ingredient for deep flavor.
- Juice of half a lemon: Adds a slight tanginess that keeps the filling light and refreshing.

When making this No Bake Classic Woolworth Cheesecake, you can find most of these ingredients at your local Woolworths, Coles, or even smaller specialty stores. For instance, I always shop for fresh cream and cream cheese from the refrigerated aisles there, where the quality is consistent. Here’s a trick I learned: whisk your cream cheese beforehand to smooth out any lumps, which saves you from any awkward biting moments, especially important for the classic no bake cheesecake texture.
To save time, especially on busy family nights, you can crush your biscuits in advance and store them in an airtight container—the same goes for melting the butter. This little prep hack means when it’s time to whip up the cheesecake, you’re halfway there! Plus, choosing store-brand ingredients can help keep the cost low without compromising taste.
If you find yourself with leftover filling or crust ingredients, did you know you can freeze whipped cream separately or store cream cheese in original packaging tightly sealed for about a week? It’s all about making your life easier while keeping the integrity of your Woolworth cheesecake dessert intact.
I’ve shared more about ingredient tips and alternatives in this lovely No Bake Classic Woolworth Cheesecake – Sugar Apron. Check it out if you want some extra insights while you get ready to bake (or, in this case, no bake).
Let’s Make This No Bake Classic Woolworth Cheesecake Together
Alright, girlfriend, now let’s dive into making our No Bake Classic Woolworth Cheesecake! Don’t worry if you haven’t made one before—this is one of those simple no bake dessert recipes where you really can’t go wrong. I’m right here with you every step of the way.
Step 1: Prepare the Crust
Start by combining your crushed digestive biscuits with melted butter in a medium bowl. Stir until the crumbs are well coated—think of it like the sandy, inviting base to your cheesecake dream. Press this mixture firmly into a 23cm springform pan or any pie dish you have handy. I usually use the back of a spoon or the bottom of a glass. Don’t rush this part because a firmly packed crust holds everything beautifully. Pop this crust in the fridge while you prepare the filling.
Step 2: Whip the Cream
In a chilled bowl, beat the thickened cream until soft peaks form. This step is crucial; soft peaks mean your cream can gently hold its shape but still fold easily into the cream cheese mixture. If you overwhip, your cheesecake might turn out grainy—that’s a rookie mistake I’ve made more times than I’d like to admit! So keep an eye on the cream as it whips.
Step 3: Mix the Cream Cheese Filling
In a separate bowl, beat the softened cream cheese with powdered sugar, vanilla extract, and lemon juice until smooth. Your filling should be silky and luscious. If you want to add a little extra oomph, now’s the time to sneak in a tablespoon of sour cream or mascarpone for richness. Once smooth, gently fold in the whipped cream with a spatula. The goal is to preserve that airy texture, so no vigorous mixing!
Step 4: Assemble and Chill
Pour your luscious filling onto the chilled crust, spreading it evenly with a spatula. This is the part where your kitchen starts smelling like the coziest dessert heaven—sweet, creamy, and inviting. Cover the pan with cling wrap and let it chill in the fridge for at least 4 hours, though overnight is best for that perfect set.
Timing-wise, in my kitchen, the No Bake Classic Woolworth Cheesecake usually takes about 15 minutes to prepare and then some patient waiting. While it’s setting, I like to clean my prep area, make a pot of tea, or even plan what to serve with it later.
Step 5: Serve and Enjoy!
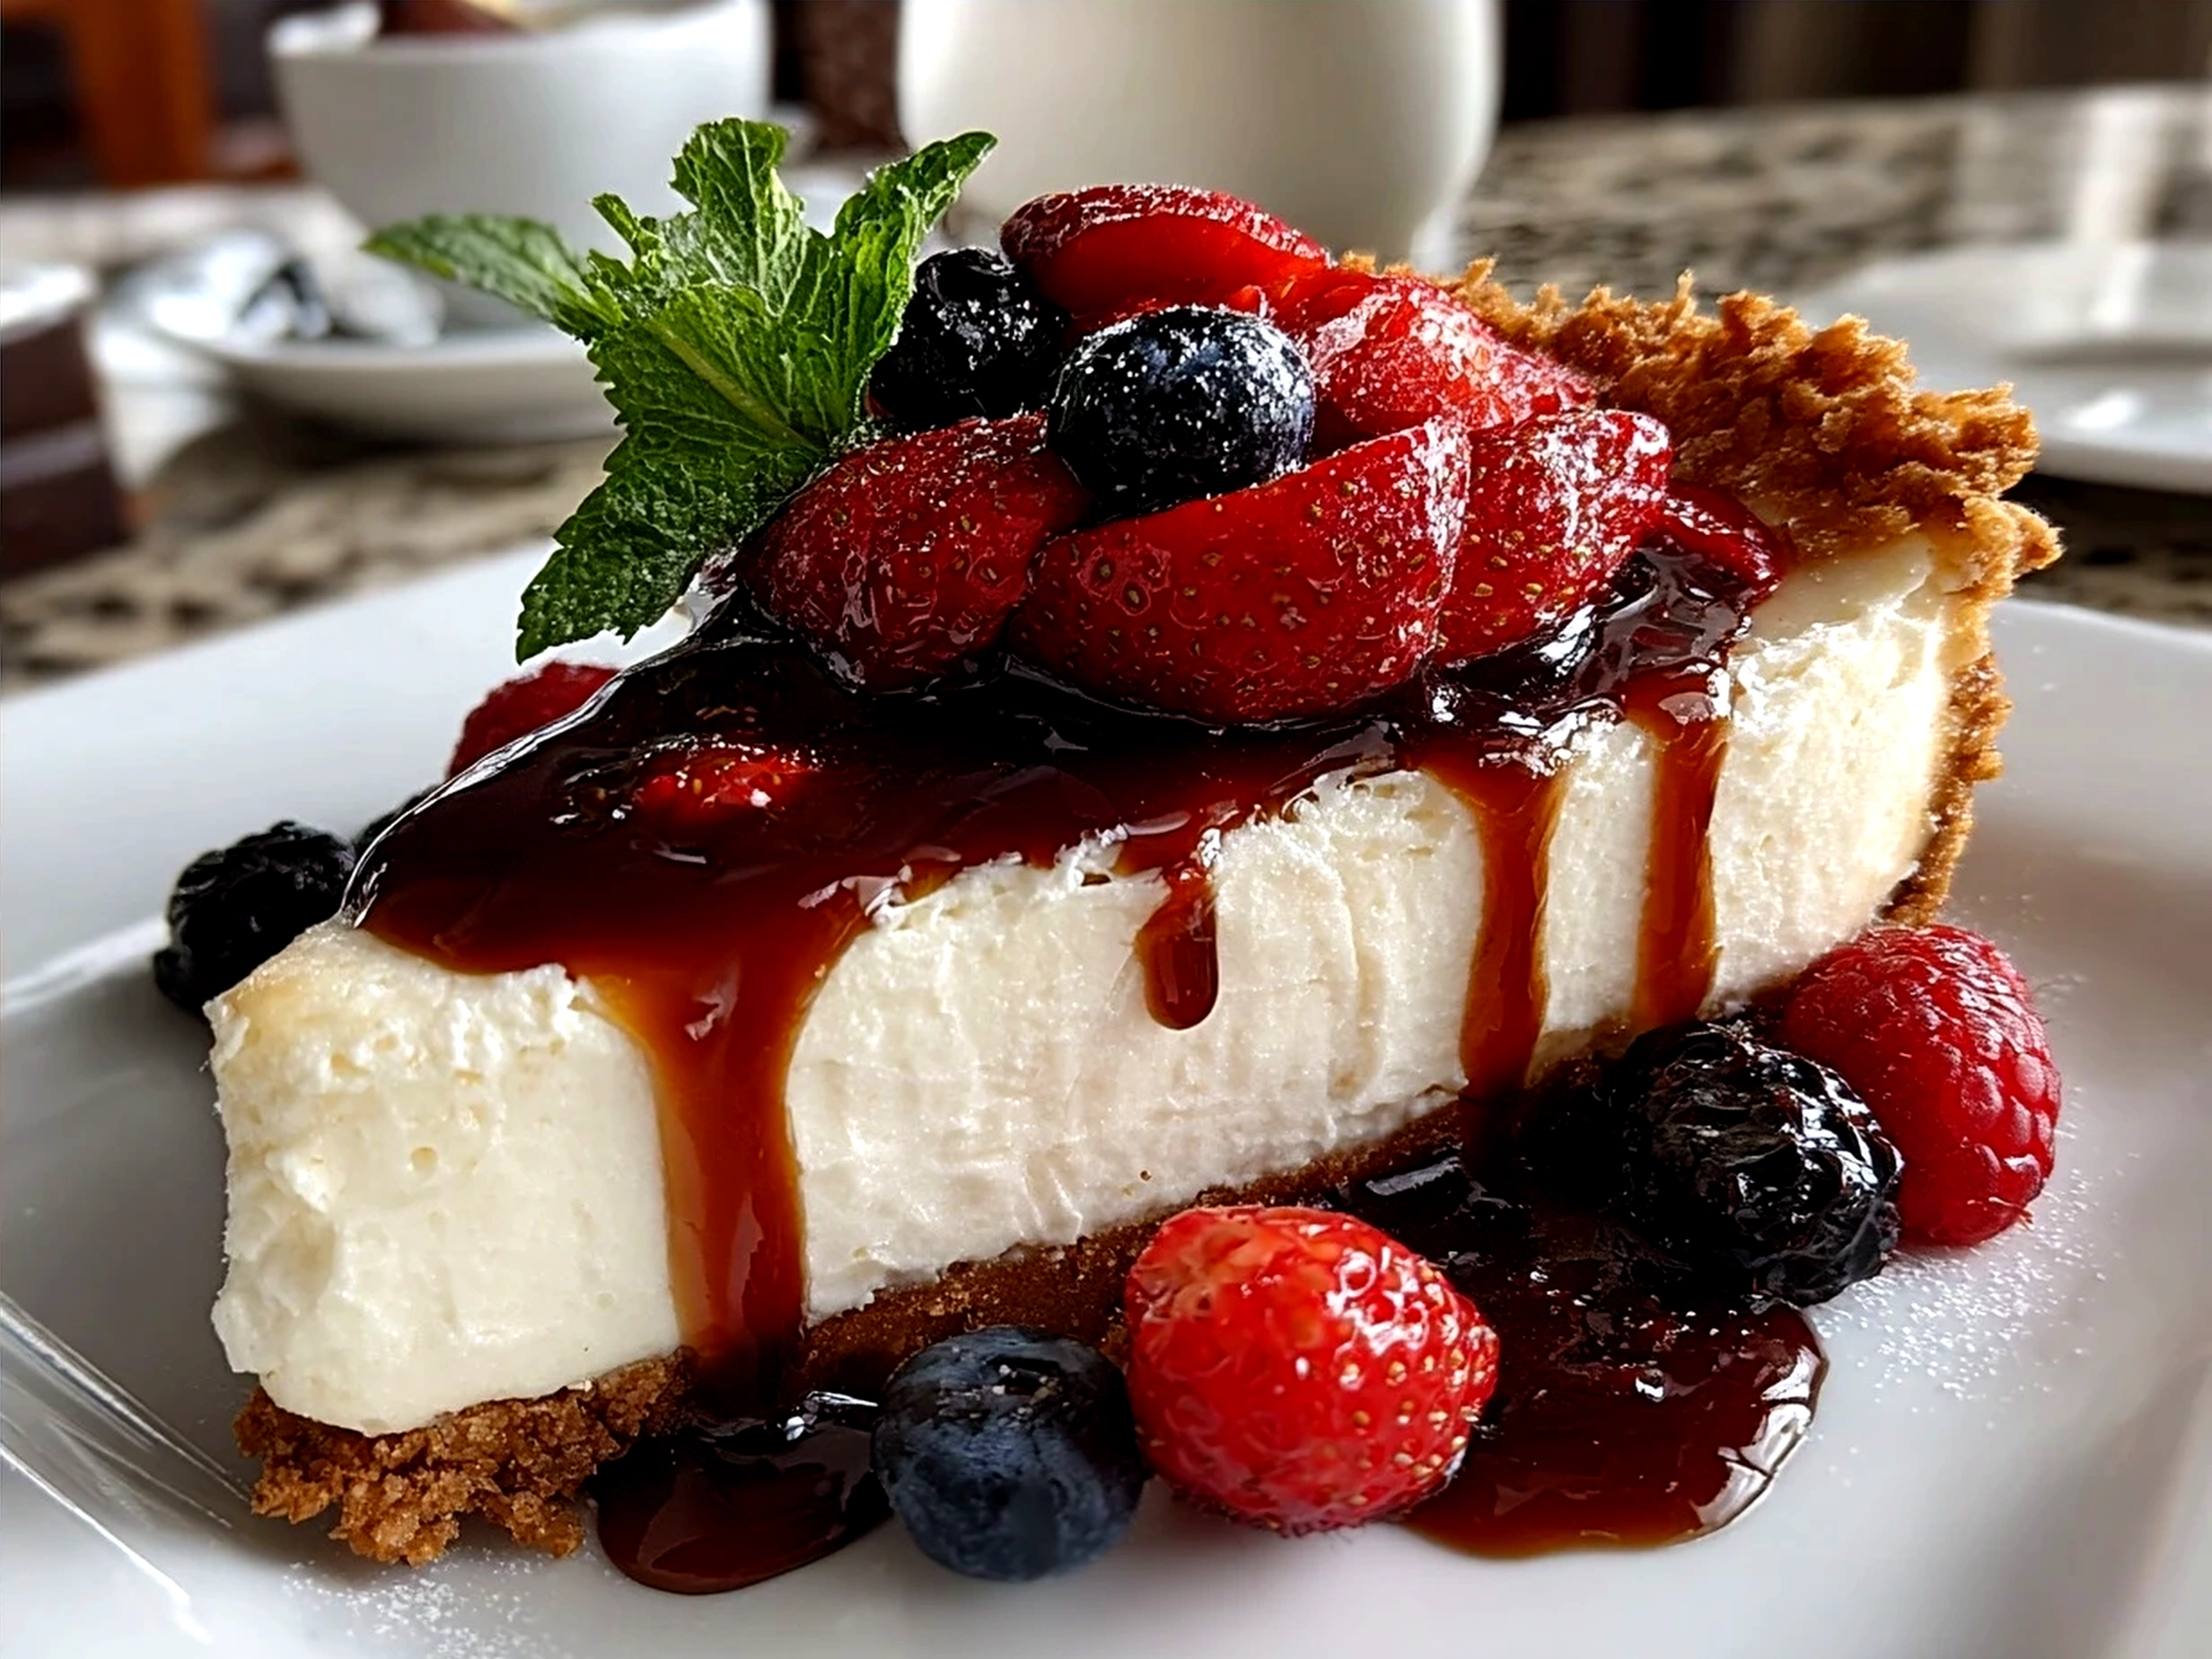
Once it’s perfectly set, you can top it with fresh berries, a drizzle of chocolate sauce, or even a spoonful of berry compote. My family especially loves it with a simple raspberry glaze. Don’t forget, if you want to mix up your no bake cheesecake recipe routine, you can find more ideas like No Bake Halloween Cheesecake for festive fun, or even my favorite No Bake Pumpkin Cheesecake Balls for easy party bites.
One thing I’ve learned from my many adventures with this classic Woolworth cheesecake dessert is to trust the process and be kind to yourself. Cheesecake making is about joy, not pressure!
How I Love to Serve This No Bake Classic Woolworth Cheesecake
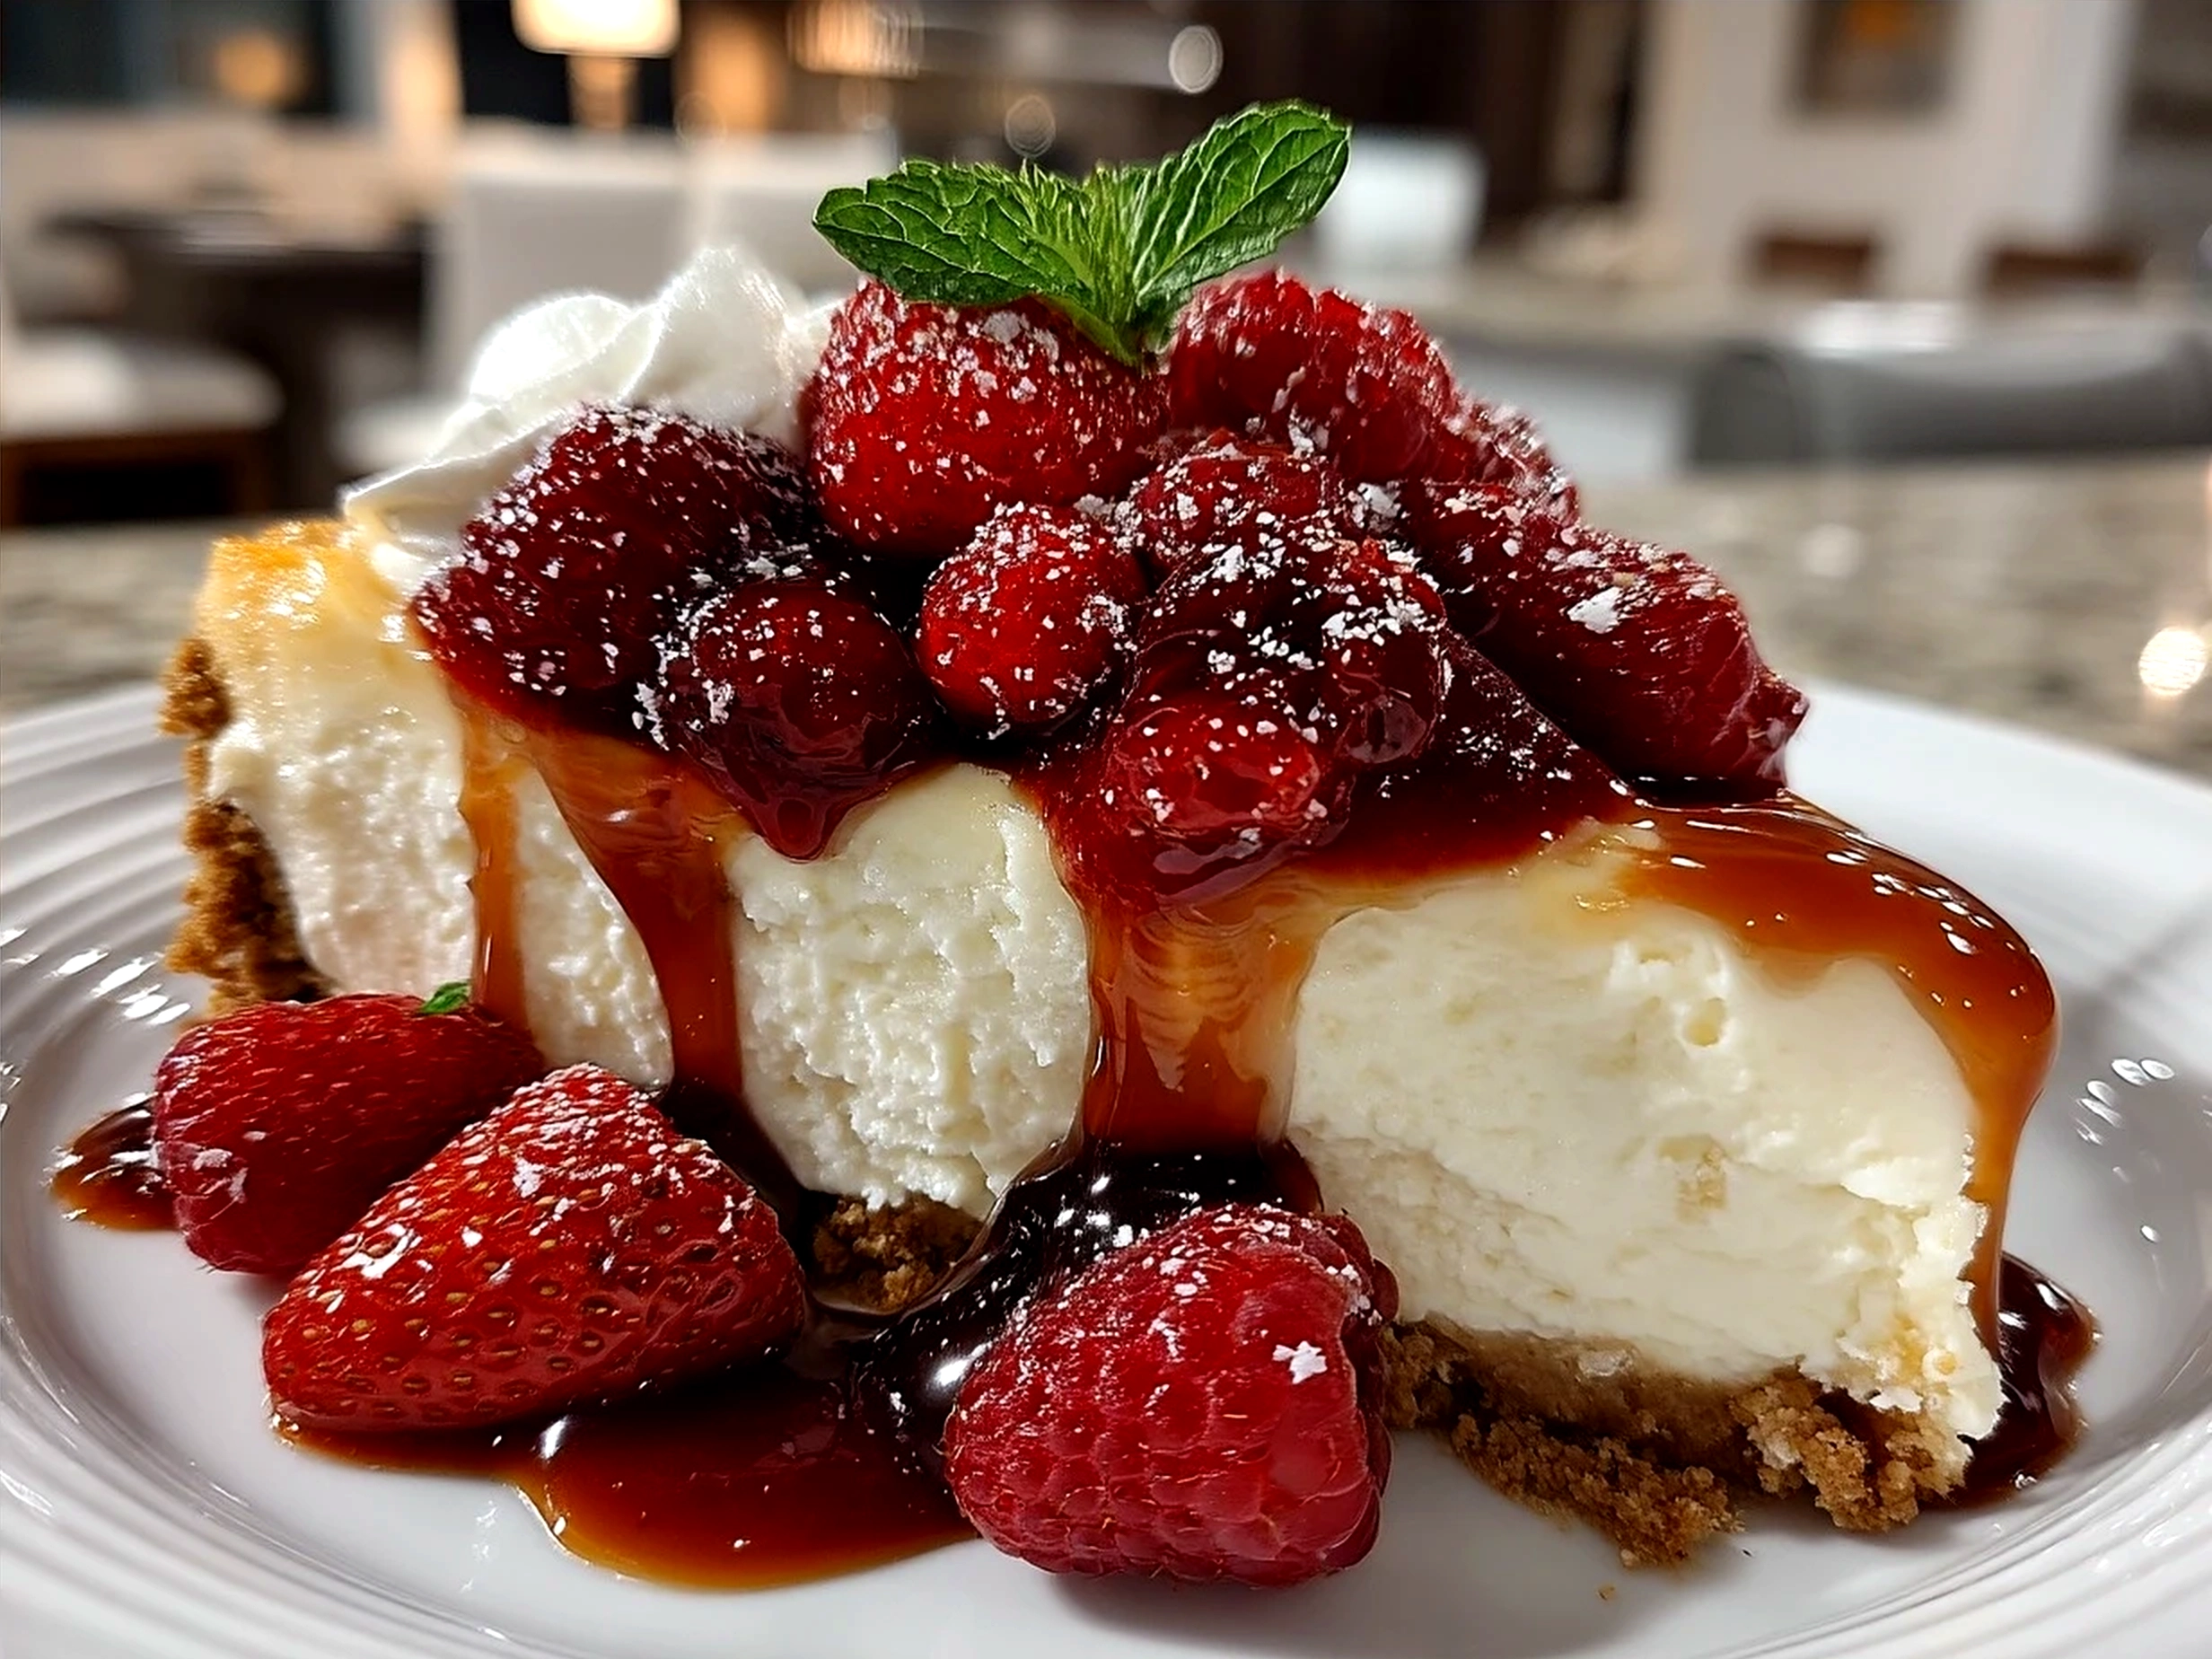
Oh, the joy of pulling out that perfectly set No Bake Classic Woolworth Cheesecake from the fridge! My family absolutely loves this dessert when I serve it chilled with a side of freshly picked berries or a dollop of homemade whipped cream. It’s a conversation starter every time because the texture is just so divine—creamy but light, a true crowd-pleaser.
For special occasions, like birthdays or Sunday family dinners, I dress it up with a drizzle of chocolate or even a tangy passionfruit glaze that adds a pop of flavor. I’ve found that pairing this classic no bake cheesecake with citrusy fruits or a crunchy nut topping works beautifully—the contrast in textures really brings the dessert alive.
This cheesecake is a fantastic choice for holidays or warm-weather barbecues because it’s a simple no bake dessert that keeps you out of the kitchen heat. When friends come over, they often ask for this No Bake Classic Woolworth Cheesecake recipe, and I’m always happy to share—especially because it’s one of those recipes that looks fancy but is actually foolproof.
If you do have leftovers—which is rare in my house!—you can freeze slices individually wrapped or repurpose the filling into mini parfait cups layered with fruit and granola for an easy second dessert. On occasion, I’ve experimented with seasonal twists, swapping lemon juice for orange zest or adding a swirl of raspberry puree, which keeps this no bake cheesecake recipe feeling fresh and exciting.
Curious to see more serving ideas? Check out this beautiful Classic Woolworth No Bake Cheesecake – A Feast For The Eyes where you’ll find some lovely presentation inspiration.
Your No Bake Classic Woolworth Cheesecake Questions Answered
I get a lot of questions about this No Bake Classic Woolworth Cheesecake, so I thought I’d share some answers here as if we were chatting over coffee.
Q1: Why isn’t my No Bake Classic Woolworth Cheesecake setting after refrigeration?
You know what I do when my cheesecake struggles to set? I check the quality of cream cheese and whipping cream first—low-fat versions sometimes don’t set well. Also, be sure you let it chill long enough; 4 hours is minimum but overnight is even better!
Q2: Can I use gelatin to firm up the no bake cheesecake filling?
I’ve tried adding gelatin a couple of times for extra firmness, but honestly, I prefer the classic recipe without it. It keeps the dessert light and creamy, perfect for a simple no bake dessert.
Q3: How do I avoid lumps in my cream cheese filling?
This was a learning curve for me! Always soften your cream cheese fully and beat it gently before adding other ingredients. Whisking it until smooth is key to a silky texture in your classic no bake cheesecake.
Q4: Can I make this Woolworth cheesecake dessert ahead of time?
Absolutely! Making it a day ahead lets the flavors meld beautifully, and it’s stress-free for dinner parties.
Q5: Is it possible to make individual servings?
Totally! I sometimes use small jars or ramekins to make personal cheesecakes—great for parties and keeps the presentation charming.
Q6: What’s the best way to store leftovers?
Store your leftover cheesecake in an airtight container in the fridge for up to 3 days. If you want to freeze, slice it first and wrap tightly to avoid freezer burn.
Q7: Are there any good variations for picky eaters?
Yes! Some family members love me to add more lemon for tang, while others prefer a sweeter version with extra powdered sugar. You could also fold in crushed cookies or chocolate chips to mix things up.
If you want to dive deeper into troubleshooting or alternative techniques, this No Bake Classic Woolworth Cheesecake page at No Dash of Gluten has some great insights. Don’t forget, every kitchen experiment teaches us a little more about our own tastes and styles.
My Final Thoughts on This No Bake Classic Woolworth Cheesecake
I can honestly say the No Bake Classic Woolworth Cheesecake holds a special place in my heart because it embodies simplicity, love, and family time wrapped up in one sweet slice. This recipe has seen our family through lazy afternoons, surprise guests, and countless celebrations. It’s a dessert you can count on to look and taste wonderful, without the stress of baking.
Here are a few My No Bake Classic Woolworth Cheesecake Pro Tips that I swear by:
- Always soften the cream cheese completely before mixing for that silky texture.
- Use full-fat cream and cheese for richness—low-fat versions just don’t give the same result.
- Be patient with chilling—overnight resting lets the flavors marry beautifully and makes slicing easier.
Over time, I’ve experimented with variations like adding passionfruit pulp on top, swirling in some berry compote, or even mixing in crushed chocolate biscuits for extra crunch. My kids adore the fruity versions, especially with strawberries, while my husband prefers it classic with just a hint of vanilla. It’s so rewarding to see how everyone finds their favorite, making the recipe truly our own family heirloom.
I encourage you to make this No Bake Classic Woolworth Cheesecake your own—adjust to your tastes, add your favorite toppings, and share it with those you love. My hope is that in your kitchen, like mine, this simple no bake dessert becomes a source of joy, comfort, and a little slice of sweetness in your busy life.
If you’re ready for more simple and seasonal no bake treats, don’t miss my No Bake Pumpkin Cheesecake Balls or the festive No Bake Halloween Cheesecake for some fun twists. Remember, cooking is about sharing happiness—so dive in and enjoy every creamy bite of your No Bake Classic Woolworth Cheesecake!
I hope you’ve found this as heartwarming and approachable as I have making it time and again. Now, go on and treat yourself to a slice of this classic no bake cheesecake love!
No Bake Classic Woolworth Cheesecake
This No Bake Classic Woolworth Cheesecake is a creamy, smooth dessert with a buttery biscuit base, perfect for any occasion without the need for baking.
- Prep Time: 15 minutes
- Cook Time: 0 minutes
- Total Time: 4 hours 15 minutes
- Yield: 8 servings
- Category: Dessert
- Method: No-Cook
- Cuisine: American
Ingredients
- 200g digestive biscuits, crushed
- 100g unsalted butter, melted
- 500g cream cheese, softened
- 200ml thickened cream
- 150g powdered sugar
- 2 tsp vanilla extract
- 2 tsp lemon juice
Instructions
- Combine crushed biscuits and melted butter in a bowl until evenly mixed.
- Press the biscuit mixture firmly into the base of a 20cm springform pan and refrigerate for 30 minutes.
- In a separate bowl, beat cream cheese until smooth, then add powdered sugar, vanilla extract, and lemon juice. Mix well.
- Whip thickened cream to soft peaks and gently fold into the cream cheese mixture until combined.
- Pour the filling over the chilled biscuit base and smooth the top.
- Refrigerate the cheesecake for at least 4 hours or overnight until set.
- Remove from springform pan, slice, and serve chilled.
Notes
For an extra touch, garnish with fresh berries or a drizzle of berry compote before serving.