
It all started with a craving – a deep, soul-satisfying craving for something sweet, creamy, and utterly comforting. That’s how this Maple Cream Pie came to be a staple in our family. It wasn’t a recipe passed down through generations, more like a happy accident born from a snow day and a near-empty pantry. I remember staring out the window, watching the snow pile up, and thinking, “I need something to warm us from the inside out.” That’s where the idea for this Maple Cream Pie sparked!
I rummaged through the fridge and cupboards, finding a forgotten bottle of pure maple syrup (a gift from a friend’s trip to Vermont, no less!), some heavy cream, and a pre-made pie crust (yes, even I take shortcuts sometimes!). I’m not gonna lie, the first attempt was… less than perfect. The custard was a bit too runny, and the crust was slightly burnt. My son, Leo, bless his heart, still devoured it, declaring it “the best pie ever!” That’s the beauty of family, right? Unconditional love, especially when it comes to dessert. But, I knew I could do better. Over the next few weeks, I tinkered with the recipe, adjusting the ratios, playing with the baking time, and finally, I nailed it.
This Maple Cream Pie has now become synonymous with cozy family gatherings. It’s the pie I bake when we need a little extra comfort, when the weather is dreary, or when we simply want to celebrate something small, like getting through a particularly hectic week. It fits so seamlessly into our busy family life because, let’s be honest, it’s relatively easy to make! I can whip it up while juggling homework help, laundry, and the endless quest to find matching socks. And, you know what? That’s what makes it even more special. It’s a little piece of homemade goodness that I can share with my loved ones, a taste of warmth and happiness in every bite. It truly is the best easy maple pie recipe for any occasion.
My cooking philosophy has always been about creating food that nourishes both the body and the soul. It’s about using simple ingredients to create dishes that bring people together. And this Maple Cream Pie embodies that perfectly. It’s not fancy, it’s not complicated, but it is incredibly delicious and comforting.
So, come on, grab your apron, and let’s make some Maple Cream Pie together. Trust me, you won’t regret it! And if you want to compare our recipes, check out this Creamy maple custard in a flaky crust. This Maple Cream Pie is one …. You might just find your new family favorite.
What You’ll Need for This Maple Cream Pie
Alright, let’s gather our ingredients! Here’s what you’ll need to make this dreamy Maple Cream Pie:
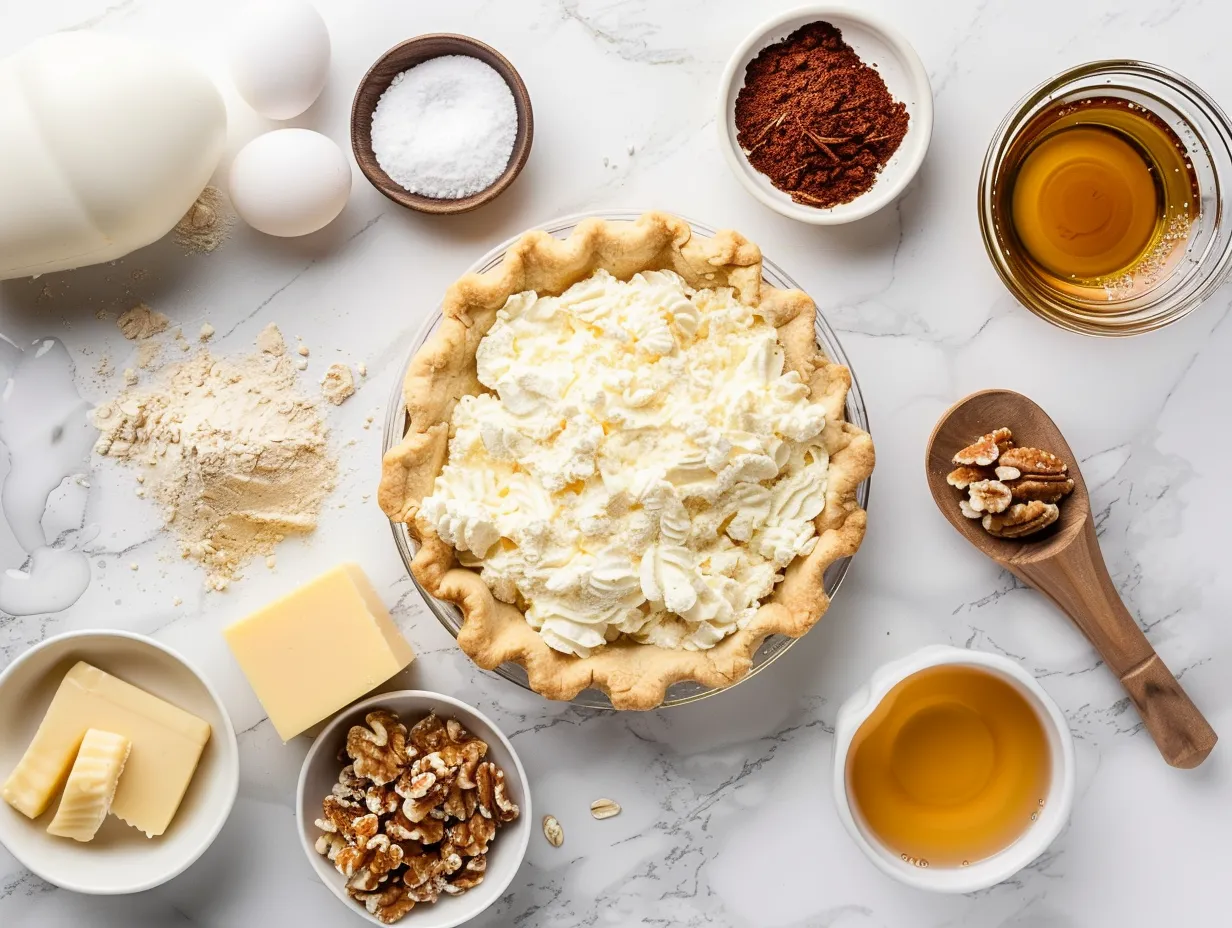
- 1 pre-made pie crust: I usually grab the refrigerated kind for convenience, but if you’re feeling ambitious, go for homemade!
- 1 ½ cups heavy cream: Don’t skimp on this! The heavy cream is what gives the pie its rich, decadent texture.
- ¾ cup pure maple syrup: This is the star of the show! Make sure it’s the real deal, not the imitation stuff. The flavor difference is HUGE.
- 4 large egg yolks: These add richness and help the custard set up perfectly.
- ¼ cup cornstarch: This is our thickening agent, ensuring a smooth and creamy filling.
- ¼ teaspoon salt: Just a pinch to balance out the sweetness.
- 2 tablespoons unsalted butter: Adds a touch of extra richness and flavor.
- ½ teaspoon maple extract (optional): For an extra boost of maple flavor, especially if your maple syrup is a bit on the mild side.
I always use Vermont maple syrup for my Maple Cream Pie – it has the most intense, delicious flavor. When making Maple Cream Pie, you can find good quality maple syrup at most grocery stores, but I prefer to buy it from local farmers markets or online retailers for the best flavor and quality. I will say, a good maple syrup is a little pricey. But it is so so worth it in this recipe!
Here’s a Maple Cream Pie trick I learned from my grandma: warm the heavy cream slightly before adding it to the other ingredients. It helps the cornstarch dissolve more easily and ensures a smoother custard. For busy families making Maple Cream Pie, the pre-made pie crust is your best friend. Don’t be ashamed to take the shortcut! It saves time and effort without sacrificing too much flavor. If you are looking for another easy weeknight family favorite, check out my recipe for Mozzarella Chicken in Basil Cream Sauce!
For cost-saving tips, keep an eye out for sales on heavy cream and maple syrup. And, if you have leftover Maple Cream Pie, store it in the refrigerator for up to 3 days. I doubt it will last that long! I’m always thinking about how to make my next pie. Why not try this Québécois Maple Cream Pie Recipe – Desserts?
Let’s Make This Maple Cream Pie Together
Okay, friend, let’s get baking! Here’s how to make this Maple Cream Pie step by step. Don’t worry, it’s easier than it looks!
- Preheat your oven to 350°F (175°C). Place your pie crust in a pie plate. If you’re using a store-bought crust, just unroll it and gently press it into the plate. Crimp the edges for a pretty finish.
- Blind bake the crust. This is important to prevent a soggy bottom! Line the crust with parchment paper and fill it with pie weights or dried beans. Bake for 15 minutes, then remove the paper and weights and bake for another 5-7 minutes, or until the crust is lightly golden brown. Set aside to cool slightly. I learned the hard way with Maple Cream Pie that blind baking is crucial! Don’t skip this step.
- In a medium saucepan, whisk together the heavy cream, maple syrup, egg yolks, cornstarch, and salt. Make sure everything is well combined and there are no lumps of cornstarch.
- Cook the custard over medium heat, stirring constantly, until it thickens. This will take about 8-10 minutes. Don’t stop stirring, or the custard will scorch! It should be thick enough to coat the back of a spoon. I learned this from my mom, who taught me how to make the perfect pie. She also makes a mean Maple Glazed Chicken with Sweet Potatoes!
- Remove the saucepan from the heat and stir in the butter and maple extract (if using). Stir until the butter is melted and everything is smooth and glossy.
- Pour the custard into the prepared pie crust. Spread it evenly.
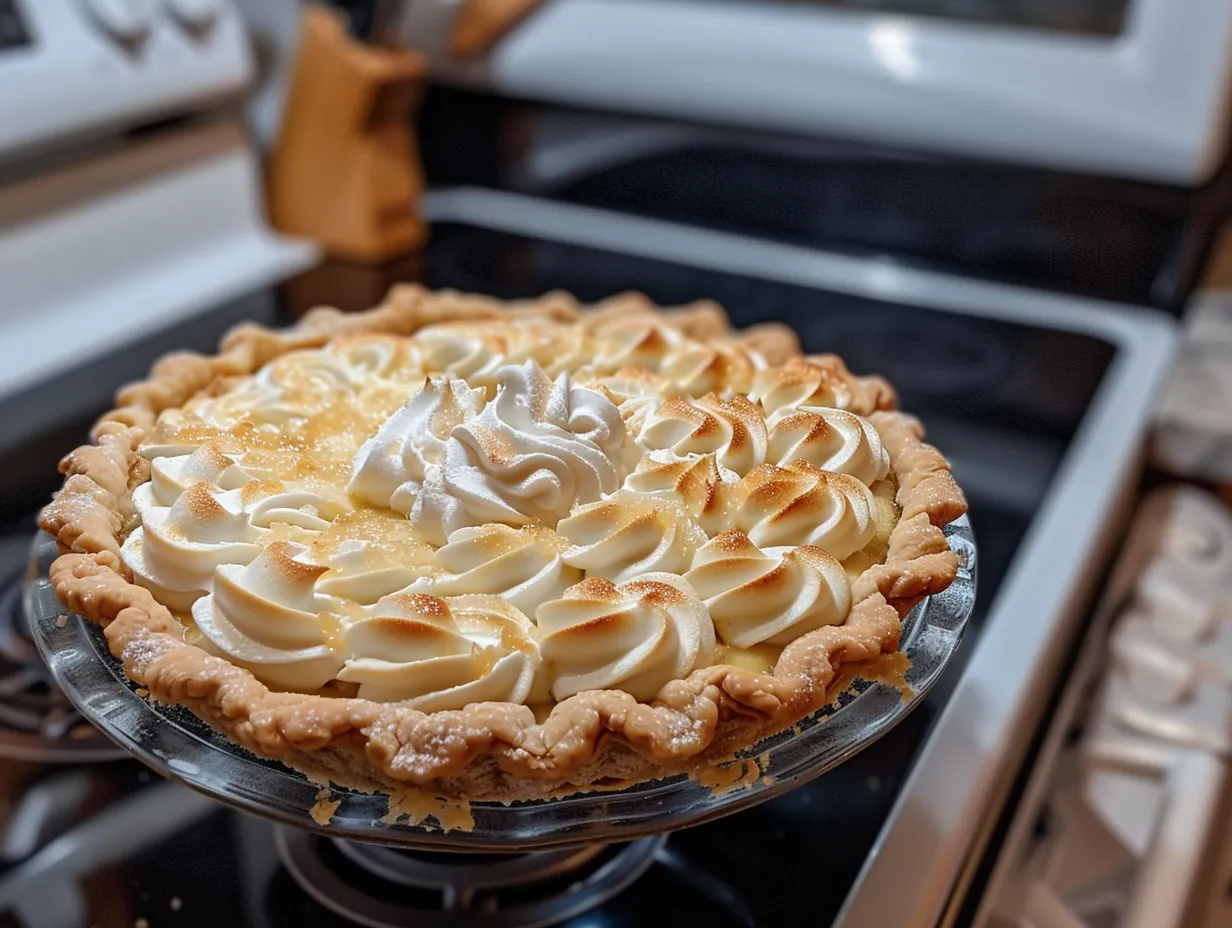
- Bake for 20-25 minutes, or until the filling is set but still slightly jiggly in the center. It should have a slight wobble, like a panna cotta. Don’t worry if your Maple Cream Pie puffs up a little during baking; it will settle as it cools.
- Let the pie cool completely on a wire rack. This is important! The filling will continue to set as it cools. Once it’s cooled to room temperature, cover it loosely with plastic wrap and refrigerate for at least 2 hours before serving. In my kitchen, Maple Cream Pie usually takes about 3-4 hours to fully set in the fridge.
While the Maple Cream Pie is cooking, I usually tidy up the kitchen or catch up on my favorite podcast. Sometimes, I even sneak in a little nap! Your Maple Cream Pie should smell like a warm hug – sweet, maple-y, and utterly irresistible. As a shortcut, you can use premade graham cracker crust! A family-tested Maple Cream Pie time-saver is to make the custard the night before and refrigerate it. Then, all you have to do is pour it into the crust and bake! The subtle richness of this Maple Cream Pie recipe makes it the perfect comfort food.
How I Love to Serve This Maple Cream Pie
Okay, so the Maple Cream Pie is ready, and now comes the best part – serving it! My family loves this Maple Cream Pie when I top it with a dollop of freshly whipped cream and a sprinkle of chopped pecans. It adds a nice textural contrast to the creamy filling.
I think it’s the perfect combination of flavors and textures that makes this pie so special. I often serve this Maple Cream Pie with a side of vanilla ice cream. The cold ice cream complements the warm pie perfectly. This Maple Cream Pie is perfect for Thanksgiving, Christmas, or any special occasion. It’s also great for a simple weeknight dessert!
For presentation tips, I like to dust the top of the pie with a little powdered sugar or cocoa powder before serving. It adds a touch of elegance and makes it look extra special. If you have extra Maple Cream Pie, store it in the refrigerator for up to 3 days. It’s also delicious cold straight from the fridge!
I’ve tried a few seasonal variations of this pie. In the fall, I like to add a pinch of cinnamon and nutmeg to the filling. In the spring, I sometimes top it with fresh berries. Friends always ask for this Maple Cream Pie recipe when I bring it to potlucks or parties. They can’t believe how easy it is to make! If you are looking for another easy family favorite, check out my recipe for Mozzarella Chicken in Basil Cream Sauce! It is so good over pasta!
Your Maple Cream Pie Questions Answered
Alright, let’s tackle some common questions about making this Maple Cream Pie. I’ve definitely had my share of kitchen mishaps, so I’m here to help you avoid them!
Q: My Maple Cream Pie filling is too runny. What did I do wrong?
A: Ah, the dreaded runny filling! The most common culprit is not cooking the custard long enough. Make sure you’re stirring constantly over medium heat until it’s thick enough to coat the back of a spoon. Also, be sure to measure the cornstarch accurately. Too little cornstarch, and your Maple Cream Pie will be soupy. You know what I do when my Maple Cream Pie isn’t setting? I put it back in the oven for a few minutes!
Q: Can I use a different type of sweetener instead of maple syrup?
A: While you could technically use another sweetener, like honey or agave, it won’t be the same. The maple syrup is what gives this pie its unique flavor. If you’re looking for other creamy pies, you could also try this recipe for Sour Cream and Onion Chicken.
Q: My pie crust is always soggy. How can I prevent that?
A: Soggy crust is the bane of every baker’s existence! Blind baking is key. Make sure you’re using pie weights or dried beans to weigh down the crust while it bakes. Also, don’t overfill the crust with custard. The less filling, the less chance of a soggy crust.
Q: Can I make this pie ahead of time?
A: Absolutely! In fact, I recommend making it at least a few hours ahead of time to allow the filling to set completely. You can even make it the day before and store it in the refrigerator.
Q: Can I freeze Maple Cream Pie?
A: I don’t recommend freezing the whole pie, as the texture of the custard can change. However, you can freeze individual slices for up to a month. Wrap them tightly in plastic wrap and then in foil.
Q: What can I do if my pie crust burns around the edges?
A: Pie crust shields are your best friend! You can buy them at most kitchen supply stores, or you can make your own out of aluminum foil. Simply cut a circle of foil and place it over the edges of the crust to protect them from burning.
Q: My family doesn’t like maple flavor. Is there a similar pie I can make?
A: If your family isn’t a fan of maple, you could try a vanilla cream pie or a chocolate cream pie. You can use the same basic custard recipe, just substitute the maple syrup with vanilla extract or melted chocolate.
My Final Thoughts on This Maple Cream Pie
This Maple Cream Pie isn’t just a dessert; it’s a symbol of comfort, family, and simple pleasures. It’s a reminder that sometimes, the best things in life are the ones that are easy to make and share with loved ones. It holds a special place in my heart because it represents those cozy moments we’ve shared as a family, gathered around the table, enjoying a slice of homemade goodness. Making a Maple Cream Pie is something the whole family can enjoy!
My Maple Cream Pie Pro Tips:
- Use high-quality maple syrup: It makes a huge difference in the flavor of the pie.
- Don’t overbake the filling: It should be set but still slightly jiggly in the center.
- Let the pie cool completely before serving: This allows the filling to set properly.
Over the years, I’ve experimented with a few variations of this Maple Cream Pie. My husband, Marco, loves it with a sprinkle of sea salt on top – he says it enhances the sweetness of the maple. My daughter, Sofia, prefers it with a drizzle of chocolate sauce. And Leo, my ever-adventurous son, likes it with a scoop of peanut butter ice cream!
I encourage you to make this Maple Cream Pie your own. Don’t be afraid to experiment with different flavors and toppings. Add a pinch of cinnamon, a dash of nutmeg, or a handful of toasted nuts. The possibilities are endless! This easy Maple Cream Pie also goes great with a scoop of vanilla ice cream!
I hope you enjoy making this Maple Cream Pie as much as I do. I hope it brings you and your family joy, comfort, and a little taste of homemade happiness. Remember, cooking is all about having fun and creating memories. So, don’t be afraid to make mistakes, to get messy, and to experiment. The most important thing is to enjoy the process and to share your creations with the people you love. This easy maple pie is a total crowd-pleaser.
So, go ahead, give this Maple Cream Pie a try. I know you’ll love it! And if you need any inspiration, check out this Maple Cream Pie ~ Barley & Sage. Happy baking!
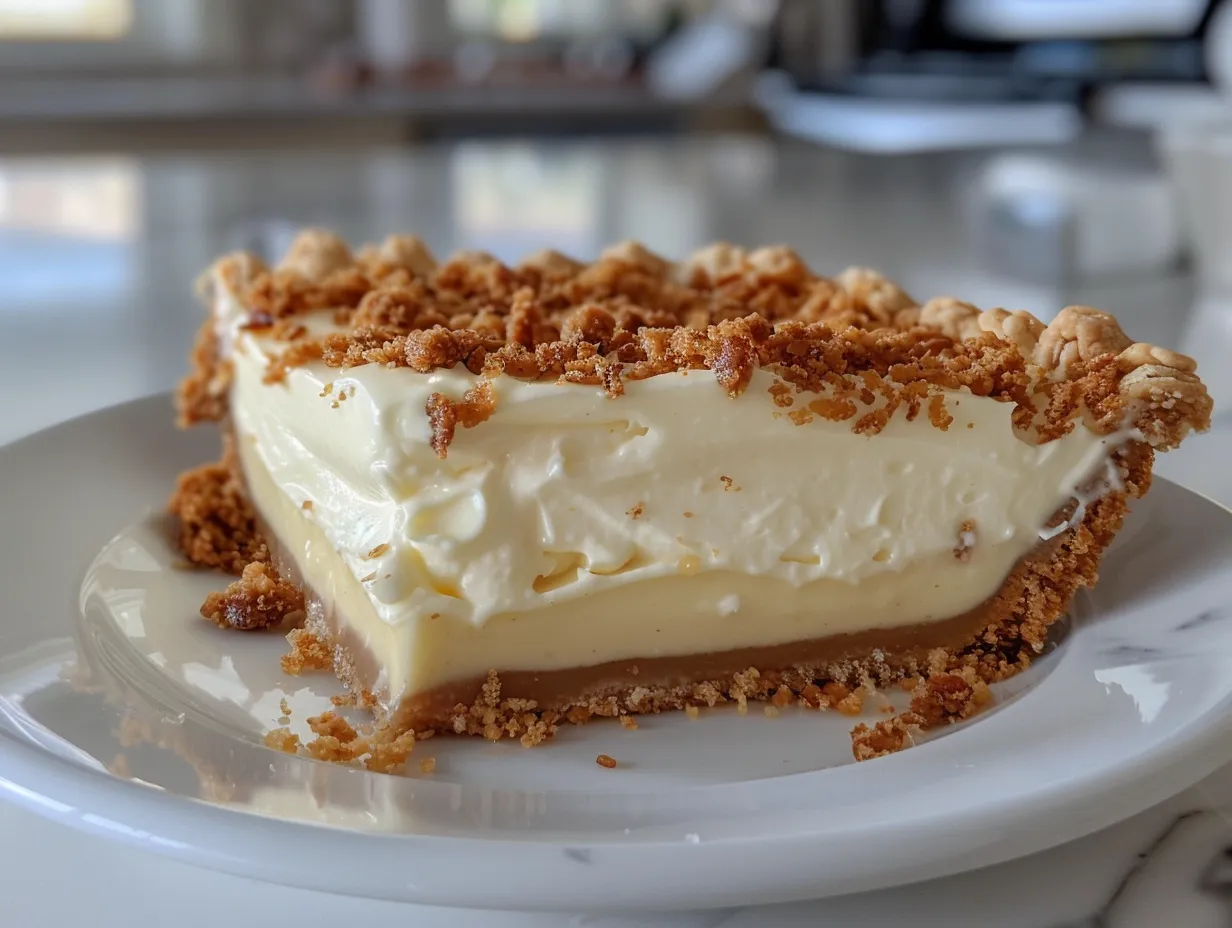
Maple Cream Pie
Indulge in the creamy sweetness of this Maple Cream Pie. Made with pure maple syrup, this pie offers a delightful taste of autumn in every bite.
- Prep Time: 15 minutes
- Cook Time: 0 minutes
- Total Time: 15 minutes
- Yield: 8 servings
- Category: Dessert
- Method: No-Cook
- Cuisine: American
Ingredients
- 1 pre-made graham cracker crust
- 1 cup heavy cream
- 8 ounces cream cheese, softened
- 1/2 cup pure maple syrup
- 1 teaspoon vanilla extract
- Pinch of salt
- Maple syrup for drizzling (optional)
- Chopped pecans for garnish (optional)
Instructions
- In a large bowl, beat the heavy cream until stiff peaks form. Set aside.
- In a separate bowl, beat the cream cheese until smooth and creamy.
- Gradually add the maple syrup and vanilla extract to the cream cheese, mixing until well combined. Add a pinch of salt.
- Gently fold the whipped cream into the maple cream cheese mixture until smooth and evenly combined.
- Pour the filling into the graham cracker crust.
- Cover and refrigerate for at least 4 hours, or preferably overnight, to allow the filling to set.
- Before serving, drizzle with additional maple syrup and garnish with chopped pecans, if desired.
- Slice and enjoy!
Notes
For a richer flavor, use dark amber maple syrup. Serve chilled for the best taste.