
When I think about the perfect quick snack that also feeds the soul, Easy Yaki Onigiri always comes to mind. I first stumbled upon this gem of a Japanese snack recipe years ago during a chilly weekend when my family craved something warm, comforting, yet simple. There’s something about those golden grilled rice balls—glazed just right with soy sauce—that makes my kitchen smell like a cozy little haven. Making Easy Yaki Onigiri has since become a treasured ritual in our home, especially when life gets hectic and everyone just wants a satisfying, hand-held treat.
You know, at first, I struggled a bit with shaping the rice just right. I remember one evening, trying to press the rice into perfect triangles only to have it stick to my hands like it had its own agenda—can you relate? But once I got the hang of the rice ball grilling techniques, it was as if the Easy Yaki Onigiri made me feel like a quick culinary ninja in my own kitchen. This recipe is surprisingly forgiving and flexible, which I love because with kids around, no one has time for perfection—just deliciousness.
One of my favorite parts about Easy Yaki Onigiri is how it fits seamlessly into our family’s busy lifestyle. Sometimes it’s a midday snack to tide everyone over, other times it’s a simple dinner when paired with miso soup or a fresh salad. It’s also a total lifesaver when I want to whip up something that feels special but doesn’t take hours. There’s a kind of magic in the crispy exterior meeting that soft, comforting rice inside, all jazzed up with a sticky, savory soy sauce glaze. And trust me, once you get your own favorite onigiri filling ideas in the mix, it’s a game changer.
If you want a walk-through on how to make this easy grilled rice ball joy, keep reading. I’ll show you everything, from what ingredients to get to the little kitchen tips that make your Easy Yaki Onigiri shine. Plus, if you enjoy this snack as much as we do, you might be interested in other family-friendly dishes I adore, like my Oven Baked Snow Crab Legs or a cozy Cheesecake with Pumpkin Swirl for dessert. We’ve all got room for a few more delicious staples, right?
What You’ll Need for This Easy Yaki Onigiri
Let’s start with the basics—you can’t make this easy Japanese snack recipe without the right ingredients. Here’s my go-to list that always leads to the tastiest grilled rice balls:
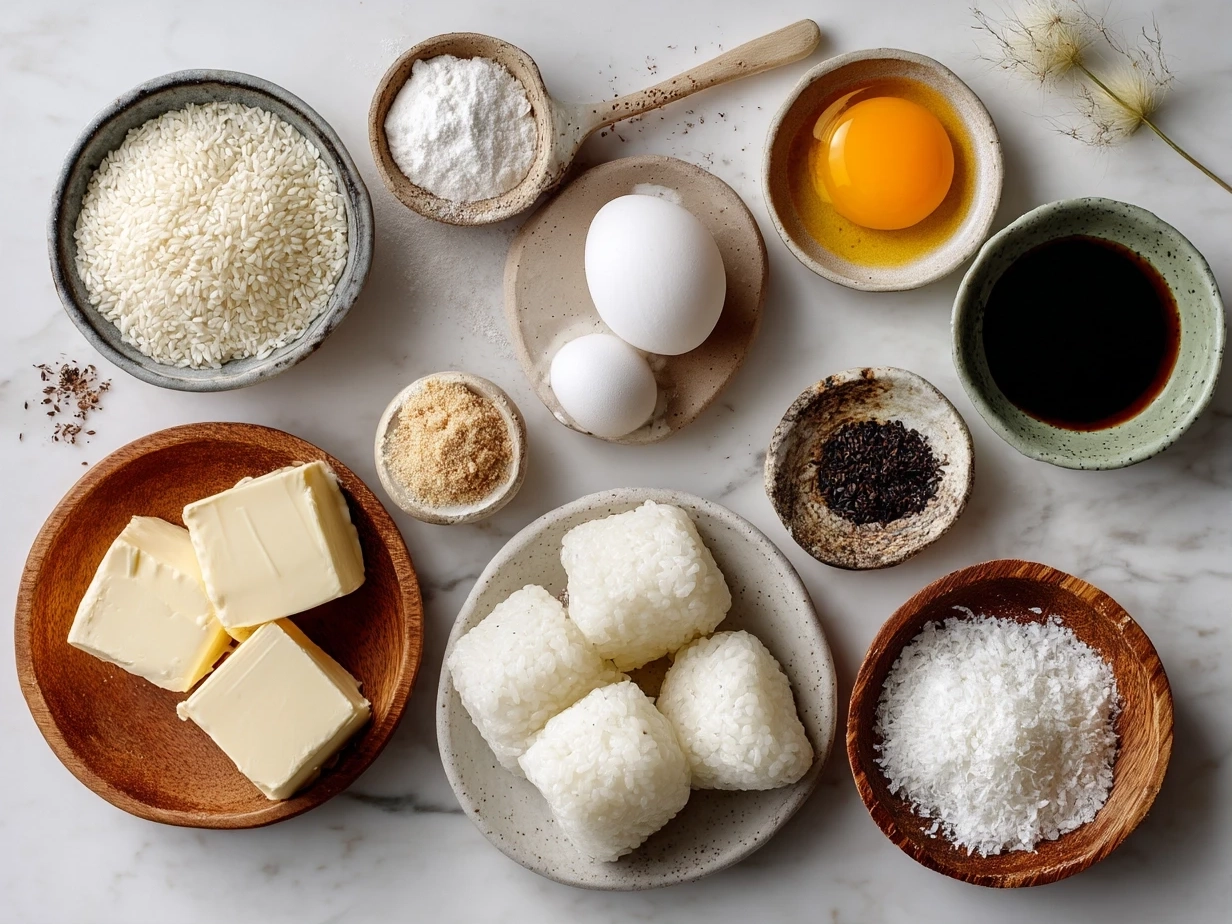
- 2 cups Japanese short-grain rice (I always pick the kind labeled “sushi rice” because its sticky texture is perfect for Easy Yaki Onigiri)
- 2 1/2 cups water (for cooking the rice)
- 1/3 cup soy sauce (the magic behind that signature soy sauce glaze)
- 1 tablespoon mirin (sweet rice wine adds a lovely caramelized touch when grilling)
- 1 teaspoon sugar (balances the saltiness just right)
- Vegetable oil or sesame oil for grilling (I prefer sesame oil for its rich aroma)
- Optional fillings: cooked salmon flakes, pickled plum (umeboshi), or even leftover grilled meat (perfect onigiri filling ideas!)
When buying ingredients for Easy Yaki Onigiri, look for Japanese short-grain rice at your local Asian market or the international aisle of the supermarket. Having this on hand means you can satisfy quick cravings anytime. As a small tip from my kitchen: I often cook extra rice earlier in the day or the night before, so when Easy Yaki Onigiri time rolls around, the rice is just right—not too dry, not too sticky.
A little kitchen wisdom I picked up is to mix the soy sauce glaze ingredients well before grilling. That way, every bite of your Easy Yaki Onigiri gets that beautiful, shiny coating. And if you’re after some ingredient savings, buying mirin and soy sauce in larger bottles from bulk stores really stretches your budget—the bottles keep well refrigerated for months.
To store leftover ingredients, like cooked rice, cover it tightly and keep it in the fridge for up to 2 days. If you want to freshen up cold rice for Easy Yaki Onigiri, sprinkle a few drops of water and microwave briefly to soften. I found this Yaki Onigiri recipe guide super insightful for ingredient ideas and kitchen shortcuts when I was perfecting my technique.
Let’s Make This Easy Yaki Onigiri Together
Alright girlfriend, it’s time to get those hands a little sticky and start crafting some tasty grilled rice balls. Don’t worry if your Easy Yaki Onigiri doesn’t come out perfect the first time—trust me, mine didn’t either. Follow my step-by-step and you’ll be serving up this warm, crispy snack in no time.
- 1. Cook your rice: Rinse the 2 cups of Japanese short-grain rice until the water runs clear, then cook with 2 1/2 cups water. In my kitchen, Easy Yaki Onigiri prep starts here and usually takes about 20 minutes for perfectly tender rice.
- 2. Shape the rice balls: When rice is cooked and still warm, scoop about a half cup into your hand. With lightly wet hands (to prevent sticking), gently press the rice into triangles or rounds, whatever you prefer. Don’t pack too tight—just enough to hold together.
- A little confession: I learned the hard way with Easy Yaki Onigiri that pressing too firmly makes the grilled rice balls dense—not as pleasant. So, a gentle but firm grip is your friend here.
- 3. Add fillings (optional): If you want to sneak in some flavor, flatten your rice ball, place a small spoonful of cooked salmon or pickled plum in the center, then cover with more rice, sealing the filling inside.
- 4. Prepare the glaze: Mix soy sauce, mirin, and sugar in a bowl to create the famous soy sauce glaze. This step is where the magic of traditional Easy Yaki Onigiri comes alive.
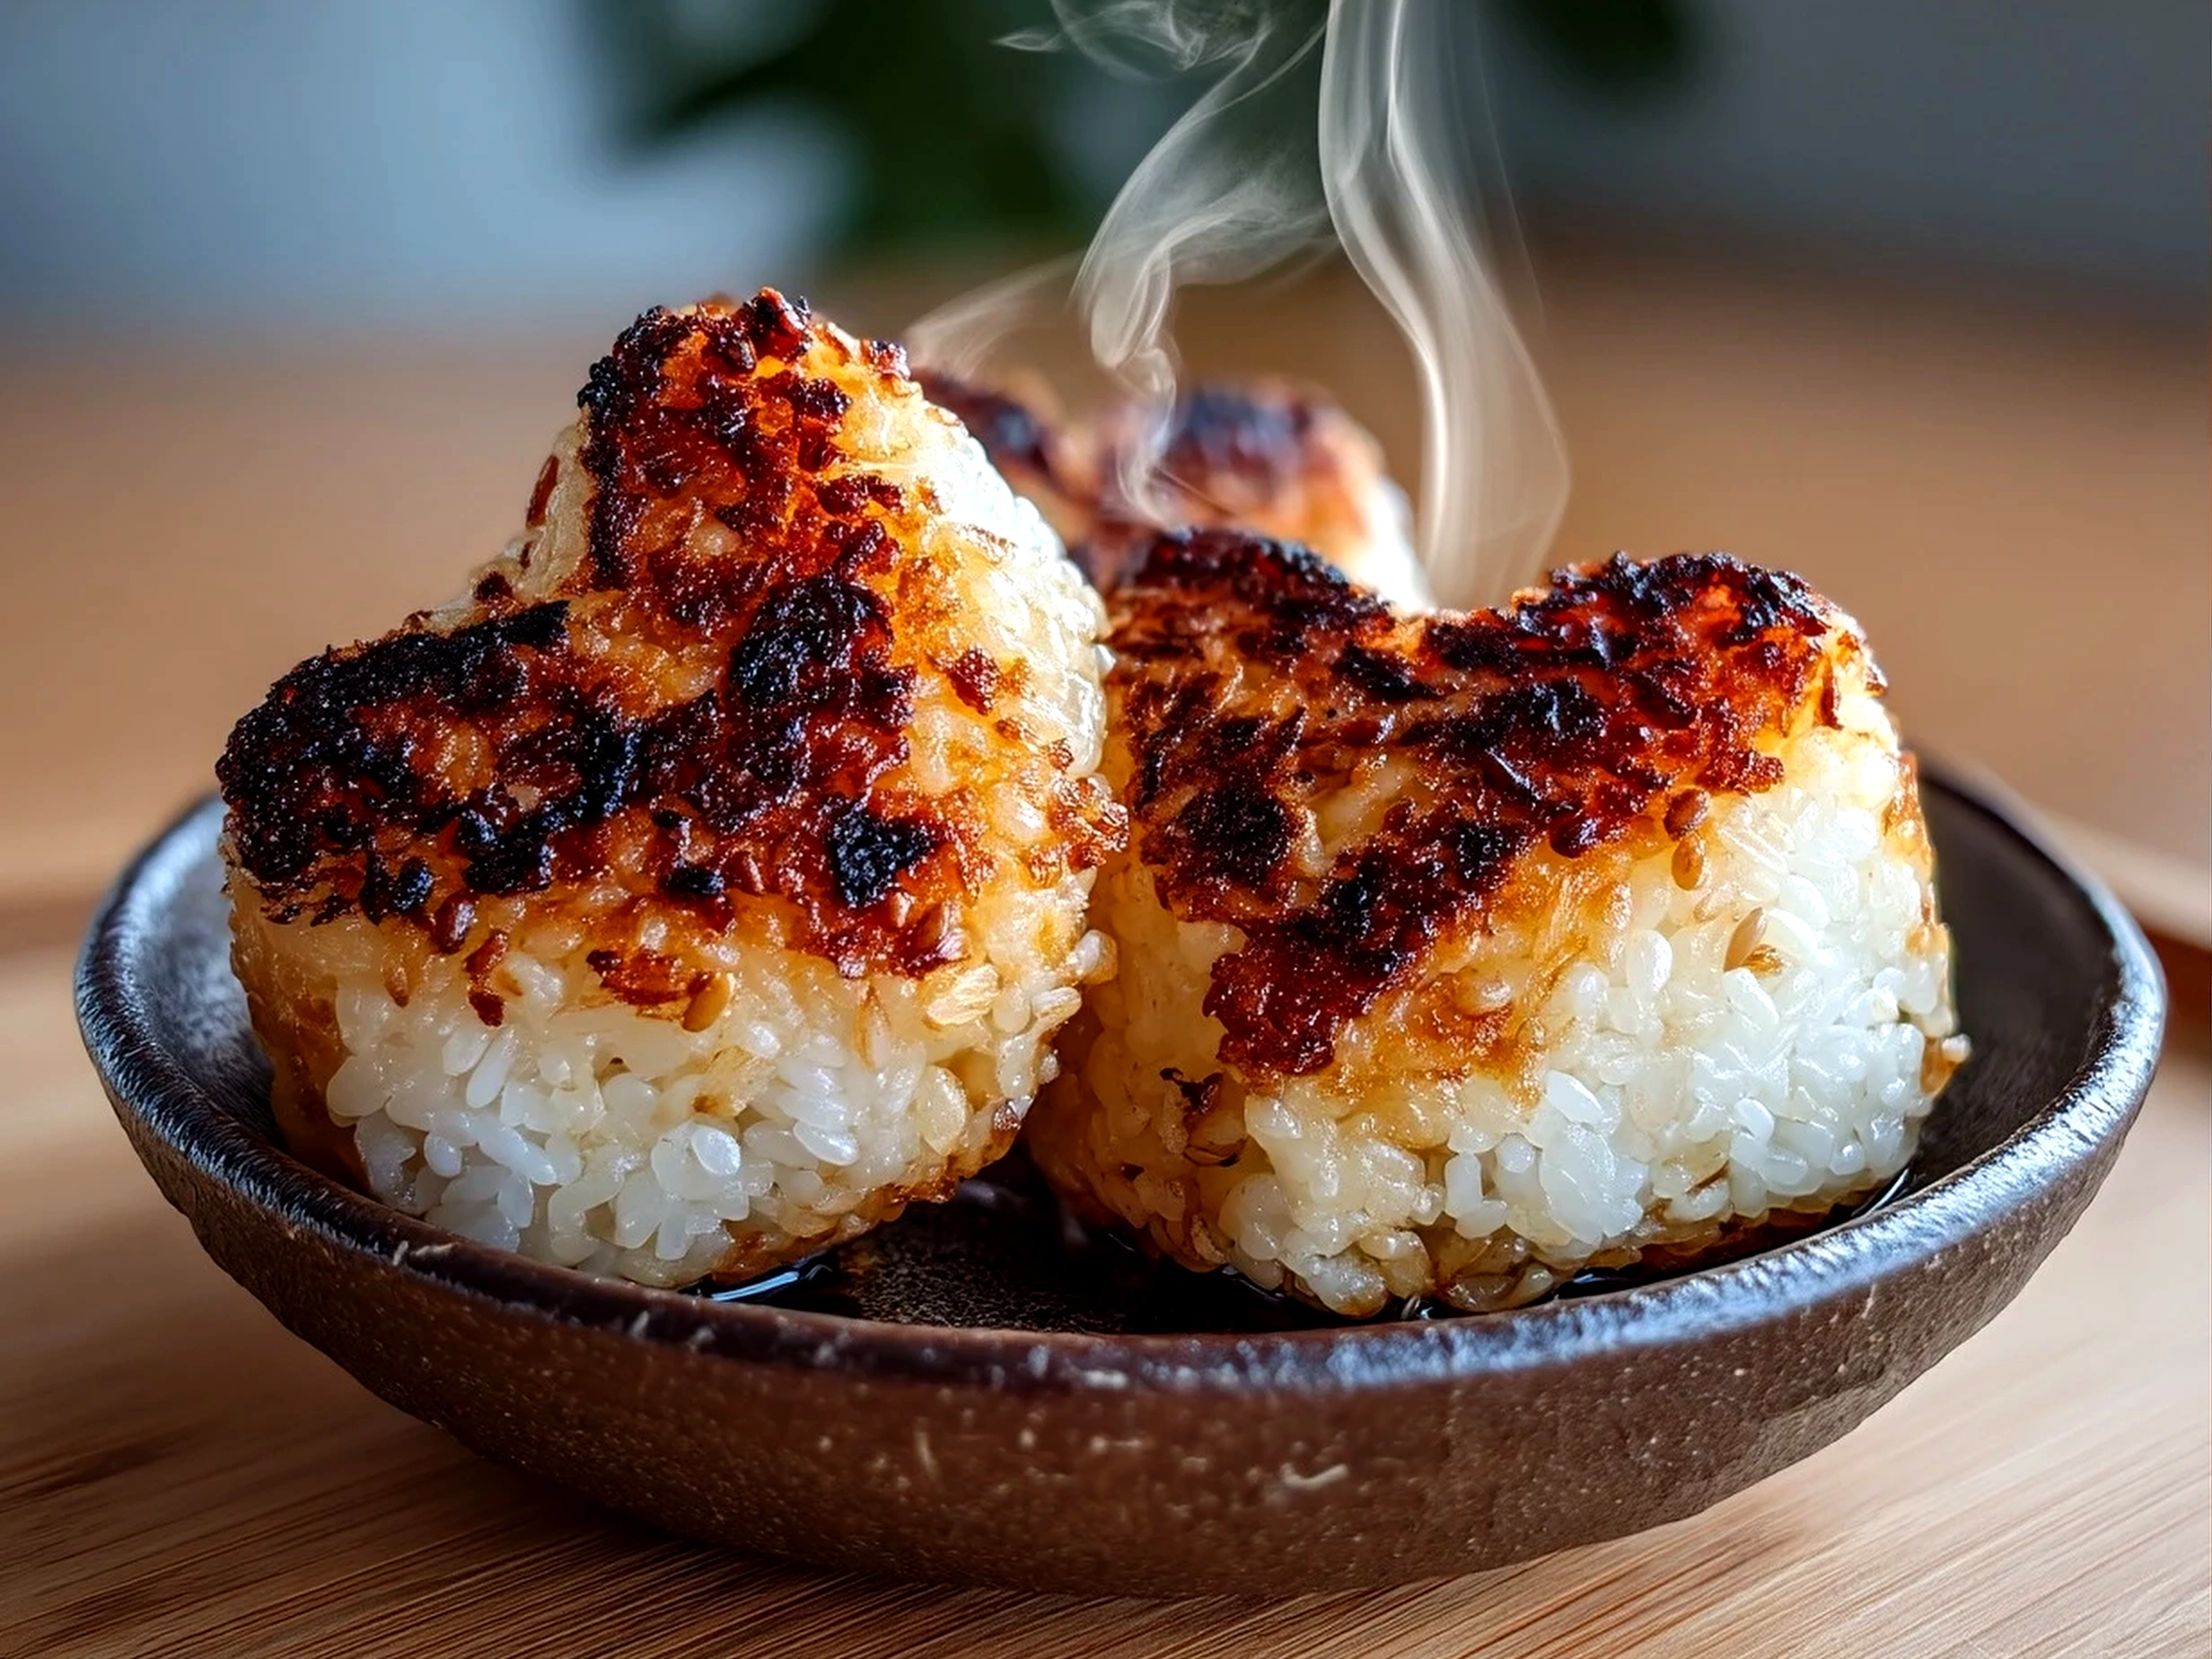
- 5. Grill the rice balls: Heat a nonstick skillet over medium heat and brush with sesame oil. Place your rice balls in the pan, grilling each side for about 3-4 minutes until golden and crispy. Then, brush the soy sauce glaze on each side and grill for another minute.
- While the Easy Yaki Onigiri is cooking, I like to tidy up the kitchen or set the table. It’s that perfect snack-moment multitasking!
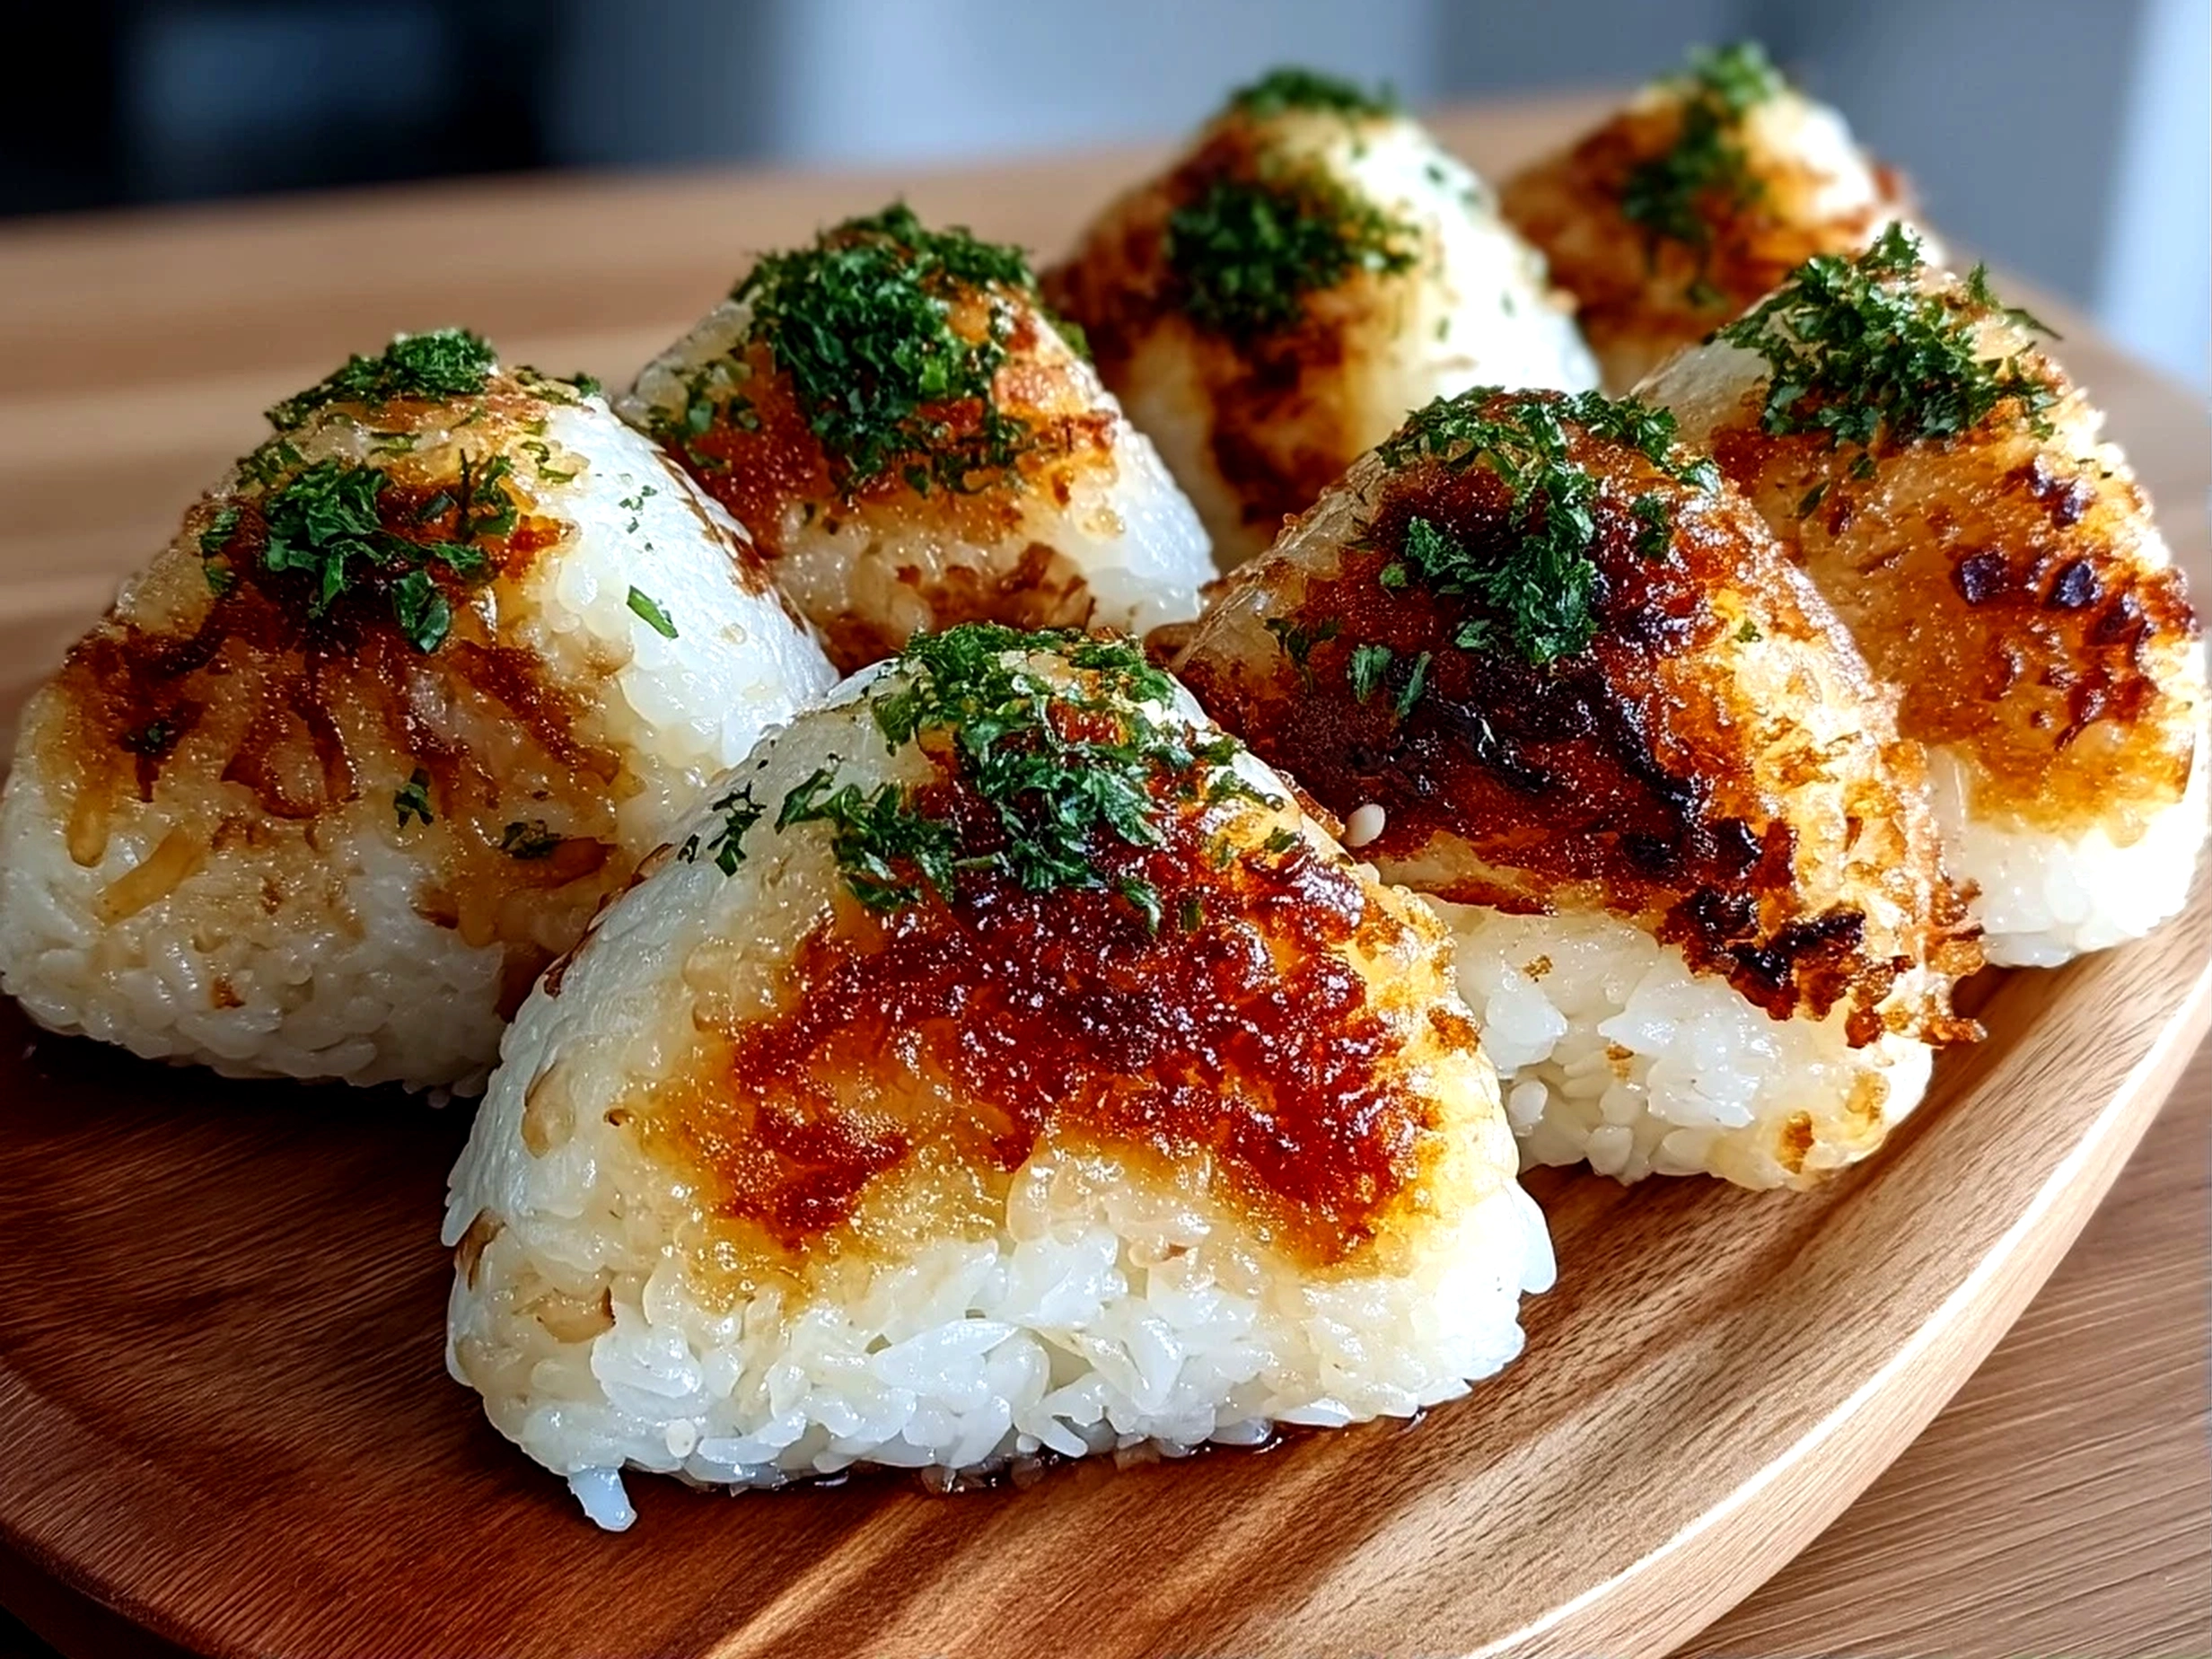
- 6. Serve hot: Your Easy Yaki Onigiri should smell irresistibly savory with just a hint of caramelized soy. The texture should be crispy outside, soft inside—a lovely contrast that keeps everyone coming back for more.
For more detailed rice ball grilling techniques and tips, I recommend checking out the insights at Okonomi Kitchen’s guide.
Remember, sometimes I double or even triple the recipe when I know the kids will be hungry later—and trust me, Easy Yaki Onigiri freeze well too for a quick reheat snack.
How I Love to Serve This Easy Yaki Onigiri
You know, my family LOVES Easy Yaki Onigiri, especially as a casual snack after school or alongside dinner. My kids have those picky phases, but these grilled rice balls are almost always a hit because you can customize them with fillings like tuna mayo or grilled chicken—the ultimate onigiri filling ideas!
We often pair Easy Yaki Onigiri with miso soup or pickles, balancing the savory richness with freshness. Sometimes, I throw together a quick cucumber salad or roasted veggies on the side, turning a simple snack into a wholesome meal.
This Easy Yaki Onigiri is perfect for quiet evenings, weekend lunches, or even picnic days. The crispy, sticky rice and the soy sauce glaze make a delightful combo that’s satisfying yet light. Presentation-wise, I like stacking them on a rustic wooden board or wrapping them individually in nori (seaweed) sheets for a beautiful touch. It reminds me of the comforting Japanese street food vibe.
If you have extra grilled rice balls, they reheat beautifully in a toaster oven or on the grill pan. Leftovers can also get diced into a stir-fry or tossed into soup for an extra kick. And trust me, when friends come over, they always ask for my Easy Yaki Onigiri recipe—it’s one of those snacks that feels both special and homey.
For pairing ideas that complement this dish, here’s a peek over at my favorite peanut butter cookie recipe that’s just as easy to make when you want a sweet follow-up: Homemade Soft Peanut Butter Cookies. A surprising but delightful combo sometimes!
Your Easy Yaki Onigiri Questions Answered
Q1: Can I use leftover rice for Easy Yaki Onigiri?
Absolutely! You want the rice to be warm and slightly sticky, so if it’s cold, sprinkle a bit of water and microwave until soft. Leftover rice is perfect for making grilled rice balls without wasting anything.
Q2: What fillings work best in Easy Yaki Onigiri?
Oh, the possibilities are endless! My favorites include salmon flakes, seasoned seaweed, umeboshi (pickled plum), or even a little cooked teriyaki chicken. Sometimes, I wrap meat around the rice for a Nikumaki onigiri version—I found a fun guide here MEAT WRAPPED RICE BALLS (Nikumaki onigiri 肉巻きおにぎり) if you want to get creative.
Q3: How do I prevent rice balls from falling apart while grilling?
A key Easy Yaki Onigiri tip is to not press the rice too hard but make sure it’s compact enough. Also, grilling over medium heat helps them hold shape without burning too fast.
Q4: Can I use a grill instead of a skillet?
Definitely! A grill adds a wonderful smoky flavor to these Japanese grilled rice balls. Just be gentle when turning them, and brush the soy sauce glaze carefully.
Q5: Are there gluten-free soy sauces for Easy Yaki Onigiri?
Yes! Tamari is a great gluten-free alternative that still delivers that rich soy sauce glaze flavor we all love.
Q6: How long does it take to make Easy Yaki Onigiri?
From start to finish, it usually takes me about 30 to 40 minutes, depending on how many rice balls I’m making. Cooking the rice is the longest part, and the grilling goes quickly and is such a fun hands-on step.
Q7: Can I refrigerate or freeze Easy Yaki Onigiri?
Yes, leftover grilled rice balls store well covered in the fridge for 1-2 days. For freezing, wrap them tightly and reheat in a toaster oven or skillet until warmed through and crispy again.
You might find this Crispy Yaki Onigiri Recipe helpful for troubleshooting and inspiration. I always encourage trying out different rice ball grilling techniques to suit your taste.
My Final Thoughts on This Easy Yaki Onigiri
Easy Yaki Onigiri holds a warm spot in my heart because it’s more than just a snack—it’s a labor of love that brings my family together. From the playful shaping to the crackling sound of the soy sauce glaze caramelizing on the grill, every step feels like creating a little memory.
My Easy Yaki Onigiri Pro Tips:
- Use freshly cooked or day-old rice for the best texture.
- Don’t over-pack the rice balls; gentle shaping preserves crispiness.
- Always brush the grill pan or skewer with oil to get that perfect golden crust.
Over time, I’ve tried Easy Yaki Onigiri with different fillings: my husband loves the classic salmon, the kids enjoy tuna mayo hides inside, and I’m all about the tangy umeboshi twist. Last winter, I added miso butter to the glaze for a rich, savory update that became an instant favorite. Making Easy Yaki Onigiri your own is part of the joy—experiment with fillings and seasonings until you find your family’s perfect bite.
If you’re excited to try making grilled rice balls, I hope this recipe brings a little warmth and simplicity to your kitchen. You might also enjoy making a batch alongside other favorites on Delilita, perhaps the either comforting Oven Baked Snow Crab Legs or these scrumptious Homemade Soft Peanut Butter Cookies for a sweet finish.
Remember, Easy Yaki Onigiri is all about ease, flavor, and sharing a moment around food. So roll up your sleeves, get that soy sauce glaze going, and enjoy these grilled rice balls with the people you love. I’m cheering you on every step of the way!
I hope you feel inspired to try your hand at Easy Yaki Onigiri soon. It’s seriously one of those recipes that feels cozy and exciting at once—the perfect Japanese snack recipe to tuck into your family’s rotation. If you try it, don’t forget to let me know all about your onigiri filling ideas and your kitchen triumphs!
Easy Yaki Onigiri
Easy Yaki Onigiri are delicious Japanese grilled rice balls with a crispy, savory soy glaze perfect as a snack or side dish.
- Prep Time: 10 minutes
- Cook Time: 10 minutes
- Total Time: 20 minutes
- Yield: 4 servings
- Category: Snack
- Method: Grilled
- Cuisine: Japanese
Ingredients
- 2 cups cooked Japanese short-grain rice
- 2 tablespoons soy sauce
- 1 tablespoon mirin
- 1 tablespoon vegetable oil or sesame oil
- Optional: toasted sesame seeds for garnish
- Optional: pickled ginger or seaweed for serving
Instructions
- Wet your hands with water and shape the cooked rice into triangular or oval rice balls.
- Heat the vegetable oil in a non-stick skillet over medium heat.
- Place the rice balls in the skillet and cook until the bottom is golden brown and crispy, about 3–4 minutes.
- Flip the rice balls carefully and cook the other side until crispy.
- Mix soy sauce and mirin in a small bowl.
- Brush the soy sauce mixture over each rice ball and cook for another 1–2 minutes, allowing the glaze to caramelize slightly.
- Remove from heat and optionally sprinkle with toasted sesame seeds.
- Serve warm with pickled ginger or seaweed if desired.
Notes
For extra flavor, try adding a small filling like miso paste or umeboshi inside the rice balls before grilling.