
Hey there, friend! Liliana here, back in my kitchen, ready to share another family favorite with you. Today, we’re diving headfirst into the wonderful world of Apple Slab Pie. Oh, the memories this dish conjures up! I can almost smell the cinnamon and sweet apples bubbling away in the oven right now.
I remember the first time I tried making an Apple Slab Pie. It was a complete disaster! The crust was too thick, the apples were undercooked, and the whole thing ended up being a soggy mess. My kids, bless their hearts, still ate it, but I knew I could do better. That’s when I started experimenting, tweaking, and perfecting until I landed on this recipe – the one I’m about to share with you. It’s become a staple at our family gatherings, potlucks, and even just a cozy Sunday afternoon treat. There’s something so comforting about a warm slice of Easy Apple Slab Pie, you know?
The aroma that fills my kitchen when this Apple Slab Pie bakes is pure magic. It’s a blend of sweet apples, warm spices, and buttery crust that just screams “fall.” And the best part? This recipe is incredibly forgiving. Even if you’re a beginner baker, you can totally nail this. I promise!
Finding the time to bake something like this, especially with a busy family, can feel impossible. But I’ve learned to sneak in little moments – prepping the apples while the kids are doing their homework, making the crust the night before, and involving the whole family in the assembly. It’s become a tradition, and it’s a wonderful way to connect and create lasting memories. I first discovered this method while trying to bake a quick Fall Dessert Recipes, it truly does help.
My cooking philosophy is simple: food should be delicious, nourishing, and made with love. And this Apple Slab Pie ticks all those boxes. It’s a simple recipe that brings so much joy, and I can’t wait for you to experience it too. So, grab your apron, preheat your oven, and let’s get baking! I promise, this Easy Apple Slab Pie will become a new family favorite.
What You’ll Need for This Apple Slab Pie
Alright, let’s gather our ingredients. Don’t worry, nothing too fancy here. Just good, wholesome ingredients that will come together to create the most delicious Apple Slab Pie.

- 6-7 medium apples (such as Honeycrisp, Granny Smith, or Gala), peeled, cored, and sliced: I always use a combination of Honeycrisp and Granny Smith for my Apple Slab Pie. The Honeycrisp adds sweetness, while the Granny Smith provides a nice tartness that balances everything out.
- 1/2 cup granulated sugar: You can adjust this to your liking, depending on how sweet you want your filling to be.
- 1/4 cup packed light brown sugar: The brown sugar adds a depth of flavor that white sugar just can’t match.
- 1/4 cup all-purpose flour: This helps to thicken the filling.
- 2 tablespoons lemon juice: The lemon juice brightens up the flavors and prevents the apples from browning.
- 2 teaspoons ground cinnamon: You can never have too much cinnamon, in my opinion!
- 1/4 teaspoon ground nutmeg: A little nutmeg adds a warm, cozy touch.
- 1/4 teaspoon ground allspice: Just a pinch of allspice elevates the flavor of the entire pie.
- 1/4 teaspoon salt: Balances the sweetness.
- 1 box (14.1 ounces) refrigerated pie crusts (2 crusts): For a quick and easy method, but feel free to use your own homemade crust recipe!
- 4 tablespoons unsalted butter, cut into small pieces: The butter adds richness and flavor to the crust.
- 1 large egg, beaten: For brushing the crust.
- 2 tablespoons milk: To mix with the egg for an egg wash.
- Coarse sugar, for sprinkling (optional): Adds a lovely sparkle and crunch.
When making Apple Slab Pie, you can usually find a good selection of apples at your local farmers market. That’s where I usually go to find the best apples for my recipes. A Apple Pie Recipe is only as good as the ingredients you use, so always go for the freshest!
Apple Slab Pie Ingredient Tips
Here’s an Apple Slab Pie trick I learned from my grandmother: after you’ve sliced your apples, toss them with the lemon juice right away to prevent them from browning. It makes a huge difference!
If you’re short on time, you can definitely use pre-made pie crusts. I won’t judge! Just make sure to let them sit at room temperature for a few minutes before unrolling them. I learned the hard way that trying to unroll a frozen pie crust results in a cracked, unusable mess. When I’m baking a Large Apple Pie, it’s important to keep it simple!
To save money, buy apples when they’re in season. They’re usually cheaper and taste better. And don’t be afraid to buy slightly bruised apples – you can always cut away the bruised parts.
Store any leftover Apple Slab Pie ingredients in airtight containers in a cool, dry place. The apples will last longer in the refrigerator, of course. Now, off we go into the baking process.
Let’s Make This Apple Slab Pie Together
Okay, my friend, let’s get our hands floury and create this masterpiece together. Don’t be scared; I’ll guide you through every step of this Easy Apple Slab Pie.
- Preheat your oven to 375°F (190°C). While the oven is heating, let’s move onto the apples.
- In a large bowl, combine the sliced apples, granulated sugar, brown sugar, flour, lemon juice, cinnamon, nutmeg, allspice, and salt. Mix well to ensure all the apples are coated in the spice mixture. Don’t worry if your Apple Slab Pie filling looks a little juicy; that’s perfectly normal.
- Lightly grease a 15×10 inch baking pan. This is important, so the pie doesn’t stick!
- Unroll one of the pie crusts and carefully place it in the prepared baking pan. Gently press the crust into the bottom and up the sides of the pan. If you are anything like me, this part can be a bit tricky.
- Pour the apple filling evenly over the crust. Distribute the apples evenly to promote even baking.
- Dot the apple filling with the butter pieces. This adds richness and flavor to the filling.
- Unroll the second pie crust and place it over the apple filling. Trim the edges of the crust and crimp them with a fork to seal. I learned the hard way with Apple Slab Pie that sealing the edges properly prevents the filling from bubbling over.
- In a small bowl, whisk together the egg and milk. Brush the egg wash evenly over the top crust. This will give the crust a beautiful golden-brown color.
- Sprinkle the crust with coarse sugar, if desired. This adds a lovely sparkle and crunch.
- Cut a few slits in the top crust to allow steam to escape. This prevents the crust from puffing up too much.
- Bake for 45-55 minutes, or until the crust is golden brown and the filling is bubbly. In my kitchen, Apple Slab Pie usually takes about 50 minutes, but oven times can vary. Keep an eye on it, and if the crust starts to brown too quickly, you can tent it with foil. If you want more tips on how to get the perfect crust, check out this Apple Slab Pie tutorial.
- Let the pie cool completely before slicing and serving. I know, it’s tempting to dig in right away, but trust me, it’s worth the wait. The filling will set up as it cools, making it easier to slice.
While the Apple Slab Pie is cooking, I usually clean up the kitchen or start preparing the side dishes. It’s a great way to make the most of my time.
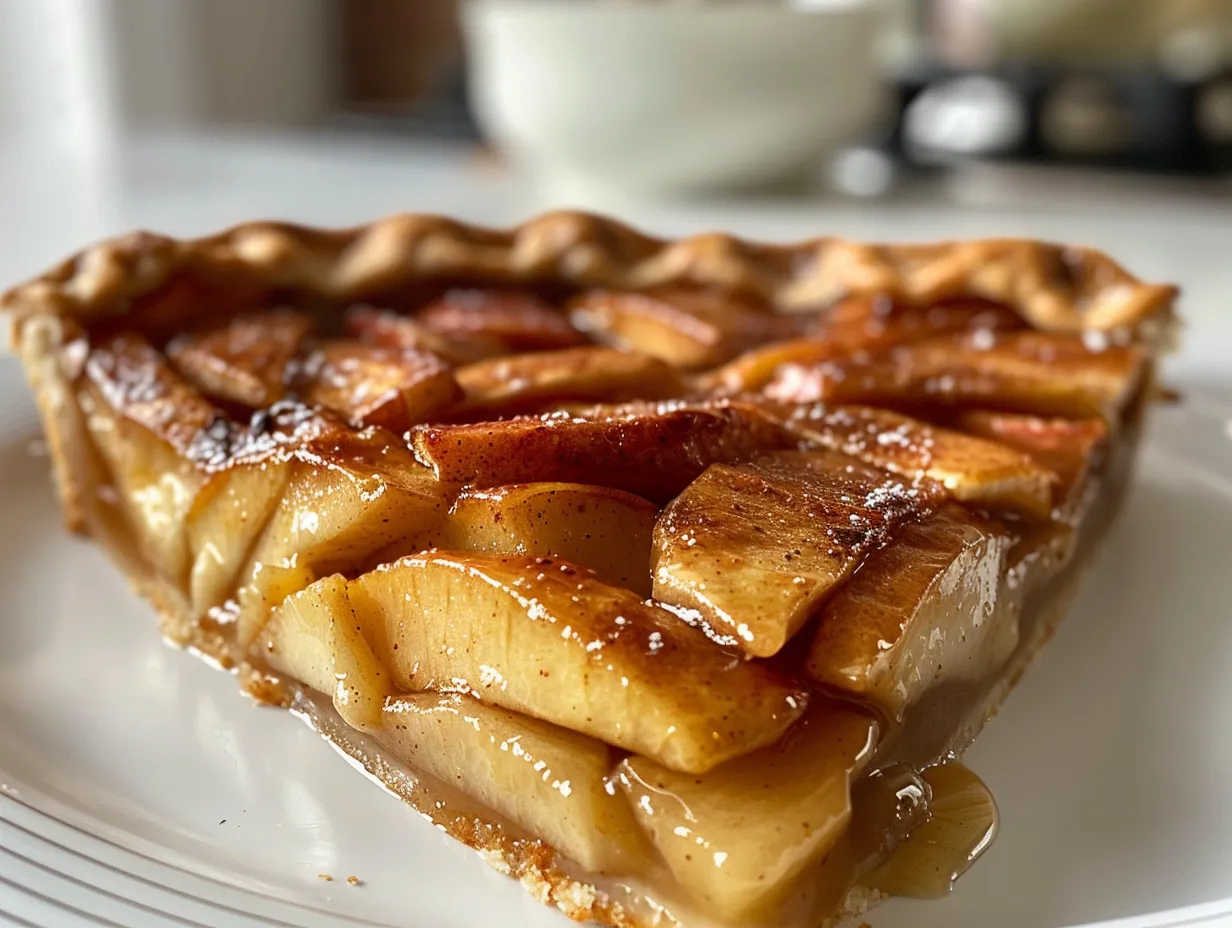
Your Apple Slab Pie should smell like a combination of sweet apples, warm spices, and buttery crust. It’s a truly irresistible aroma! Don’t be afraid to peek through the oven window and admire your creation.
A family-tested Apple Slab Pie shortcut is to use a pizza cutter to slice the cooled pie into even squares. It’s so much easier than trying to cut it with a knife! Now you can slice and share this beautiful Apple Slab Pie.
How I Love to Serve This Apple Slab Pie
Oh, how I love serving this Apple Slab Pie! It’s more than just a dessert; it’s an experience. And a tasty Fall Dessert Recipes addition!
My family loves this Apple Slab Pie when I serve it warm with a scoop of vanilla ice cream. The cold ice cream melting over the warm pie is just heavenly. Or if you are feeling fancy, a dollop of whipped cream works wonders too!
My go-to side dishes that pair with this Apple Slab Pie are a simple green salad or a cheese board. The salad provides a refreshing contrast to the sweetness of the pie, while the cheese board adds a savory element that complements the apples and spices.
This Apple Slab Pie is perfect for Thanksgiving, Christmas, potlucks, or any occasion that calls for a comforting and delicious dessert. It’s also great for bake sales and school events, as it’s easy to slice and serve.
For presentation, I like to dust the Apple Slab Pie with powdered sugar or drizzle it with caramel sauce. You can also garnish it with fresh apple slices or a sprig of mint.
If you have extra Apple Slab Pie, store it in an airtight container in the refrigerator. It will keep for up to 3 days. You can reheat it in the oven or microwave, or enjoy it cold straight from the fridge. My kids actually like to eat this Large Apple Pie cold the next day!
I’ve tried a few seasonal Apple Slab Pie variations. In the fall, I like to add a sprinkle of chopped pecans or walnuts to the filling. In the winter, I like to add a splash of bourbon or rum to the filling for an extra touch of warmth. And for another festive Apple Slab Pie treat try this recipe for Apple Cider Sangria
Friends always ask for this Apple Slab Pie recipe when I bring it to potlucks or parties. It’s always a crowd-pleaser, and I’m always happy to share it. After all, good food is meant to be shared! If you want even more pie inspiration, check out this Apple Slab Pie with Maple Icing – Sally’s Baking recipe.
Your Apple Slab Pie Questions Answered
Okay, let’s tackle some of the most common questions I get about making this Apple Slab Pie. I’ve been there, made the mistakes, and learned from them, so hopefully, my experiences can help you avoid some common pitfalls.
- “My Apple Slab Pie crust is always soggy. What am I doing wrong?”
You know what I do when my Apple Slab Pie crust is soggy? I blind-bake the bottom crust for about 10 minutes before adding the filling. This helps to crisp it up and prevent it from getting soggy. You can also brush the bottom crust with egg white before adding the filling to create a barrier against the moisture.
- “My Apple Slab Pie filling is too runny. How can I thicken it?”
If your filling is too runny, try adding a tablespoon or two of cornstarch or tapioca starch to the filling mixture. This will help to absorb some of the excess liquid. You can also reduce the amount of liquid in the recipe by using drier apples or cooking the filling on the stovetop for a few minutes before adding it to the crust.
- “Can I use different types of apples for this Apple Slab Pie?”
Absolutely! I encourage you to experiment with different types of apples to find your favorite combination. Some good options include Honeycrisp, Granny Smith, Gala, Fuji, and Braeburn. Just make sure to use a mix of sweet and tart apples for the best flavor. The most important part of baking is making adjustments to make it your own!
- “Can I make this Apple Slab Pie ahead of time?”
Yes, you can definitely make this Apple Slab Pie ahead of time. Simply bake it as directed, let it cool completely, and then cover it tightly with plastic wrap and refrigerate it for up to 2 days. You can reheat it in the oven or microwave before serving, or enjoy it cold.
- “My Apple Slab Pie crust is browning too quickly. What should I do?”
If your crust is browning too quickly, you can tent it with foil. Simply loosely cover the pie with a sheet of aluminum foil to protect the crust from the heat.
- “Can I freeze this Apple Slab Pie?”
Yes, you can freeze this Apple Slab Pie. Bake it as directed, let it cool completely, and then wrap it tightly in plastic wrap and aluminum foil. Freeze for up to 3 months. Thaw in the refrigerator overnight before reheating. It’s a great way to save a delicious Fall Dessert Recipes for later.
- “Can I make this into smaller pies?”
Of course! If you don’t want to bake one large slab pie, you can easily divide the filling and crust between smaller pie dishes. Just adjust the baking time accordingly. This is a great way to make individual desserts for a party or gathering.
One time, I accidentally used salted butter instead of unsalted butter in the crust. The pie was still delicious, but it had a slightly salty flavor that wasn’t quite right. I learned my lesson: always double-check your ingredients! One time while testing out the Slab Pie Recipe, I even almost forgot to add the apples!
My Final Thoughts on This Apple Slab Pie
Well, friend, we’ve reached the end of our baking adventure. I hope you’re feeling confident and excited to try this Apple Slab Pie recipe. It truly is a special one for me, filled with memories and love.
This Apple Slab Pie recipe holds a special place in my heart because it reminds me of family gatherings, cozy fall days, and the simple joy of sharing good food with loved ones. It’s a recipe that’s been passed down through generations, and I’m so happy to be sharing it with you.
My Apple Slab Pie Pro Tips:
- Use a mix of apple varieties for the best flavor.
- Don’t overfill the crust, or the filling will bubble over.
- Let the pie cool completely before slicing and serving for cleaner cuts.
I’ve tried a few variations of this Apple Slab Pie over the years. One time, I added a layer of caramel to the bottom of the crust before adding the apple filling. It was incredibly decadent and delicious! Another time, I added a sprinkle of chopped walnuts and a drizzle of maple syrup to the top of the crust. It was a perfect fall treat. And of course, my kids enjoy the regular Large Apple Pie most.
My son, loves the classic version with vanilla ice cream, while my daughter prefers it with a dollop of whipped cream and a sprinkle of cinnamon. The great thing about this recipe is that it’s so versatile. You can easily customize it to suit your own tastes and preferences.
I encourage you to make this Apple Slab Pie your own. Don’t be afraid to experiment with different flavors, toppings, and crust designs. The most important thing is to have fun and enjoy the process. For example, I tried a Caramel Apple Cheesecake Dip that my children and family really enjoyed!
I hope that your Apple Slab Pie cooking experience is filled with joy, laughter, and delicious smells. And most of all, I hope that it brings you closer to your loved ones. You can even make Caramel Apple Slices with Chocolate Drizzle for the kids while waiting for the Apple Slab Pie.
So, go ahead, grab your ingredients, preheat your oven, and get ready to bake the most delicious Apple Slab Pie you’ve ever tasted. I have no doubt that you’ll create a masterpiece that your family and friends will rave about for years to come. I have had many people ask about the apple slab pie – smitten kitchen offers similar tips!
Happy baking!
Apple Slab Pie
This Apple Slab Pie is the perfect dessert for a crowd. It features a flaky crust and a delicious apple filling spiced with cinnamon and nutmeg.
- Prep Time: 20 minutes
- Cook Time: 50 minutes
- Total Time: 70 minutes
- Yield: 12 servings
- Category: Dessert
- Method: Baked
- Cuisine: American
Ingredients
- 2 boxes (14.1 ounces each) refrigerated pie crusts
- 8 medium apples, peeled, cored, and sliced
- 3/4 cup granulated sugar
- 1/4 cup all-purpose flour
- 2 tablespoons lemon juice
- 2 teaspoons ground cinnamon
- 1/4 teaspoon ground nutmeg
- 1/4 cup butter, cut into small pieces
- 1 large egg, beaten
- 2 tablespoons coarse sugar, for sprinkling
Instructions
- Preheat oven to 375°F (190°C).
- Line a 15x10x1 inch baking pan with parchment paper.
- Unroll one pie crust and place it in the prepared pan, pressing it into the bottom and up the sides.
- In a large bowl, combine apple slices, granulated sugar, flour, lemon juice, cinnamon, and nutmeg. Toss to coat.
- Pour the apple mixture into the crust-lined pan.
- Dot the top of the apple filling with butter pieces.
- Unroll the second pie crust and cut into strips. Arrange the strips in a lattice pattern over the apple filling.
- Brush the lattice crust with beaten egg and sprinkle with coarse sugar.
- Bake for 45-50 minutes, or until the crust is golden brown and the filling is bubbly.
- Let cool completely before cutting into squares and serving.
Notes
Serve warm with a scoop of vanilla ice cream or a dollop of whipped cream for an extra special treat.