
It’s so great to have you here in my kitchen today! The sun is shining, the birds are singing, and the aroma of… well, not quite yet, but soon it will be the most amazing, sweet, and fruity Strawberry Pie! I’m so excited to share this recipe with you, because it’s a true family favorite.
I have to confess, my first attempt at making Strawberry Pie was a disaster. I overcooked the filling, and the crust was… let’s just say it was more hockey puck than flaky perfection. But I’m stubborn (my husband calls it ‘determined’!), and I refused to be defeated by a simple pie. After several tries (and a few tears!), I finally cracked the code. And now, this Strawberry Pie is one that my kids beg me to make all summer long.
This recipe is perfect for those busy weeknights when you want something special but don’t have a ton of time. It’s also fantastic for picnics, potlucks, or any occasion where you want to impress with a show-stopping dessert. Plus, it’s so much easier than you think! We can even whip up a batch of this fresh Strawberry Pie while the little ones are taking a nap!
You know me, I’m all about simple, delicious food that brings people together. This Strawberry Pie recipe embodies that philosophy perfectly. It’s a dish that’s meant to be shared and enjoyed with the people you love. From my kitchen to yours, let’s get baking.
So, grab your apron, and let’s get started! I promise, you’ll be so glad you did.
***
What You’ll Need for This Strawberry Pie
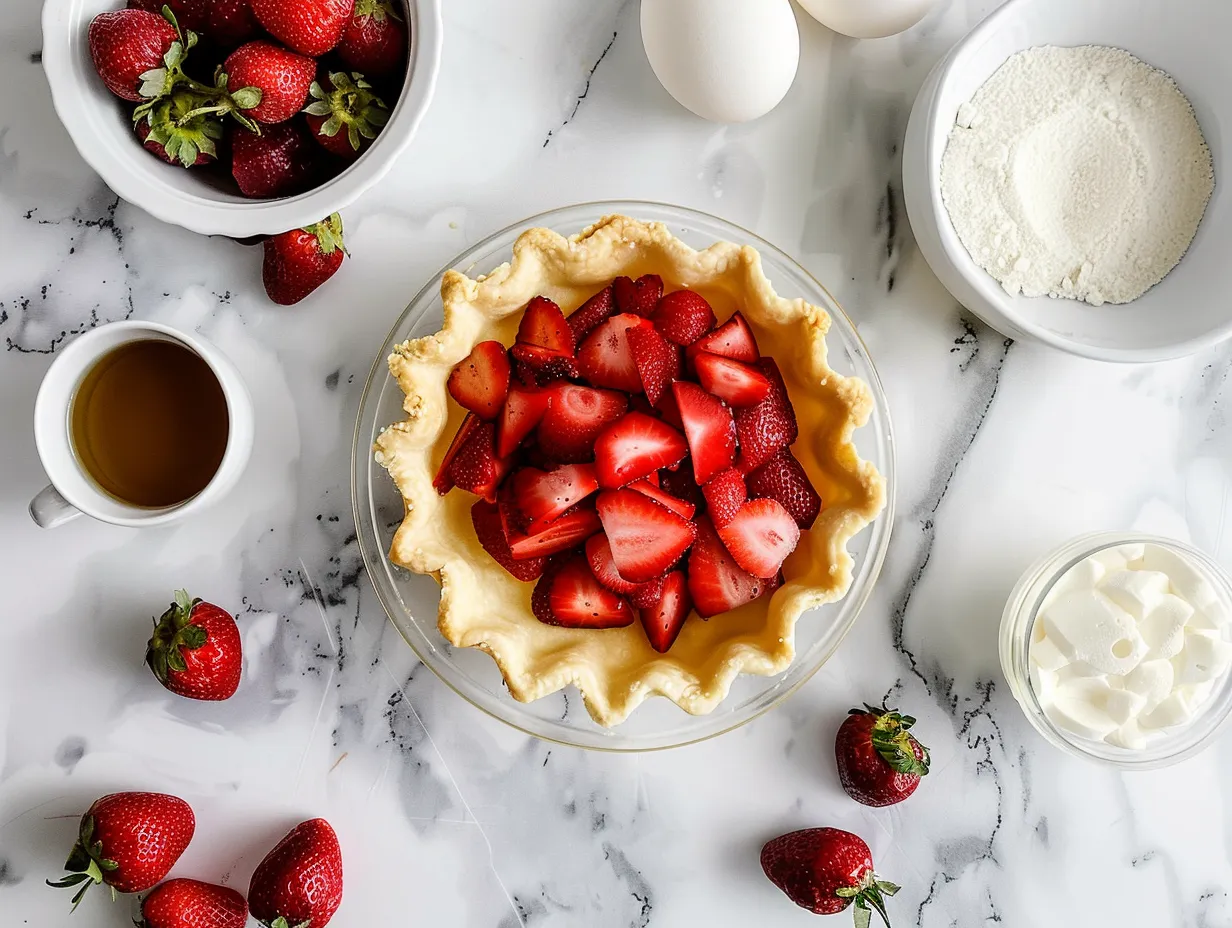
Okay, let’s gather our ingredients! I always find it so much easier when everything is prepped and ready to go. This Strawberry Pie is pretty straightforward.
Here’s what you’ll need:
- 1 pre-made pie crust (or homemade, if you’re feeling ambitious!): I usually opt for the store-bought kind to save time, especially during the week.
- 4 cups fresh strawberries, hulled and sliced: Of course, the better the strawberries, the better the Strawberry Pie.
- ¾ cup granulated sugar: You can adjust this to your liking, depending on how sweet your strawberries are.
- ¼ cup cornstarch: This is what thickens our filling.
- ½ cup water: Just plain old water.
- 2 tablespoons lemon juice: This brightens up the flavor and prevents the strawberries from getting too mushy. I always use fresh lemon juice for my Strawberry Pie, it makes all the difference.
- 1 tablespoon butter: Adds a little richness to the filling.
- Optional: Whipped cream or vanilla ice cream, for serving: Because everything is better with whipped cream, right?
Shopping tip: When making Strawberry Pie, you can often find really good deals on strawberries at your local farmer’s market, especially during peak season.
Here’s a Strawberry Pie trick I learned: If your strawberries are particularly juicy, you might want to add an extra tablespoon of cornstarch to the filling.
And for a cost-saving tip, if strawberries are out of season, frozen strawberries can work in a pinch for this Strawberry Pie. Just make sure to thaw them completely and drain off any excess liquid before using.
Finally, you can store any leftover ingredients – like unused strawberries or lemon juice – in airtight containers in the refrigerator.
Alright, now that we have all our ingredients, let’s get to the fun part!
***
Let’s Make This Strawberry Pie Together
Alright, friend, let’s get down to business and whip up this amazing Strawberry Pie. Don’t worry, I’ll be with you every step of the way!
- Prepare the Pie Crust: If you’re using a store-bought crust, take it out of the refrigerator and let it sit at room temperature for about 15 minutes. If you’re making your own, pat yourself on the back and get it fitted into your pie plate.
- Preheat the Oven (if baking crust): If you’re pre-baking your pie crust, preheat your oven to 375°F (190°C). Prick the bottom of the crust with a fork to prevent it from puffing up. You can use pie weights or dried beans to weigh it down. Bake for 12-15 minutes, or until lightly golden brown. Let it cool completely before adding the filling. I learned the hard way with Strawberry Pie that a soggy crust is a no-go!
- Prepare the Strawberry Filling: In a large saucepan, combine the sugar and cornstarch. Whisk them together until there are no lumps. I like to do this before adding the wet ingredients to ensure everything mixes evenly.
- Add Water and Lemon Juice: Gradually whisk in the water and lemon juice until the mixture is smooth.
- Cook the Filling: Place the saucepan over medium heat and cook, stirring constantly, until the mixture comes to a boil and thickens. This usually takes about 5-7 minutes. Don’t worry if your Strawberry Pie filling seems a little thin at first, it will thicken as it cooks.
- Add Butter: Remove the saucepan from the heat and stir in the butter until it’s melted and incorporated.
- Gently Fold in Strawberries: Gently fold in the sliced strawberries. Be careful not to mash them! We want to keep them as intact as possible for that beautiful Strawberry Pie presentation.
- Pour into Crust: Pour the strawberry filling into the prepared pie crust.
- Chill: Cover the pie with plastic wrap and refrigerate for at least 3 hours, or preferably overnight, to allow the filling to set completely. In my kitchen, Strawberry Pie usually takes closer to 4 hours to fully set, but it’s worth the wait!
- Serve and Enjoy: Once the pie is chilled, remove it from the refrigerator and slice. Serve with a dollop of whipped cream or a scoop of vanilla ice cream, if desired.
While the Strawberry Pie is chilling, I usually tidy up the kitchen and maybe sneak in a quick cup of coffee. Treat yourself, you deserve it!
Your Strawberry Pie should smell like sweet strawberries and a hint of lemon. And it should look absolutely beautiful! This easy strawberry pie recipe never fails to wow.
And for a family-tested Strawberry Pie shortcut, if you’re really short on time, you can skip the pre-baking step and use a graham cracker crust instead. It’s a delicious and easy alternative!
***
How I Love to Serve This Strawberry Pie
Okay, so the Strawberry Pie is ready, and now it’s time to think about how to serve it! This is where you can really get creative and make it your own.
My family loves this Strawberry Pie when I serve it with a big dollop of homemade whipped cream. There’s just something about the creamy, sweet whipped cream that perfectly complements the tartness of the strawberries.
For side dishes, I often pair this Strawberry Pie with a light and refreshing fruit salad. It’s a great way to add even more fruit to the meal and keep things feeling light and summery. I also sometimes serve it with a scoop of vanilla ice cream. The warm pie and cold ice cream is a classic combination that everyone loves.
This Strawberry Pie is perfect for so many occasions. It’s fantastic for summer barbecues, picnics, or even just a simple weeknight dessert. It’s also a great option for potlucks, because it’s always a crowd-pleaser.
When it comes to presentation, I like to keep it simple. I usually just slice the pie and arrange the slices on a pretty plate. Then, I add a dollop of whipped cream or a scoop of ice cream to each slice. Sometimes, I’ll sprinkle a few fresh strawberry slices on top for an extra touch of elegance.
If you have extra Strawberry Pie, you can store it in the refrigerator for up to 3 days. Just make sure to cover it tightly with plastic wrap or place it in an airtight container to prevent it from drying out.
I also love to experiment with seasonal variations. In the fall, I sometimes add a sprinkle of cinnamon to the filling for a warm, cozy twist. And in the winter, I’ve even tried adding a little bit of balsamic vinegar to the strawberries for a more complex flavor.
Friends always ask for this Strawberry Pie recipe when I make it, and it’s so rewarding to share something that brings so much joy to others! I think it is also a great no bake strawberry pie recipe if you buy a pre made crust and chill!
***
Your Strawberry Pie Questions Answered
I know you probably have some questions about making Strawberry Pie, so I’ve compiled a list of some of the most common ones I get asked. Don’t worry, I’ve been there, and I’m happy to share my wisdom!
Q: My Strawberry Pie filling is too runny. What did I do wrong?
A: Don’t worry, we’ve all been there! The most common reason for a runny filling is not using enough cornstarch or not cooking the filling long enough. Make sure you’re using the correct amount of cornstarch (¼ cup) and that you’re cooking the filling until it comes to a boil and thickens. Also, sometimes strawberries release a lot of juice. In that case, you can add an extra tablespoon of cornstarch to the filling. You know what I do when my Strawberry Pie filling seems too runny? I just pop it back on the stove for a few more minutes and let it thicken up a bit more.
Q: Can I use frozen strawberries instead of fresh?
A: Yes, you can! But keep in mind that frozen strawberries tend to release more water than fresh strawberries, so you may need to adjust the amount of cornstarch accordingly. Make sure to thaw them completely and drain off any excess liquid before using.
Q: Can I make this pie ahead of time?
A: Absolutely! In fact, I highly recommend making this pie ahead of time. It needs at least 3 hours to chill in the refrigerator, but it’s even better if you can let it chill overnight. This allows the filling to set completely and the flavors to meld together.
Q: My pie crust is soggy. How can I prevent this?
A: Soggy pie crust is the bane of every baker’s existence! To prevent a soggy crust, make sure you pre-bake it before adding the filling. Prick the bottom of the crust with a fork to prevent it from puffing up, and use pie weights or dried beans to weigh it down. You can also brush the bottom of the crust with a layer of melted chocolate or egg wash before adding the filling to create a barrier against the moisture.
Q: Can I add other fruits to this pie?
A: Absolutely! Feel free to get creative and add other fruits to this pie. Blueberries, raspberries, or even peaches would be delicious additions. Just make sure to adjust the amount of sugar and cornstarch accordingly. I’ve had blog readers tell me they have tried this Strawberry Pie with peaches.
Q: How long will this pie last in the refrigerator?
A: This pie will last for up to 3 days in the refrigerator. Just make sure to cover it tightly with plastic wrap or place it in an airtight container to prevent it from drying out.
Q: Can I freeze this pie?
A: I don’t recommend freezing this pie, as the filling can become watery when thawed.
***
My Final Thoughts on This Strawberry Pie
Well, there you have it! My go-to Strawberry Pie recipe. I truly hope you give this recipe a try. It’s a special recipe for me because it reminds me of all the wonderful summers spent with my family. It’s a taste of sunshine and happiness in every bite.
Remember, cooking is all about experimentation and having fun! Don’t be afraid to get creative and put your own spin on this recipe. Add a sprinkle of cinnamon, a dash of vanilla extract, or even a handful of chopped nuts. The possibilities are endless! If you are looking for a homemade strawberry pie this is the perfect recipe!
Here are a few of my Strawberry Pie Pro Tips:
- Use the freshest strawberries you can find: This will make a huge difference in the flavor of the pie.
- Don’t overcook the filling: Overcooking the filling can result in a tough, rubbery texture.
- Let the pie chill completely: This is essential for the filling to set properly.
I also wanted to share a few Strawberry Pie variations I’ve tried over the years:
- Strawberry Rhubarb Pie: Add a cup or two of diced rhubarb to the filling for a tart and tangy twist. My husband absolutely loves this version!
- Chocolate Strawberry Pie: Add a layer of melted chocolate to the bottom of the pie crust before adding the strawberry filling. My kids go crazy for this one!
- Strawberry Pretzel Pie: Use a pretzel crust instead of a traditional pie crust for a salty and sweet combination. My girlfriends always rave about this version!
I hope you’ll try to make this Strawberry Pie your own. Please, don’t hesitate to reach out if you have any questions. I’m always here to help!
Happy baking, my friend! I just know that you can bake a delicious fresh strawberry pie!
And, if you want another strawberry treat, why not give my Strawberry Shortcake Cake Recipe a try!
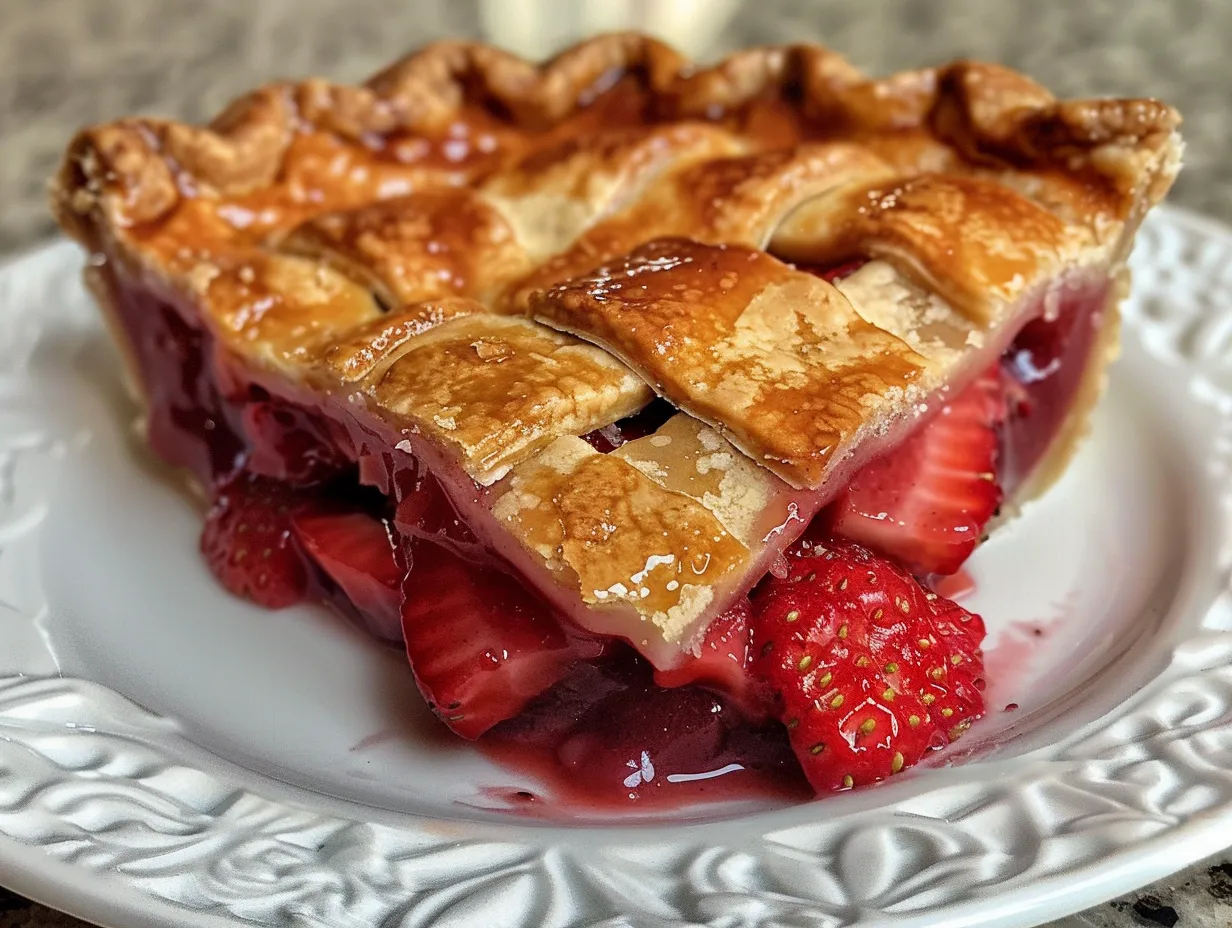
Strawberry Pie

This classic Strawberry Pie is bursting with fresh strawberry flavor in a flaky, buttery crust. A perfect dessert for summer gatherings and guaranteed to be a crowd-pleaser!
- Prep Time: 20 minutes
- Cook Time: 50 minutes
- Total Time: 70 minutes
- Yield: 8 servings
- Category: Dessert
- Method: Baked
- Cuisine: American
Ingredients
- 1 pre-made pie crust
- 6 cups fresh strawberries, hulled and sliced
- ¾ cup granulated sugar
- ¼ cup cornstarch
- ¼ cup water
- 2 tablespoons lemon juice
- 2 tablespoons butter, cut into small pieces
- Optional: Whipped cream, for serving
Instructions
- Preheat oven to 375°F (190°C).
- Place pie crust in a 9-inch pie plate.
- In a large bowl, gently toss the sliced strawberries with sugar.
- In a small bowl, whisk together cornstarch and water until smooth.
- Pour the cornstarch mixture over the strawberries and toss to coat.
- Add the lemon juice and butter to the strawberry mixture.
- Pour the strawberry filling into the prepared pie crust.
- Bake for 45-50 minutes, or until the crust is golden brown and the filling is bubbly. If the crust browns too quickly, cover the edges with foil.
- Let the pie cool completely before slicing and serving.
- Optional: Serve with whipped cream.
Notes
For a richer flavor, use a homemade pie crust. You can also add a glaze to the top of the pie after it has cooled.