
Okay, gather ’round, friends! Let’s chat about something near and dear to my heart (and my sweet tooth!): Halloween Oreo Bark. Just saying the name makes me smile. It’s funny, you know, I wasn’t always a dessert person. I used to think baking was too precise, too fussy. Give me a savory dish any day!
But then, Halloween rolled around one year, and my kids were begging for something fun and festive. I stumbled upon a basic Oreo bark recipe and thought, “Okay, I can handle melting chocolate and smashing cookies.”
The first time I made Halloween Oreo Bark, it was…a disaster! The chocolate seized, the Oreos were pulverized, and the sprinkles looked like a toddler had attacked the kitchen. I almost gave up, but my kids were watching, their faces full of hopeful anticipation.
So, I took a deep breath, threw out the seized chocolate, and started again. This time, I melted the chocolate slowly, stirred gently, and let my kids help with the Oreos and sprinkles. It wasn’t perfect, but it was ours.
Now, Halloween Oreo Bark is a family tradition. Every October, we gather in the kitchen, put on some spooky tunes, and create a batch (or two!) of this magical treat. It’s so incredibly easy to make, and the variations are endless. Plus, it’s a no-bake dessert, which is a huge win in my book, especially when I’m juggling school events, costume preparations, and all the other craziness that comes with Halloween.
I even started experimenting with different chocolates, like I recently tried a batch using dark chocolate for a more sophisticated flavor, but my kids always prefer the classic white chocolate. If you want to try a more sophisticated version, perhaps try my Parmesan Mushroom Chicken Soup for dinner!
Halloween Oreo Bark has truly become a symbol of our family’s Halloween spirit. The kids even remember the first time we made it, and how it was “the ugliest but yummiest thing ever!” I still laugh about that. It’s so much more than just a recipe; it’s a memory maker.
Trust me, if I can make this Halloween Oreo Bark, you can too. Don’t be intimidated! Embrace the imperfections, have fun with it, and let your creativity shine. I’m here to guide you every step of the way. Let’s get started!
What You’ll Need for This Halloween Oreo Bark
Alright, let’s talk ingredients. This Halloween Oreo Bark is all about simplicity, so you don’t need anything fancy. Here’s what you’ll need:
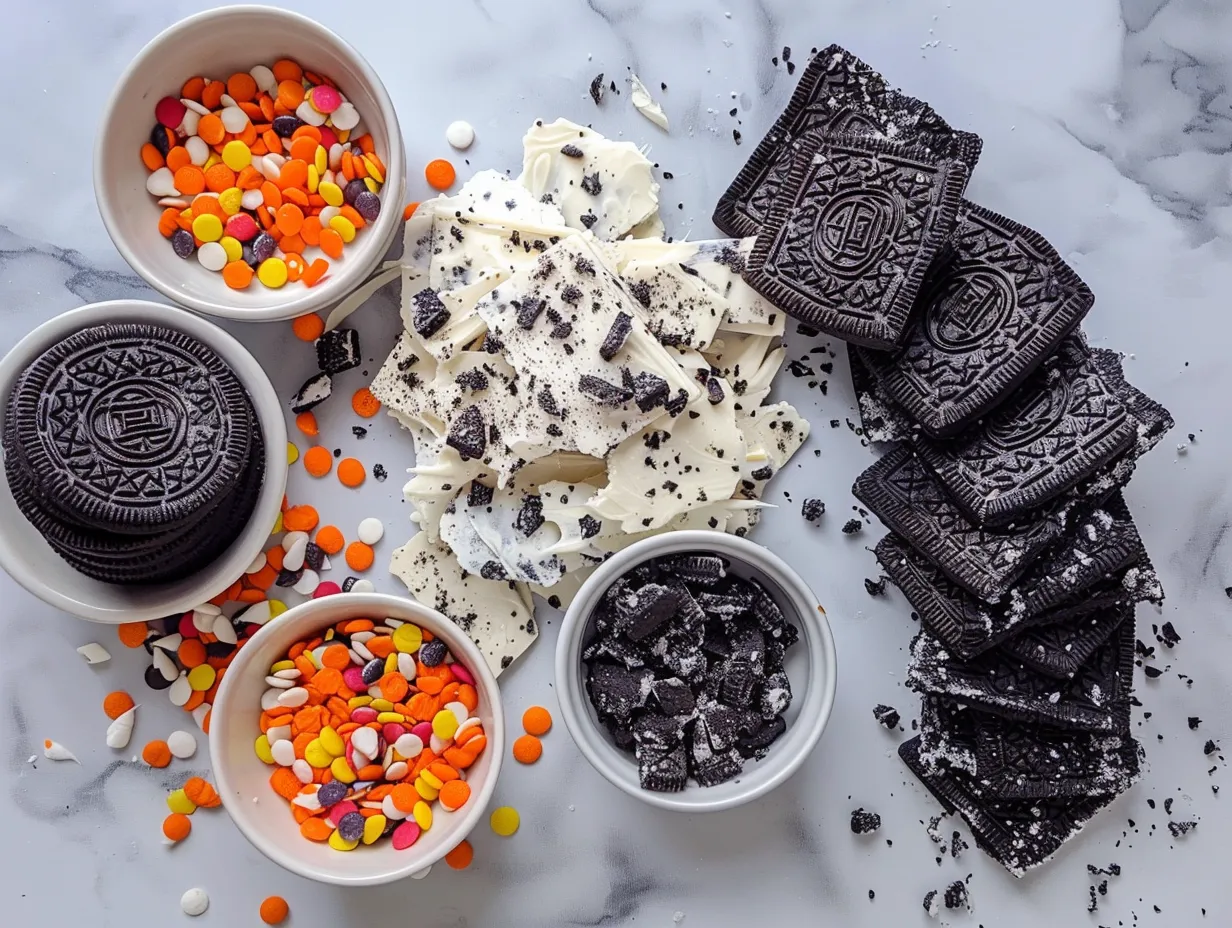
- 16 ounces White Chocolate or Semi-Sweet Chocolate: I always use Ghirardelli melting wafers for my Halloween Oreo Bark. They melt smoothly and taste amazing. However, feel free to use your favorite chocolate chips. Just make sure to melt them slowly and stir frequently to avoid burning.
- 1 package (about 14.3 ounces) Halloween Oreo Cookies: The star of the show! You can use the classic Halloween Oreos with the orange filling or the spooky-themed ones with the Halloween designs. For an extra kick, I sometimes use golden Oreos in this Oreo bark recipe for a different kind of delicious contrast!
- 1/2 cup Halloween Sprinkles: Get creative here! I like to use a mix of shapes, colors, and sizes. Think orange, black, purple, green – the more festive, the better!
- Optional: Candy Corn, M&Ms, or other Halloween Candies: These are great for adding extra texture and visual appeal to your Halloween Oreo Bark.
- Optional: 1 tablespoon Coconut Oil: I find that adding coconut oil to the melting chocolate makes it extra smooth and glossy.
Shopping, Wisdom, and Prep
Shopping Tips: When making Halloween Oreo Bark, I usually grab my ingredients at Target or Walmart. They always have a great selection of Halloween candy and sprinkles this time of year. You can often find the Halloween Oreos on sale, too!
Kitchen Wisdom: Here’s a Halloween Oreo Bark trick I learned from my grandma: Always chop your chocolate into smaller pieces before melting it. This helps it melt more evenly and prevents burning. You can also use a double boiler or melt it in the microwave in 30-second intervals, stirring in between.
Ingredient Prep Shortcuts: If you’re short on time, you can buy pre-crushed Oreos or use a food processor to pulse them quickly. I also like to measure out all my ingredients before I start melting the chocolate so everything is ready to go. For more time-saving tips, you might also enjoy my Butternut Squash Soup recipe.
Cost-Saving Tips: You can save money on Halloween Oreo Bark ingredients by buying generic chocolate chips instead of name-brand ones. Also, check your local dollar store for sprinkles and Halloween candy.
Storage Tips: Store leftover Halloween Oreo Bark ingredients in airtight containers in a cool, dry place. The chocolate chips and sprinkles will last for several months. I also buy chocolate in bulk, it saves a lot of money!
Let’s Make This Halloween Oreo Bark Together
Okay, let’s get our hands dirty and create some Halloween Oreo Bark magic! I promise, it’s easier than you think.
- Prepare your pan: Line a baking sheet (about 9×13 inches) with parchment paper or a silicone baking mat. This will prevent the Halloween Oreo Bark from sticking. I learned the hard way that skipping this step leads to a sticky mess!
- Crush the Oreos: Place the Halloween Oreos in a large resealable bag and crush them into small pieces using a rolling pin or your hands. Don’t crush them too finely; you want some chunks for texture. I usually let the kids do this part – they love smashing things!
- Melt the chocolate: In a double boiler or microwave-safe bowl, melt the white chocolate (or semi-sweet chocolate) until smooth and creamy. If using a microwave, heat in 30-second intervals, stirring in between, until melted. Be careful not to overheat the chocolate, as it can burn easily. Remember my disaster story? This is where I went wrong the first time!
- Add Coconut Oil (Optional): If using, stir in the coconut oil until it’s fully incorporated into the melted chocolate. It will make the chocolate extra smooth and shiny.
- Pour and spread the chocolate: Pour the melted chocolate onto the prepared baking sheet and spread it evenly into a thin layer using a spatula or spoon. Your Halloween Oreo Bark should smell like sweet, heavenly goodness at this point.
- Sprinkle with Oreos and Halloween candies: Immediately sprinkle the crushed Oreos and Halloween candies over the melted chocolate. Gently press them into the chocolate so they stick. While the Halloween Oreo Bark is setting, I like to tidy up the kitchen and start thinking about what spooky movie we’ll watch while we enjoy our treat.
- Add the Halloween Sprinkles: Now comes the fun part! Sprinkle the Halloween sprinkles generously over the bark. The more sprinkles, the merrier!
- Chill: Place the baking sheet in the refrigerator for at least 30 minutes, or until the chocolate is firm. This is crucial for getting that perfect snap when you break the Halloween Oreo Bark.
- Break into pieces: Once the chocolate is firm, remove the baking sheet from the refrigerator and break the bark into irregular pieces using your hands or a knife.
- Enjoy! That’s it! Your Halloween Oreo Bark is ready to be devoured.
Tips for Success
Personal Halloween Oreo Bark Cooking Tips: I learned the hard way with Halloween Oreo Bark that patience is key when melting the chocolate. Rushing the process will only result in burned chocolate and a ruined batch.
Timing: In my kitchen, Halloween Oreo Bark usually takes about 15 minutes to prepare and 30 minutes to chill. It’s a quick and easy treat that’s perfect for busy weeknights or last-minute Halloween parties.
Reassuring Notes: Don’t worry if your Halloween Oreo Bark isn’t perfectly smooth or if the toppings aren’t evenly distributed. That’s part of the charm! Embrace the imperfections and have fun with it.
Sensory Cues: Your Halloween Oreo Bark should smell like sweet chocolate and vanilla. The Oreos will add a slightly crunchy texture, and the sprinkles will provide a burst of color and fun.
Family-Tested Halloween Oreo Bark Shortcuts: If you’re really short on time, you can use pre-made chocolate bark and simply sprinkle the Oreos and Halloween candies on top. It’s not quite the same as homemade, but it’s a great option in a pinch!
For another delicious Oreo Halloween recipe, take a look at this Halloween Oreo Bark recipe – Cravings of a Lunatic.
How I Love to Serve This Halloween Oreo Bark
This Halloween Oreo Bark is incredibly versatile. My family loves this Halloween Oreo Bark when I package it up in little cellophane bags and give it out as treats to trick-or-treaters. It’s always a hit!
Serving Suggestions
Go-To Side Dishes: I don’t usually serve side dishes with Halloween Oreo Bark, but it pairs perfectly with a cup of hot cocoa or a glass of milk. You can even crumble it over ice cream for an extra-special treat.
Occasions: This Halloween Oreo Bark is perfect for Halloween parties, school events, or just a fun family night at home. It’s also a great homemade gift for friends and neighbors. And if you’re feeling festive, put on some Halloween tunes!
Presentation Tips: I like to arrange the Halloween Oreo Bark on a festive Halloween platter or in a decorative bowl. You can also drizzle it with melted chocolate or caramel for an extra touch of elegance.
Leftover Ideas: If you have extra Halloween Oreo Bark (which is rare in my house!), you can crumble it over yogurt, oatmeal, or pancakes. You can also use it to decorate cakes or cupcakes.
Seasonal Variations: In the fall, I sometimes add chopped pecans or walnuts to the Halloween Oreo Bark for a seasonal twist. You could also use pumpkin spice Oreos for an extra burst of flavor.
Guest Reactions: Friends always ask for this Halloween Oreo Bark recipe whenever I make it. It’s such a crowd-pleaser! They love the combination of chocolate, Oreos, and sprinkles.
Looking for more Halloween ideas? Take a look at this Halloween Candy Bark with Oreo Cookies – Chenée Today recipe!
Your Halloween Oreo Bark Questions Answered
Okay, let’s tackle some common questions about Halloween Oreo Bark. I’ve made my fair share of mistakes over the years, so I’m here to share my wisdom (and my failures!) with you.
Troubleshooting Common Issues
Q: My chocolate seized up when I was melting it. What did I do wrong?
A: Oh honey, we’ve all been there! Seized chocolate is the bane of every baker’s existence. The most common cause is overheating the chocolate or getting water in it. To prevent this, melt the chocolate slowly over low heat or in the microwave in 30-second intervals, stirring in between. Make sure your bowl and utensils are completely dry. If your chocolate does seize, try stirring in a tablespoon of vegetable oil or shortening. Sometimes, it can help bring it back to life. You know what I do when my Halloween Oreo Bark chocolate seizes? I take a deep breath, throw it out, and start again. Don’t beat yourself up over it!
Q: Can I use different types of chocolate for this recipe?
A: Absolutely! While I prefer white chocolate for Halloween Oreo Bark, you can use milk chocolate, dark chocolate, or even a combination of all three. Experiment and see what you like best! My family is split – I love dark chocolate, but the kids are firmly in the white chocolate camp.
Q: My Oreo bark is too soft and melts easily. How can I make it firmer?
A: This usually happens when the chocolate isn’t tempered properly or if it’s too warm in your kitchen. To temper the chocolate, melt it slowly and gradually, stirring constantly. Make sure not to overheat it. You can also add a tablespoon of cocoa butter to the melted chocolate, which will help it set up firmer. Store the Halloween Oreo Bark in the refrigerator to keep it from melting.
Q: Can I make this recipe ahead of time?
A: Yes, you can! Halloween Oreo Bark can be made up to a week in advance and stored in an airtight container in the refrigerator. Just make sure to keep it away from strong odors, as chocolate can absorb them easily.
Q: Can I freeze Halloween Oreo Bark?
A: I don’t recommend freezing Halloween Oreo Bark, as it can change the texture of the chocolate and make it crumbly. It’s best to enjoy it fresh.
Q: My sprinkles are sinking into the chocolate. How can I prevent this?
A: This usually happens when the chocolate is too warm. Make sure the chocolate has cooled slightly before adding the sprinkles. You can also gently press the sprinkles into the chocolate so they stick.
Q: Can I add nuts to this recipe?
A: Absolutely! Chopped pecans, walnuts, or almonds would be delicious in this Halloween Oreo Bark. Just make sure to add them after you’ve sprinkled the Oreos and candies on top.
Q: Is there an alternate recipe using peanut butter?
A: I have tried it using peanut butter chips, and the result was amazing. It added a new flavor profile that I had never thought of before. It is worth a try!
My Final Thoughts on This Halloween Oreo Bark
This Halloween Oreo Bark isn’t just a recipe; it’s a tradition, a memory, a symbol of family fun. It’s a reminder that the best things in life are often the simplest. And it’s proof that even kitchen disasters can lead to something beautiful (and delicious!).
This recipe holds a special place in my heart because it reminds me of all the fun we’ve had in the kitchen as a family. It’s a recipe that my kids will hopefully pass down to their own children someday. If you love this recipe you might also enjoy my simple Thai chicken soup recipe.
More Tips and Variations
My Halloween Oreo Bark Pro Tips:
- Don’t over-bake or melt the chocolate! Patience is key to an ideal chocolate.
- Let your kids help with the sprinkles! It’s a great way to get them involved in the kitchen.
- Store the bark in an airtight container in the refrigerator! This will keep it fresh and prevent it from melting.
Here are some Halloween Oreo Bark variations we’ve tried and loved:
- Peanut Butter Cup Bark: Add chopped Reese’s Peanut Butter Cups to the bark. My son, Mateo, is obsessed with this version.
- Candy Corn Bark: Add candy corn and chopped pretzels to the bark. This is my daughter Sofia’s favorite.
- M&M Bark: Use Halloween-colored M&Ms instead of sprinkles. This is a classic that everyone loves.
I hope you’ll give this Halloween Oreo Bark recipe a try. It’s so easy to make, and it’s guaranteed to be a hit with your family and friends. Don’t be afraid to get creative and make it your own. Add your favorite candies, sprinkles, or nuts. Let your imagination run wild!
Most importantly, have fun in the kitchen. Cooking should be a joyful experience, not a chore. Gather your loved ones, put on some music, and create some delicious memories together. I can’t wait to hear about your Halloween Oreo Bark adventures! Happy baking!
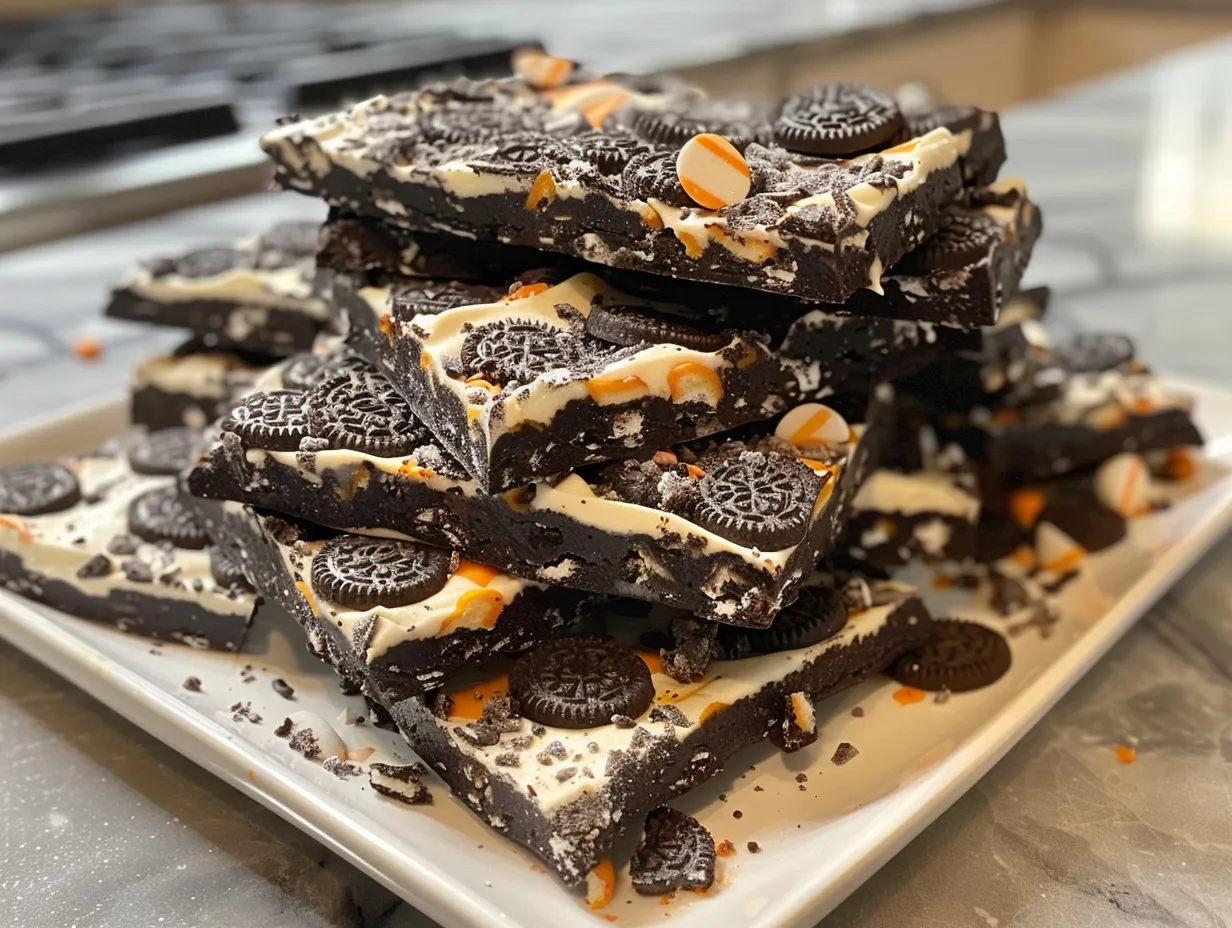
Halloween Oreo Bark

This Halloween Oreo Bark is a super simple and festive treat, perfect for parties or a quick dessert. Loaded with melted chocolate, Oreo cookies, and Halloween sprinkles, it’s a guaranteed crowd-pleaser!
- Prep Time: 10 minutes
- Cook Time: 5 minutes
- Total Time: 15 minutes
- Yield: 12 servings
- Category: Dessert
- Method: No-Cook
- Cuisine: American
Ingredients
- 16 oz semi-sweet chocolate chips
- 20 Halloween Oreo cookies, roughly chopped
- 1/4 cup Halloween sprinkles
Instructions
- Line a baking sheet with parchment paper.
- Melt the chocolate chips in a microwave-safe bowl in 30-second intervals, stirring in between, until smooth.
- Pour the melted chocolate onto the prepared baking sheet and spread evenly.
- Immediately sprinkle the chopped Oreo cookies and Halloween sprinkles over the chocolate.
- Gently press the toppings into the chocolate.
- Refrigerate for at least 30 minutes, or until the bark is firm.
- Break the bark into pieces and serve.
Notes
For an extra festive touch, use white chocolate and add a few drops of orange food coloring to create a Halloween-themed color. You can also substitute other Halloween candies for the sprinkles.