
From the moment I stir together the batter for these Date Brownies, I’m transported back to the cozy kitchen of my childhood, where my mom first introduced me to the magic of dates in desserts. The rich, caramel-like sweetness of those plump little gems, combined with the dense, fudgy texture of brownies, created a treat that quickly became a family staple. My first attempt at making Date Brownies was a bit of a kitchen adventure—let’s just say my blender had a moment when I tried pureeing the dates without soaking them first! But that little mishap taught me the importance of softening dates, which leads to the moist Date Brownies that everyone raves about today.
What I love most about this Date Brownies recipe is how it fits into our busy family life. On hectic school mornings or after a lively weekend soccer game, I can pull these brownies out, and within moments, the house fills with a warm, inviting aroma that promises a wholesome treat without the guilt. These aren’t your average brownies—they’re packed with natural sweetness and the fiber of dates, making them my go-to for a healthier indulgence. Over time, I’ve perfected a version that’s equally delicious as healthy date brownies, gluten-free date brownies, or even a vegan date brownies recipe, so there’s truly something for everyone.
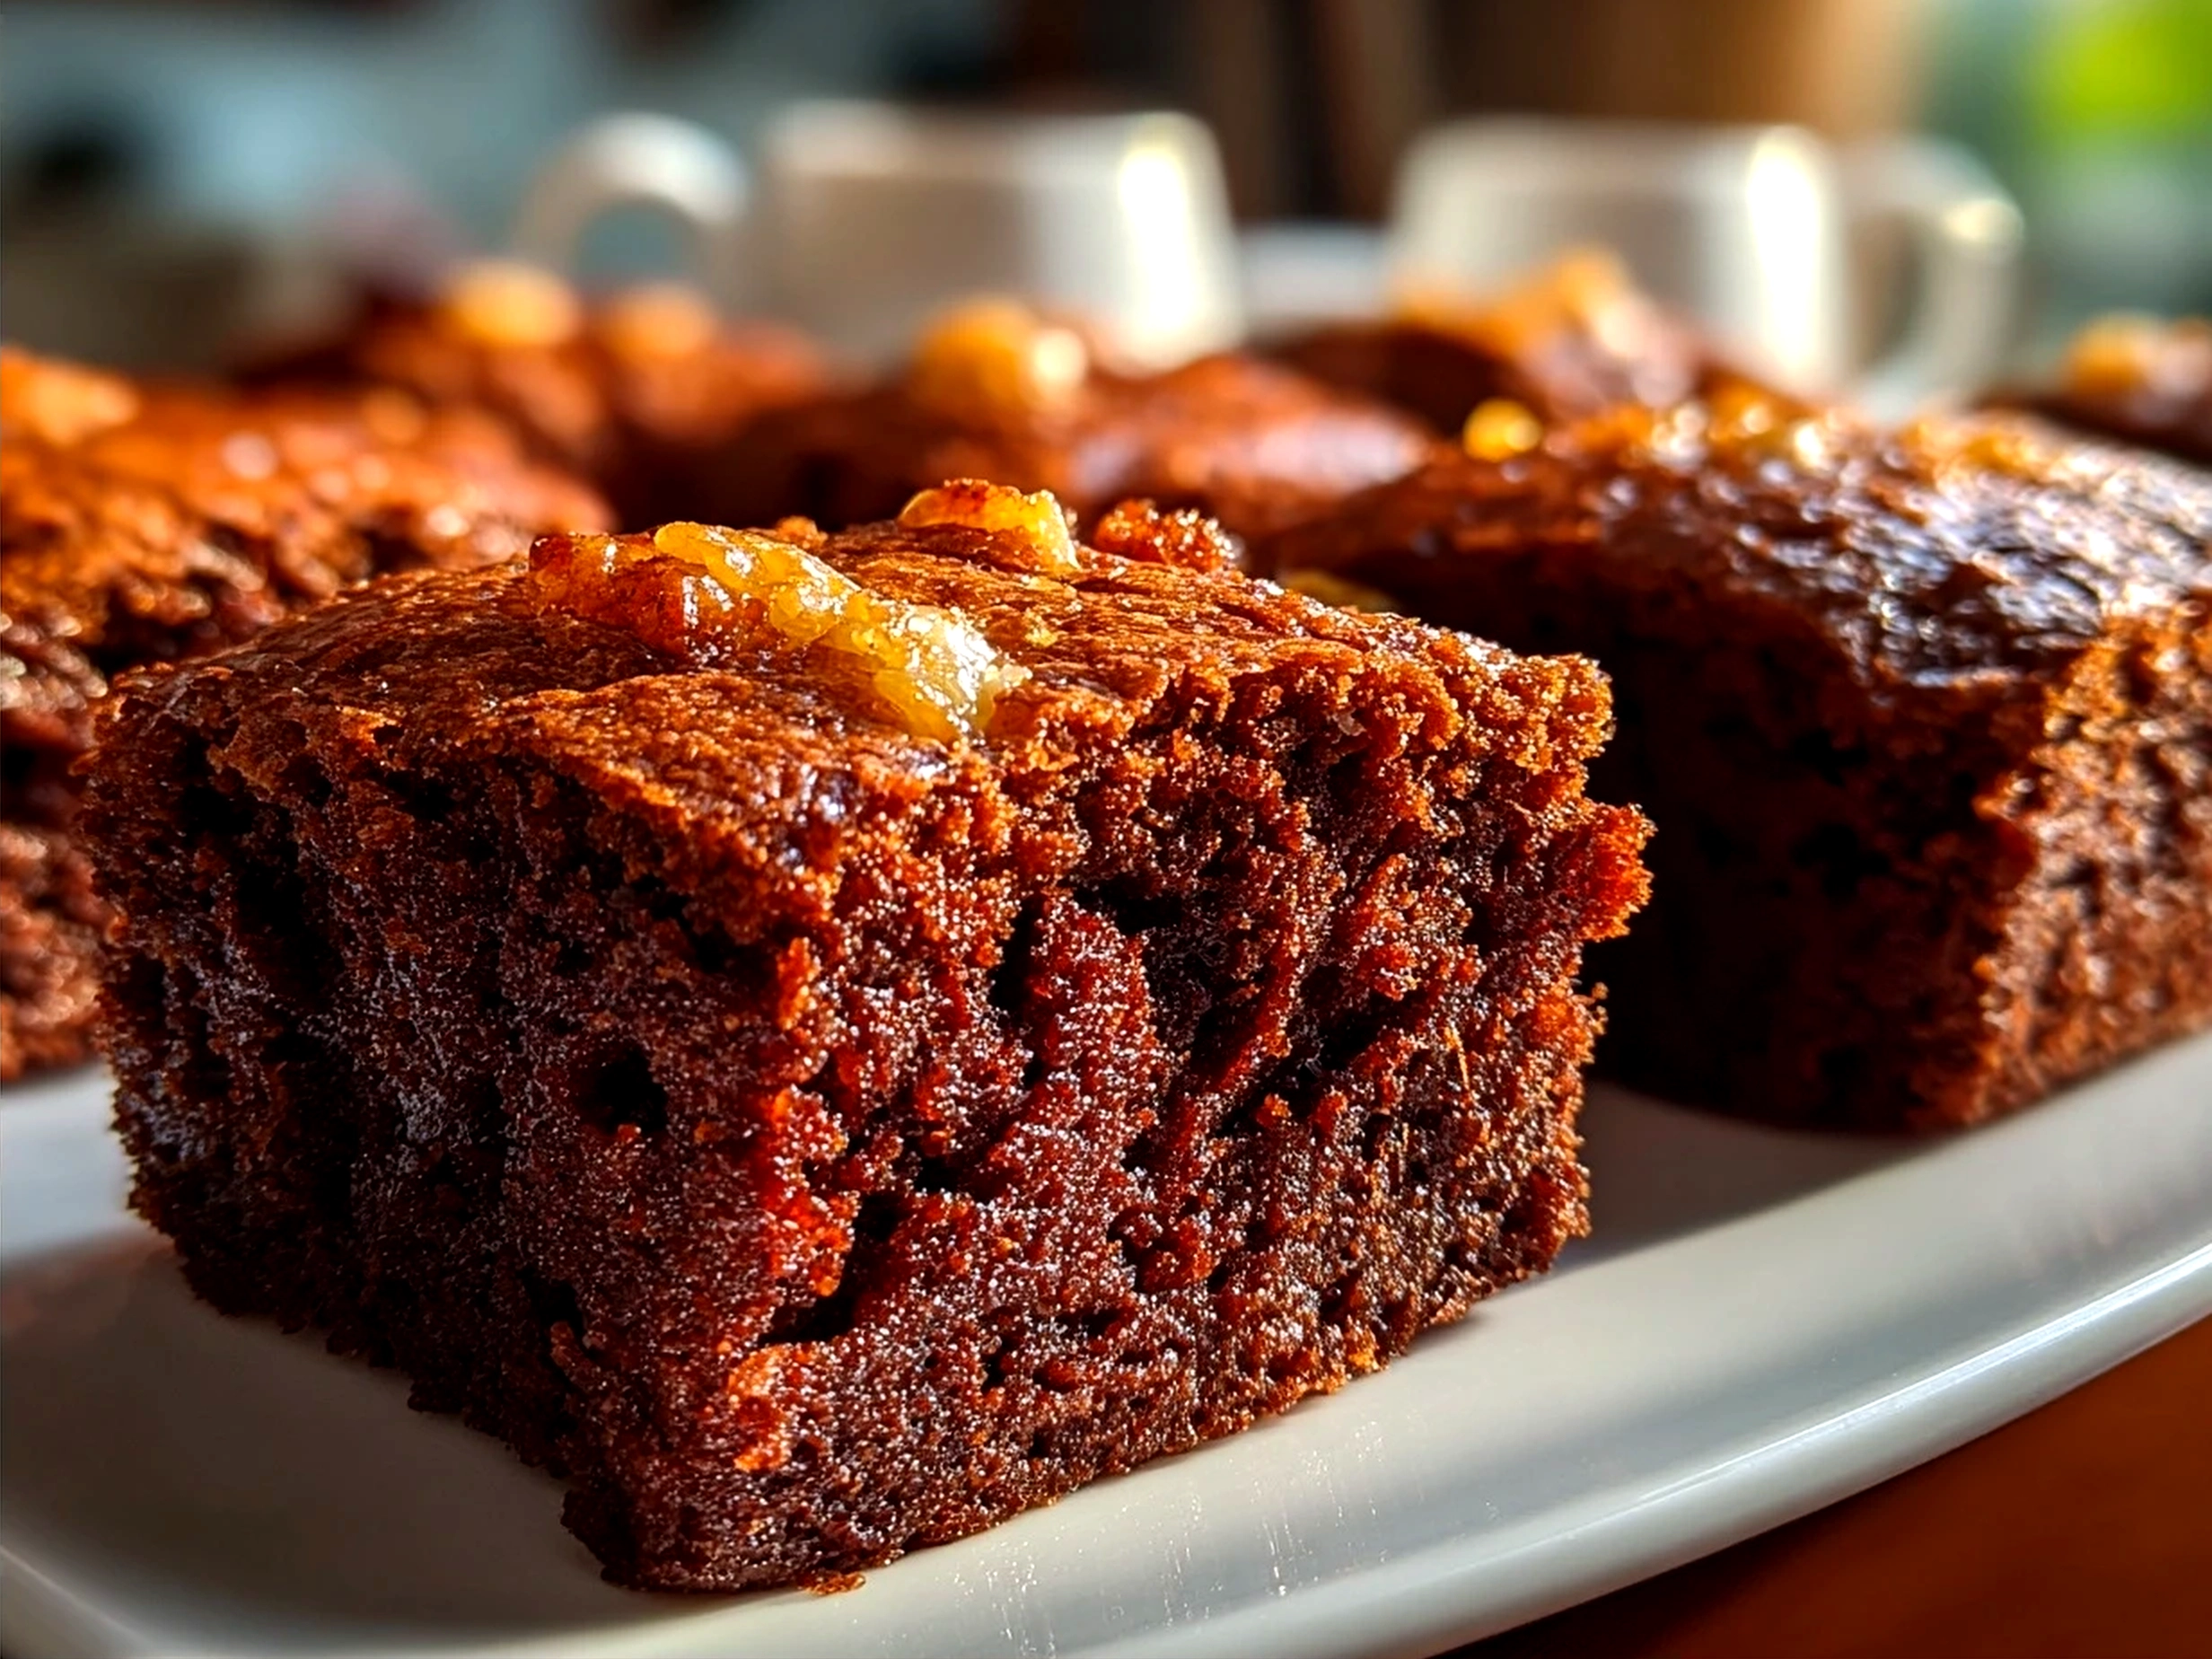
I savor the way the walnuts add a subtle crunch in my favorite date and walnut brownies variation, which feels festive enough for holiday gatherings yet simple enough for an everyday snack. If you ever feel intimidated by fancy baking, trust me, Date Brownies are a game-changer because they’re forgiving and flavorful. Plus, they’re a fantastic way to sneak some wholesome ingredients into your family’s diet without compromising on that classic brownie satisfaction. Before you know it, you might find Date Brownies becoming your family favorite, just like mine.
If you’re curious about how to get these just right or want some quick tips to avoid my early slip-ups, stick around—I’ve got you covered with everything from what you’ll need to the best way to serve Date Brownies. And if you love brownies with a twist, you might want to check out my other favorites like my Loaded Cream Cheese Halloween Brownies or the super fun Halloween Swirl Oreo Cream Cheese Brownies, which all bring a joyful, family-friendly twist on classic brownies. Trust me, with these Date Brownies in your baking roster, you’re in for plenty of sweet smiles and happy moments!
What You’ll Need for This Date Brownies
When it comes to making the perfect Date Brownies, having the right ingredients on hand is half the battle won! I always make sure to keep these essentials stocked because Date Brownies are a frequent request around here. Here’s my tried-and-true list for a batch that turns out just right:
- 1 ½ cups pitted Medjool dates (soaked if they’re a bit dry)
- ¾ cup gluten-free flour blend (I usually go for one with xanthan gum included for the best gluten-free date brownies)
- ½ cup chopped walnuts (optional, but those date and walnut brownies are worth it!)
- ½ cup coconut oil, melted (or use olive oil for a healthier vibe)
- ¼ cup unsweetened cocoa powder
- 1 teaspoon baking soda
- ½ teaspoon sea salt
- 1 teaspoon pure vanilla extract
- ½ cup maple syrup or agave nectar (if you’re making vegan Date Brownies recipe)
- ¼ cup almond milk (or any plant-based milk, depending on your preference)
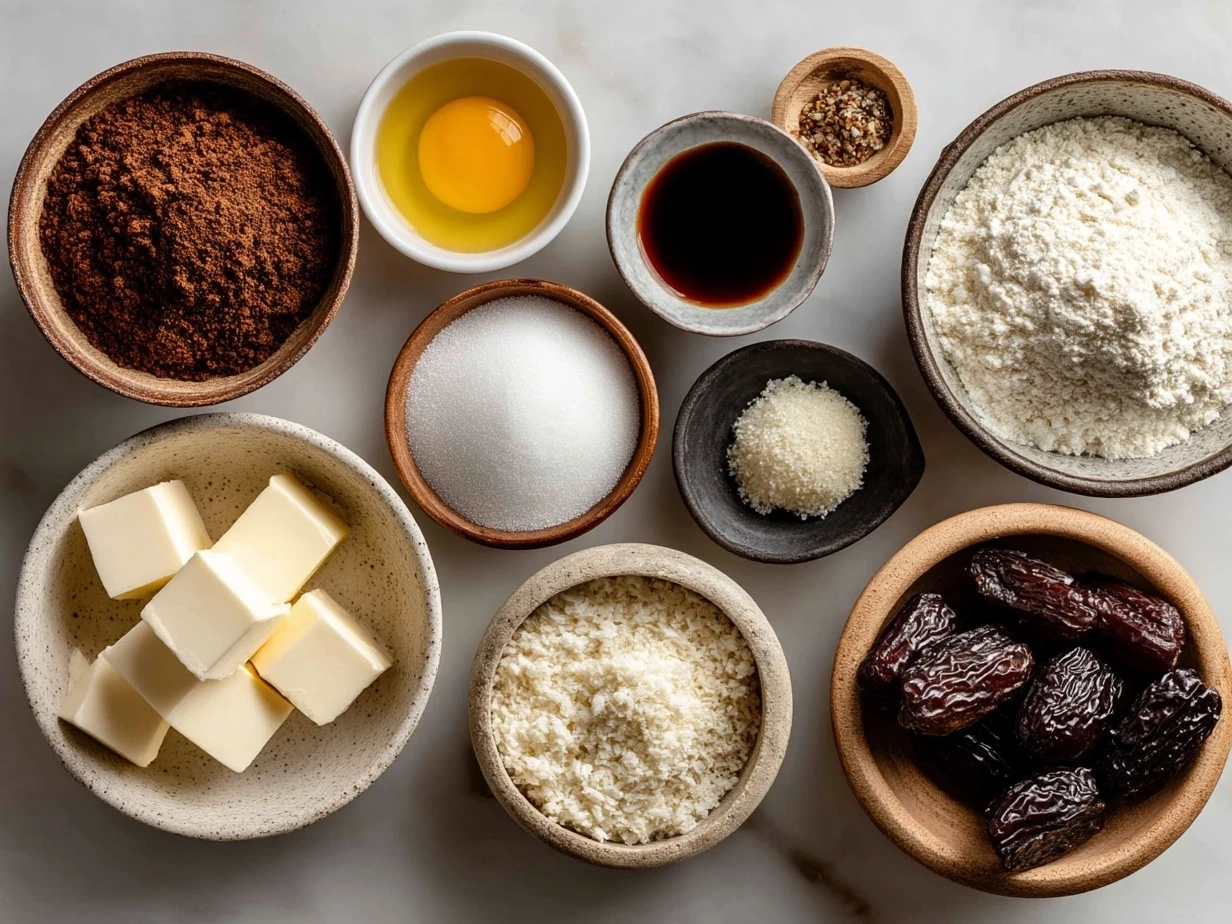
I always recommend using soft, fresh Medjool dates since they’re naturally sweet and rich, making them a star in this moist Date Brownies recipe. When shopping, fresh dates can usually be found in the dried fruit aisle or at farmers’ markets—sometimes they’re even freshest in bulk bins! For pantry-friendly convenience, I pre-soak a batch of dates whenever they look a bit dry to keep them plump and juicy for my brownies.
Here’s a Date Brownies trick I learned from experimenting: soaking your dates in warm water for about 10 minutes softens them perfectly, which makes your batter smoother and your brownies more moist. Trust me, a little extra prep upfront means those decadent bites later will be so worth it.
For cost-saving, I like buying walnuts and cocoa powder in bulk from health food stores, which keeps my Date Brownies budget-friendly, especially since these ingredients are staples in my kitchen. And don’t forget, any leftover dates can be stored in the fridge for up to two weeks or frozen for even longer, which is perfect for when you want to whip up some more gluten-free date brownies on a whim.
If you want to explore more baking tips and ingredient options that work wonderfully with Date Brownies, you might find this gluten and dairy-free brownie recipe inspiring, as it uses dates as a natural sweetener too.
Let’s Make This Date Brownies Together
Baking Date Brownies together is one of those simple joys that feel like we’re sharing a secret in the kitchen. Ready to dive in? Great! Here’s how I do it every time with love and a few handy tips.
- Preheat your oven to 350°F (175°C) and line a 9×9-inch baking pan with parchment paper. This makes lifting our Date Brownies out a breeze later.
- Prepare your dates: If you haven’t already, soak the pitted dates in warm water for 10 minutes. Drain, then toss them into your blender along with the melted coconut oil, maple syrup, vanilla extract, and almond milk. Blend until smooth and creamy. Don’t worry if your Date Brownies batter looks thick—it should!
- Mix the dry ingredients: In a large bowl, combine the gluten-free flour, cocoa powder, baking soda, and sea salt. Whisk these well because this step helps ensure your Date Brownies bake evenly.
- Combine wet and dry: Pour the date mixture into the dry ingredients and gently fold together until just combined. Overmixing sometimes makes Date Brownies less tender, so slow and steady wins here.
- Fold in those walnuts: If you’re making date and walnut brownies like me, sprinkle the chopped walnuts into the batter and give it a few gentle stirs.
- Pour and spread the batter evenly into your prepared pan. I use an offset spatula to get a smooth top, but a spoon works too.
- Bake for about 25 to 30 minutes. My cooking experience shows that every oven differs, but at the 25-minute mark, I start checking with a toothpick—when it comes out with a few moist crumbs, the Date Brownies are perfect. They should smell like chocolate heaven filled with a hint of caramel sweetness.
- Cool completely before slicing: I know that’s hard to wait for, but this step ensures your Date Brownies don’t crumble. Plus, cooling helps them develop that fudgy texture we all crave.
While the Date Brownies are baking, I usually tidy up the kitchen or prep a cup of coffee. It’s such a comforting moment knowing a wholesome treat is just minutes away. If you want to check out some more tips for vegan date brownies recipe, Splurge with Ella’s take is fantastic for ideas on making date brownies without any eggs or dairy.
Remember, if your Date Brownies look a little dense or gooey at first, don’t worry—they’re meant to be moist brownies with a caramelized date sweetness, not cakey. With practice, you’ll know exactly how your oven and ingredients behave.
Another shortcut I swear by is using a food processor for the dates; it saves time and gives my Date Brownies such a silky batter.
If you’re a fan of recipes combining flavors, you might also enjoy my Pumpkin Cheesecake Brownies, which share that creamy, moist texture I’ve perfected with Date Brownies.
How I Love to Serve This Date Brownies
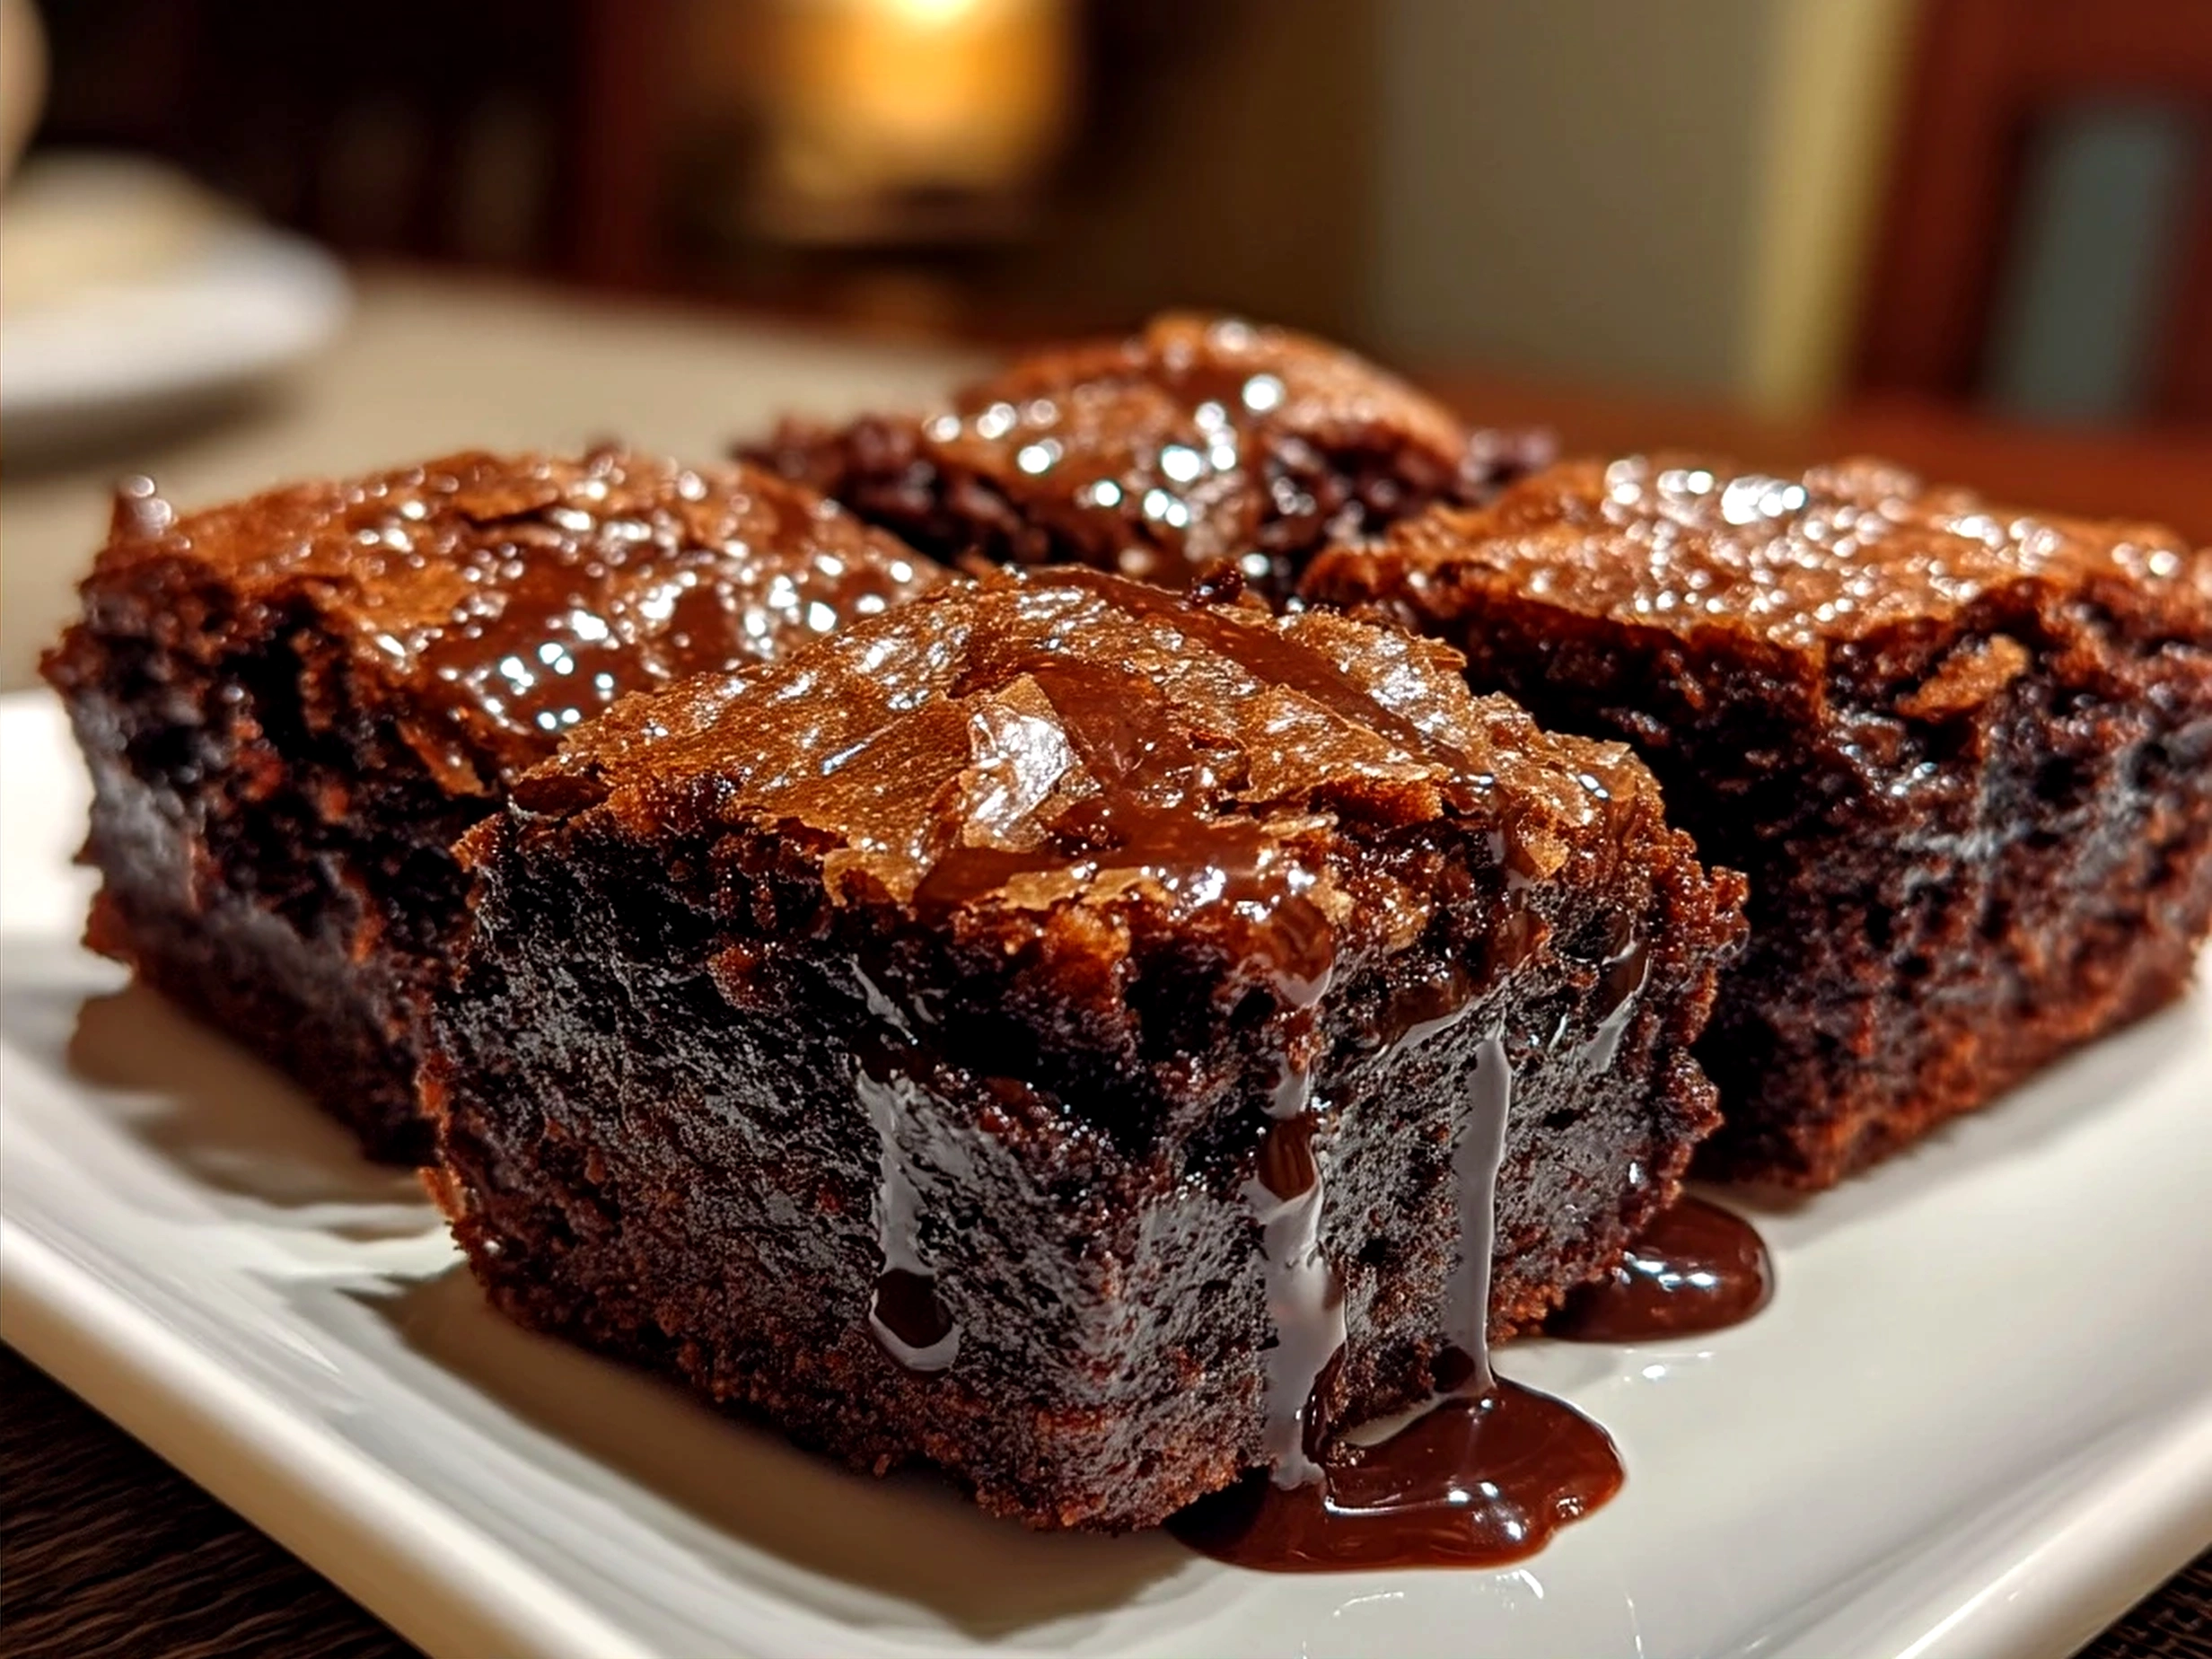
When it comes to serving my Date Brownies, my family’s enthusiasm always encourages me to keep this recipe in regular rotation. My kids adore these moist Date Brownies warm with a scoop of vanilla ice cream or even a dollop of Greek yogurt for a little tang. For an afternoon treat, I sometimes slice them into smaller squares and pack them in lunchboxes with sliced apples—both snackers and parents appreciate a sweet that feels a little healthier.
My favorite sides for Date Brownies are fresh berries or a cup of chai tea. The spicy warm notes of chai play beautifully with the deep flavors of dates and cocoa. For brunch or dessert tables, I’ve found that a dusting of powdered sugar or a drizzle of homemade caramel sauce transforms the Date Brownies into something elegant yet fuss-free.
Date Brownies are perfect for all occasions—from casual family nights to holiday parties. I always bring date and walnut brownies to our Thanksgiving dessert spread; they’re a hit and add that lovely nutty crunch to the table. When friends visit, I’ve noticed they often ask for this recipe, raving about how wholesome yet indulgent the brownies taste.
If you ever find yourself with leftover Date Brownies, don’t throw them away! These brownies freeze wonderfully—just wrap them tightly and pop them in your freezer. They make for a quick toasted snack or breakfast on-the-go. Sometimes I crumble them over oatmeal during winter for a comforting touch.
Seasonally, I’ve experimented by adding pumpkin spice or orange zest to my Date Brownies, which adds fresh personality without stealing the spotlight from the dates themselves. For a bit of fun texture, I also love swirling in cream cheese before baking, like in my Loaded Cream Cheese Halloween Brownies, which blends wonderfully with the moist richness of Date Brownies.
Serving Date Brownies is truly like sharing a warm hug—rich, sweet, and just a little bit special every time.
Your Date Brownies Questions Answered
Over the years, I’ve received tons of great questions from readers about making Date Brownies, and honestly, we’ve all been there figuring out what works best! Here are some of the common ones:
Q: Can I make gluten-free date brownies with regular flour?
A: Absolutely! If gluten isn’t a concern for your family, you can swap gluten-free flour for all-purpose flour in a 1:1 ratio. Just keep in mind that gluten-free blends often contain xanthan gum which helps hold the brownies together, so you may notice a slightly different texture. My family loves both versions!
Q: My Date Brownies come out dry—what’s wrong?
A: This happened to me early on when I skipped soaking the dates. The secret to moist Date Brownies is definitely in softening the dates before blending. Also, avoid overbaking; aim for that slightly underbaked fudgy center. For more baking tips, I found this great post very helpful for balancing moisture levels in brownies sweetened with dates.
Q: Can I make these into vegan date brownies recipe?
A: Yep! My recipe already uses plant-based milk and oils with no eggs, so it’s naturally vegan. Make sure your maple syrup or other sweeteners are vegan-friendly, and you’re good to go.
Q: What’s the best way to store Date Brownies?
A: After cooling completely, I store mine in an airtight container at room temperature for up to 3 days. For longer storage, wrap tightly and freeze. This keeps the moistness intact.
Q: Can I add other nuts or seeds?
A: For sure! Almonds, pecans, or sunflower seeds all work beautifully. I sometimes alternate for texture variations—the date and walnut brownies remain a favorite, though.
Q: Can I double the recipe?
A: Yes, just be sure to use a larger baking pan (like 9×13 inches) and adjust baking time as needed. Keep an eye on it as the edges can cook faster.
Q: Do these Date Brownies really taste like traditional brownies?
A: They do, but with a lovely natural sweetness and slight chew from the dates. My readers have said they appreciate the healthier twist without losing that classic brownie joy.
If you’re curious about other creative vegan date brownies recipes, Splurge with Ella shares some fantastic variations with tips on how to keep these treats guilt-free and flavorful.
My Final Thoughts on This Date Brownies
This Date Brownies recipe holds a special corner in my heart because it symbolizes comfort, family, and the joy of baking something nourishing and delicious together. Over the years, I’ve watched my kids grow up loving these brownies, and even my parents ask me to bring date and walnut brownies to every family gathering. It’s wonderful how a simple recipe can weave itself into so many memories and menus.
My Date Brownies Pro Tips:
- Always soak your dates ahead of time to get that perfect moist Date Brownies texture.
- Don’t overbake—pull the brownies from the oven when a toothpick shows a few moist crumbs.
- Try folding walnuts or your favorite nuts in for added crunch and flavor.
We’ve also experimented with variations like adding espresso powder for a mocha twist, substituting coconut sugar for a deeper caramel flavor, and even swirling in peanut butter for a nutty surprise. Each batch feels uniquely ours.
My husband prefers the classic date and walnut brownies, while my youngest begs for the vegan date brownies recipe version because it aligns better with her dietary needs. It’s amazing how versatile this recipe is—it truly invites you to make it your own.
If you’ve been waiting for a dessert that combines wholesome ingredients with indulgent flavor, I encourage you to try making Date Brownies your new kitchen staple. I hope that as you mix, bake, and share, these brownies bring you as much joy in your home as they do in mine. And remember, sweet friend, there’s nothing better than enjoying a moist, delicious Date Brownies with the ones you love.
For more decadent brownie inspiration, don’t forget to check out my Pumpkin Cheesecake Brownies or the Halloween Swirl Oreo Cream Cheese Brownies for special occasions. Happy baking!
If you have any more Date Brownies questions or want to share your own baking stories, I’d love to hear them—just drop me a line anytime!
Date Brownies

These Date Brownies are a naturally sweet and fudgy dessert, combining rich chocolate with caramel-like dates for a wholesome treat.
- Prep Time: 15 minutes
- Cook Time: 25 minutes
- Total Time: 40 minutes
- Yield: 9 servings
- Category: Dessert
- Method: Baked
- Cuisine: American
Ingredients
- 1 cup pitted dates
- 1/4 cup boiling water
- 1/2 cup whole wheat flour
- 1/4 cup cocoa powder
- 1/2 teaspoon baking soda
- 1/4 teaspoon salt
- 1/4 cup melted coconut oil
- 1/4 cup honey or maple syrup
- 2 large eggs
- 1 teaspoon vanilla extract
Instructions
- Preheat oven to 350°F (175°C) and grease an 8×8 inch baking pan.
- Soak the pitted dates in boiling water for 10 minutes, then blend into a smooth paste.
- In a bowl, combine flour, cocoa powder, baking soda, and salt.
- In another bowl, whisk eggs, melted coconut oil, honey (or maple syrup), and vanilla extract.
- Mix the date paste into the wet ingredients until fully incorporated.
- Gradually add the dry ingredients to the wet mixture and stir gently until just combined.
- Pour the batter into the prepared baking pan and spread evenly.
- Bake for 20-25 minutes or until a toothpick inserted in the center comes out with moist crumbs.
- Allow to cool before cutting into squares and serving.
Notes
For extra richness, sprinkle chopped walnuts or dark chocolate chips on top before baking.