
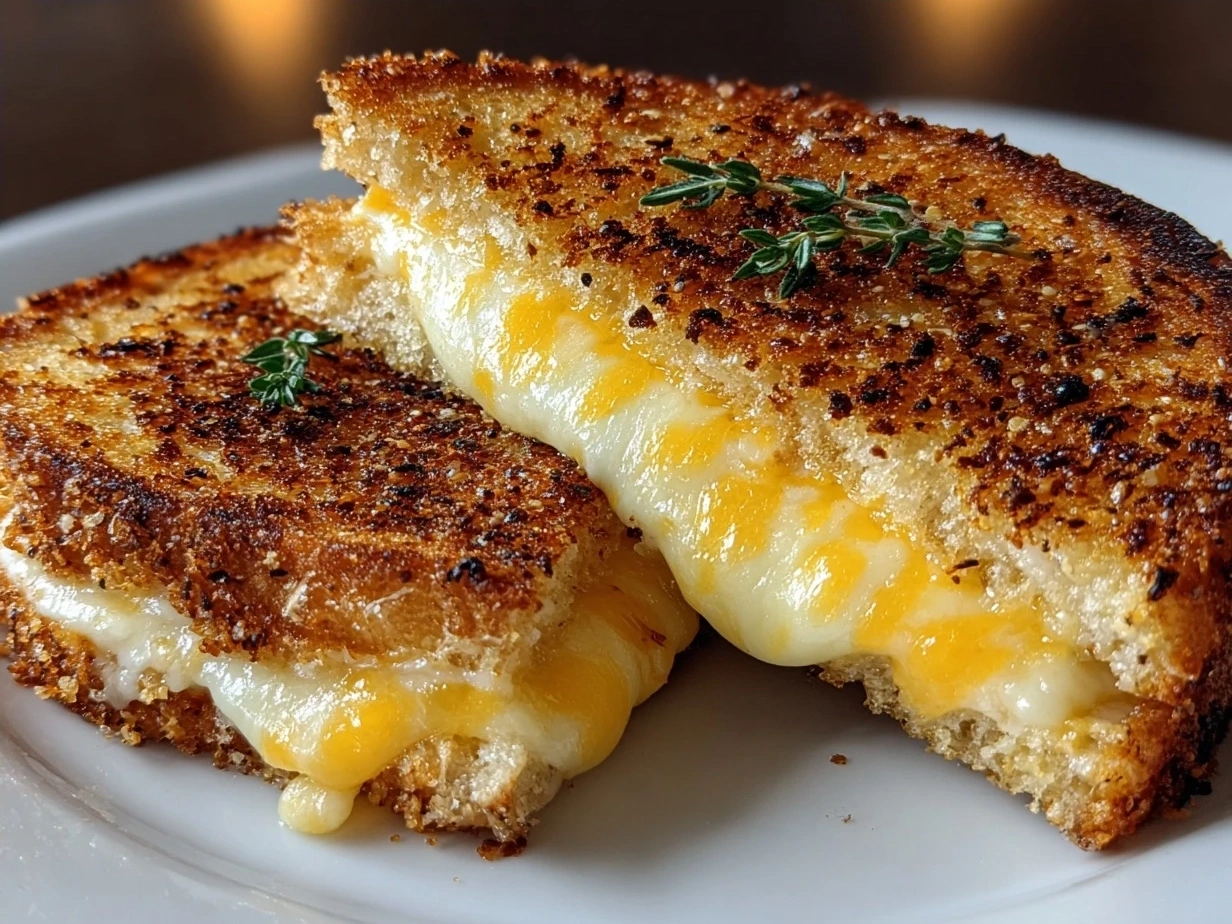
There’s nothing quite like the smell of a golden grilled cheese cooking on the stove — that first hint of toasted bread giving way to the warm, gooey promise of melted cheese. I remember early on in my cooking days, I had no idea how much attention this humble sandwich deserved. I’d slap two slices of bread together with cheese in the middle, toss the whole thing into a hot pan, and hope for the best. Spoiler alert: I’ve learned a lot since then! Now, grilled cheese is one of those comfort food classics that brings my whole family together on a busy weeknight or lazy weekend afternoon.
My husband jokes that I could open a grilled cheese shop based on how often I make this buttery, crispy, melty treat for my kids and me. I honestly think it’s because this toasted sandwich is so forgiving and flexible — you can play with different kinds of bread, cheeses, or extras like ham or tomato and still end up with something delicious. But the real secret? The buttered bread. I learned early on that how you butter the bread makes or breaks the grilled cheese — dreamy, crispy edges come from spreading that butter evenly on the outside, not just throwing it on like frosting. There’s even a great chat on whether to butter the outside of the bread for grilled cheese where cooks share their tips.
My favorite recipe is actually a bit of a family heirloom at this point. I found it tucked inside a cookbook I borrowed from my mother-in-law years ago and have been perfecting it ever since. It’s become a go-to, especially when life gets hectic, because you can whip up this grilled cheese in under 10 minutes from start to finish. Plus, every kid I know loves the crispy, buttery bread combined with the gooey melted cheese inside — it’s pure comfort food magic. If you’re interested, you can see one of my creative twists on this classic here: grilled cheese burrito, a fun way my family ups the ante when everyone’s ready for something a little different.
Honestly, if you’re like me, sometimes dinner needs to come together fast without sacrificing that home-cooked warmth. So trust me when I say pan frying your grilled cheese to golden perfection is well worth the small effort — the crunchy, buttery bread and velvety melted cheese filling make it one of the ultimate cozy meals. I’m excited to share not just my recipe but also some of my favorite tips and tricks for nailing that perfect grilled cheese every time. So pull up a chair, let’s warm up the pan, and get ready to make the kind of comfort food that feels like a big hug on a plate.
What You’ll Need for This Grilled Cheese
Before we jump into the pan frying magic, let me share what I always keep stocked for my grilled cheese adventures. I’m all about keeping things simple but flavorful, so I have my trusty favorites that never disappoint.
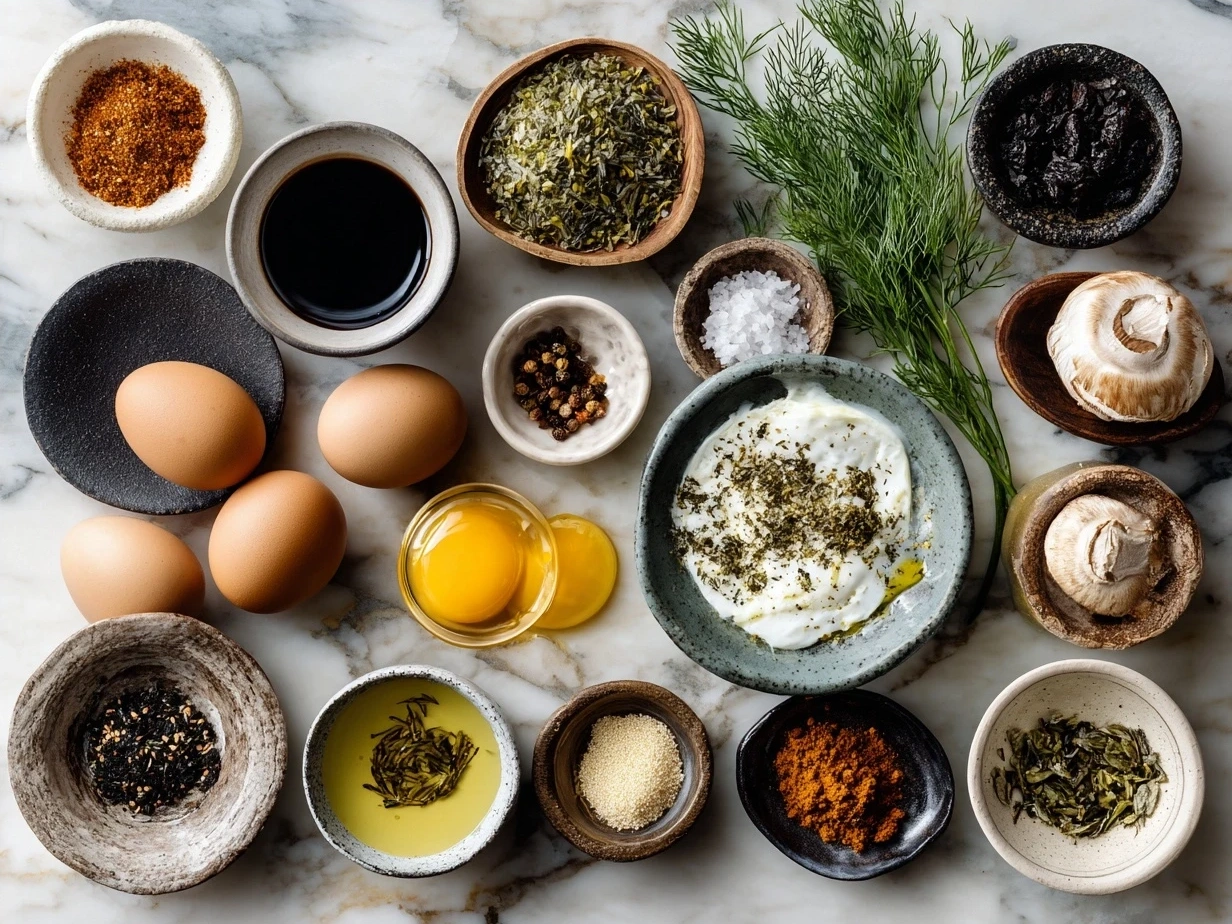
- 4 slices of good quality sandwich bread (I love a hearty white or sourdough for that crisp, buttery crust)
- 4 slices of sharp cheddar cheese (sharp but not overpowering — you want that blanket of melted cheese magic)
- 2 tablespoons unsalted butter, softened (the key to getting that golden toasted sandwich crust)
- Optional: 1 tablespoon mayonnaise (some friends swear by mayo on the outside instead of butter for a tangy twist)
- Optional extras like sliced tomato, ham, or crispy bacon for variety
I always choose cheeses that melt well — cheddar is my go-to because it gives me that classic comfort food flavor, but I’m not shy about mixing in mozzarella or gruyere for a little flair. You can find great cheeses for grilled cheese at most grocery stores, but if you want to feel fancy, artisan cheese shops often have perfect melting blends.
Here’s a little kitchen wisdom I learned from a weekend market visit: placing your cheese slices out at room temperature for a few minutes before building your grilled cheese really helps the melted cheese create that gooey pull we all crave. Bonus tip: if you’re buying bread at the store, look for day-old bread or bakery markdowns — it actually grills better without getting too soggy.
For busy days, I sometimes pre-slice the cheese and store it in an airtight container so I’m ready to make grilled cheese in a flash. Butter also keeps well for a couple weeks if you store it chilled, so no worries if you buy a big block. Whipping up a grilled cheese perfect for lunch or dinner moves much faster with these little shortcuts — I always say, the better prepared you are, the more stress-free that pan frying step will be!
If you want to see a melty grilled cheese and ham variation that my friends loved, check out this great melty grilled cheese and ham recipe — comfort food at its finest!
Let’s Make This Grilled Cheese Together
Okay girlfriend, picture me right there in the kitchen alongside you, butter knife in one hand and spatula in the other, ready to turn this simple grilled cheese into a crispy, melty masterpiece. Don’t worry if your first attempt looks a little rustic — that’s part of the charm!
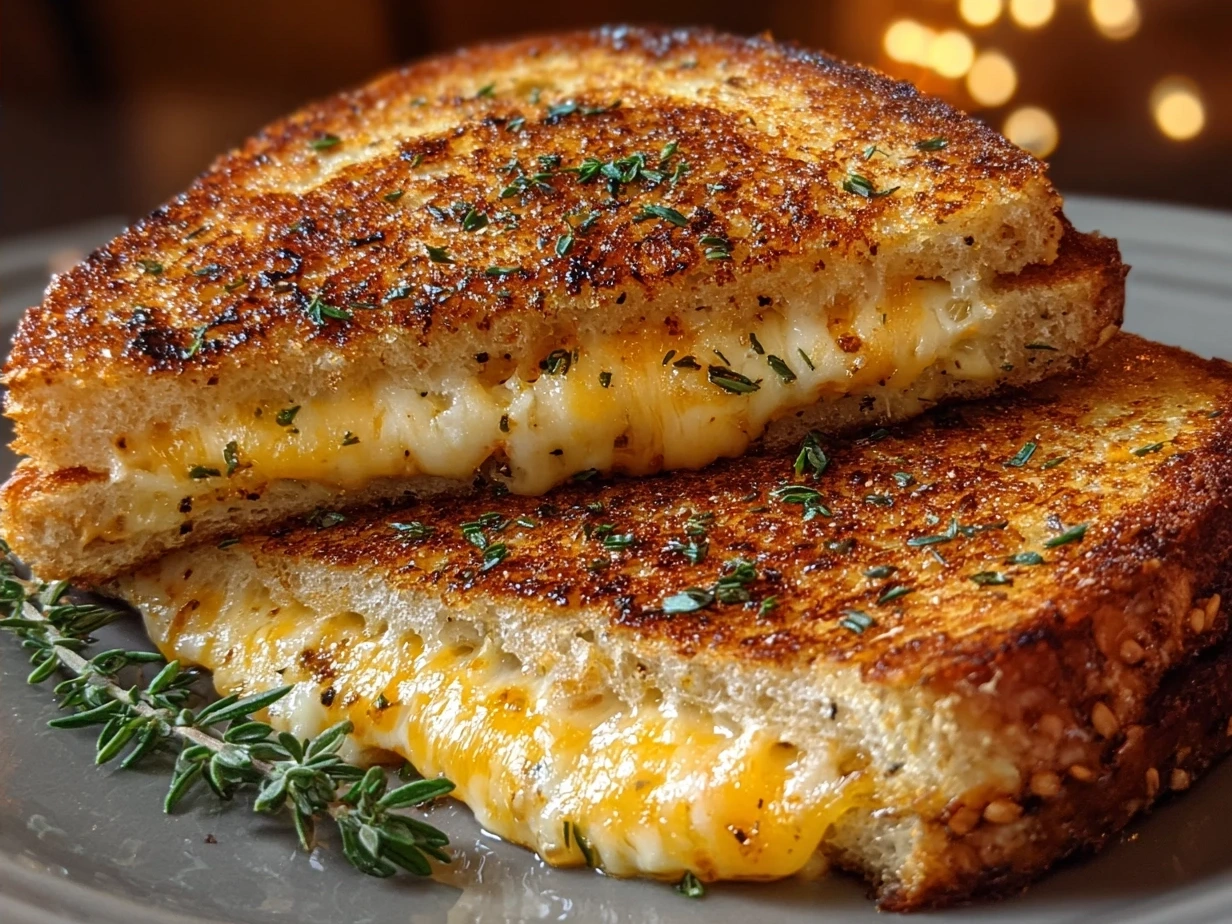
Step 1: Start by laying out your four slices of sandwich bread on a clean surface. Spread about a teaspoon of butter evenly on one side of each slice — this is the outside that’s going to hit the pan and get that golden, toasted crunch. I learned the hard way that uneven buttering leads to patchy browning (and that sad, soggy bread nobody wants).
Step 2: Now flip the slices over so the unbuttered side is up and layer on your cheese. Two slices of cheddar per sandwich work perfectly, but if you want it extra cheesy, go for it. I love adding a little extra cheese on the edges for that beautiful cheese pull everyone raves about. While you’re prepping, you could also add those sliced tomato or ham bits for a little something special.
Step 3: Carefully place one buttered slice, butter-side-down, onto a heated skillet set to medium-low. Medium-low is your friend here because you want the bread to toast slowly, giving the cheese time to melt fully inside without burning the crust. Cover the pan loosely with a lid if you have one — this traps heat and speeds up melting.
Step 4: After about 3-4 minutes, check the underside — it should be a deep golden brown. Then, flip carefully with your spatula and toast the other side for another 3 minutes until that buttered bread is beautifully crisp and the cheese is bubbling. Your kitchen should smell like that classic grilled cheese comfort food aroma — crisp, buttery, and cheesy all at once.
Step 5: Remove your grilled cheese from the pan and let it sit a minute before slicing — it helps the melted cheese settle so you don’t lose half in the pan (we’ve all been there). While it’s resting, I usually start on the next sandwich or grab a bowl for dipping sauce.
In my kitchen, grilled cheese usually takes about 8-10 minutes total, and trust me, every second is worth it. If you want more tips on perfecting your pan frying technique, Chef Alex Guarnaschelli has shared a fun guide on making a classic pan-fried grilled cheese you might enjoy.
Remember, the biggest thing is not to rush — medium heat and patience will give you that golden toasted sandwich perfection with oozy melted cheese inside. If you want a quick shortcut, you can skip the lid and just cook a little longer on the lower heat, but I really love that gentle melt-and-crisp combo.
How I Love to Serve This Grilled Cheese
Now, let me tell you about how my family loves to enjoy this grilled cheese — full confession, this meal gets requested on repeat around here! Typically, I pair it with a classic tomato soup for dipping; there’s something incredibly soothing about dunking that crispy grilled cheese into warm soup. It turns the toasted sandwich into a whole comforting experience.
For sides, my family often goes for a fresh green salad or some crunchy carrot sticks to balance the richness. When we’re feeling extra cozy, I’ll whip up some roasted tomato soup from scratch, or for a quicker fix, reach for a good-quality canned version — it’s all about the ease on those busy evenings.
This grilled cheese is the perfect dinner for weeknights, lunchboxes, or even a casual weekend snack. One time, during a fall get-together, I tried a version with pumpkin-spiced cheese (yes, really!) inspired by my no-bake pumpkin cheesecake balls recipe (just as comforting in its own way!). My friends couldn’t get enough, and it added such a seasonal twist to the traditional meal.
When it comes to presentation, I’ve learned that cutting the grilled cheese diagonally not only looks pretty but also makes it easier to handle for little hands — my kids always prefer it that way! If you have extra grilled cheese, slice it into strips and use it for dipping into soup the next day — zero waste and double the comfort.
Friends always ask me for this recipe, especially when I bring a platter of crispy grilled cheese to casual parties — there’s just something about that buttery, melted cheese combo that everyone adores. If you want more cozy comfort food ideas that pair well, my spicy buffalo chicken mac and cheese recipe is a total hit (check it out here).
Your Grilled Cheese Questions Answered
You know, after years of making grilled cheese and chatting with readers, I’ve collected a hefty list of questions — so let’s get down to the nitty-gritty of all things grilled cheese!
Q1: How do I stop my grilled cheese from getting soggy?
A: Great question! The trick is using buttered bread on the outside and cooking on medium to medium-low heat. This helps the bread toast up nice and crisp while the cheese melts slowly inside. I also avoid adding too many wet extras like tomato unless they’re sliced thinly and patted dry. If soggy sandwiches have haunted you, try my buddy’s tip using mayo on the outside for a crispier finish — tons of fun takes on toasted sandwiches out there! See this discussion on buttering techniques.
Q2: What’s the best cheese for grilled cheese?
A: For classic comfort food vibes, I’m a huge fan of sharp cheddar for its bite and meltability. But mixing cheddar with mozzarella or gruyere can give you that perfect stretchy, creamy texture. My family loves switching it up — my son prefers American cheese but I sneak in cheddar for flavor balance. It’s all about what you enjoy melted cheese-wise!
Q3: Can I use any bread?
A: Absolutely! I usually gravitate towards a sturdy sandwich bread or sourdough because it holds up well to pan frying without getting too greasy. But fun fact: grilled cheese with thick-cut, country-style bread is a game changer when you want a rustic feel. Just remember, buttered bread helps keep it crispy, so don’t skip that step.
Q4: Should I cover the pan while cooking?
A: I do cover the pan loosely with a lid during melting because it traps heat and helps achieve that perfect melted cheese inside without charring the bread. If you don’t have a lid, cooking a bit longer on lower heat works too. Chef Alex Guarnaschelli’s grilled cheese guide is great for mastering this.
Q5: How do I reheat leftover grilled cheese?
A: I recommend reheating in a skillet over medium heat rather than the microwave to bring back that crispy exterior and melty inside. You can also pop leftovers in a toaster oven if you have one for a few minutes — perfect for maintaining that buttery crunch.
Q6: Can I add extras like ham or tomato?
A: Yes! Adding thin slices of ham or tomato is a popular upgrade and gives you a heartier sandwich. Just be mindful of adding too much moisture which can interfere with the sandwich crisping. A good tip is to sauté tomatoes first or pat them dry to avoid sogginess — check out this melty grilled cheese and ham recipe for inspiration.
Q7: Any tips for kids who only like plain grilled cheese?
A: Totally relatable! Keeping it simple with just buttered bread and cheddar cheese is often the way to go. You can sneak in different cheese blends gradually by small additions or keep extra fillings on the side for dipping. My daughter loved plain grilled cheese until recently, when she warmed up to the classic combo with tomato slices.
If you want to chat further about making grilled cheese magical or need more comfort food ideas, check out my grilled cheese burrito recipe! It’s a fun twist that really gets the family excited.
My Final Thoughts on This Grilled Cheese
You know, folks often ask me why grilled cheese holds such a special place at my table. The truth is, it’s more than just toast and cheese — it represents a simple, reassuring meal that brings comfort like no other. Each bite is buttery, crisp, and full of melty cheese goodness, a sort of edible hug. Over the years, I’ve perfected this grilled cheese recipe, but what really makes it shine is the memories created eating it with my family.
Pro Tip #1: Always butter the outside of the bread evenly for a crispy golden crust that’s a dream to bite into. Uneven buttering? Nope, no thank you!
Pro Tip #2: Low and slow wins the grilled cheese race. Medium-low heat lets the melted cheese get all ooey and smooth without burning the bread.
Pro Tip #3: Don’t rush the resting step after cooking — letting the grilled cheese sit for a minute keeps the melted cheese from oozing everywhere when you slice.
My family enjoys three main grilled cheese variations: the classic cheddar on sourdough (dad’s favorite), a gooey mozzarella and tomato combo (my pick), and a ham-and-cheese delight for the kids. If you want to recreate a fun grilled cheese that blends comfort food with a twist, I recommend trying my grilled cheese burrito.
I hope you’ll make this grilled cheese your own, experimenting with your favorite cheeses, breads, or extra fillings. Cooking should be joyful and nourishing, and this grilled cheese recipe is an easy way to bring that into your kitchen. Remember, the best grilled cheese is the one shared with love and laughter at the table.
If you want more cozy recipe inspiration after this, don’t miss my no-bake pumpkin cheesecake balls (a delightful fall treat) or the spicy buffalo chicken mac and cheese (comfort food with a kick).
So go on—grab your skillet, butter your bread, and enjoy the simple, rich pleasure of a perfectly toasted grilled cheese. Here’s to countless delicious, melty sandwiches and happy moments in your kitchen!
grilled cheese
A classic grilled cheese sandwich featuring crispy golden bread and melted gooey cheese, perfect for a quick and comforting meal.
- Prep Time: 5 minutes
- Cook Time: 8 minutes
- Total Time: 13 minutes
- Yield: 1 sandwich
- Category: Snack
- Method: Grilled
- Cuisine: American
Ingredients
- 2 slices of bread
- 2 slices of cheddar cheese
- 1 tablespoon butter
Instructions
- Preheat a skillet over medium heat.
- Butter one side of each slice of bread.
- Place one slice of bread, buttered side down, onto the skillet.
- Add the cheese slices on top of the bread in the skillet.
- Cover with the second slice of bread, buttered side up.
- Cook until bread is golden brown and cheese is melted, about 3-4 minutes per side.
- Flip carefully and cook the other side.
- Remove from skillet, slice in half, and serve warm.
Notes
For extra flavor, try adding a slice of tomato or a sprinkle of herbs before grilling.