
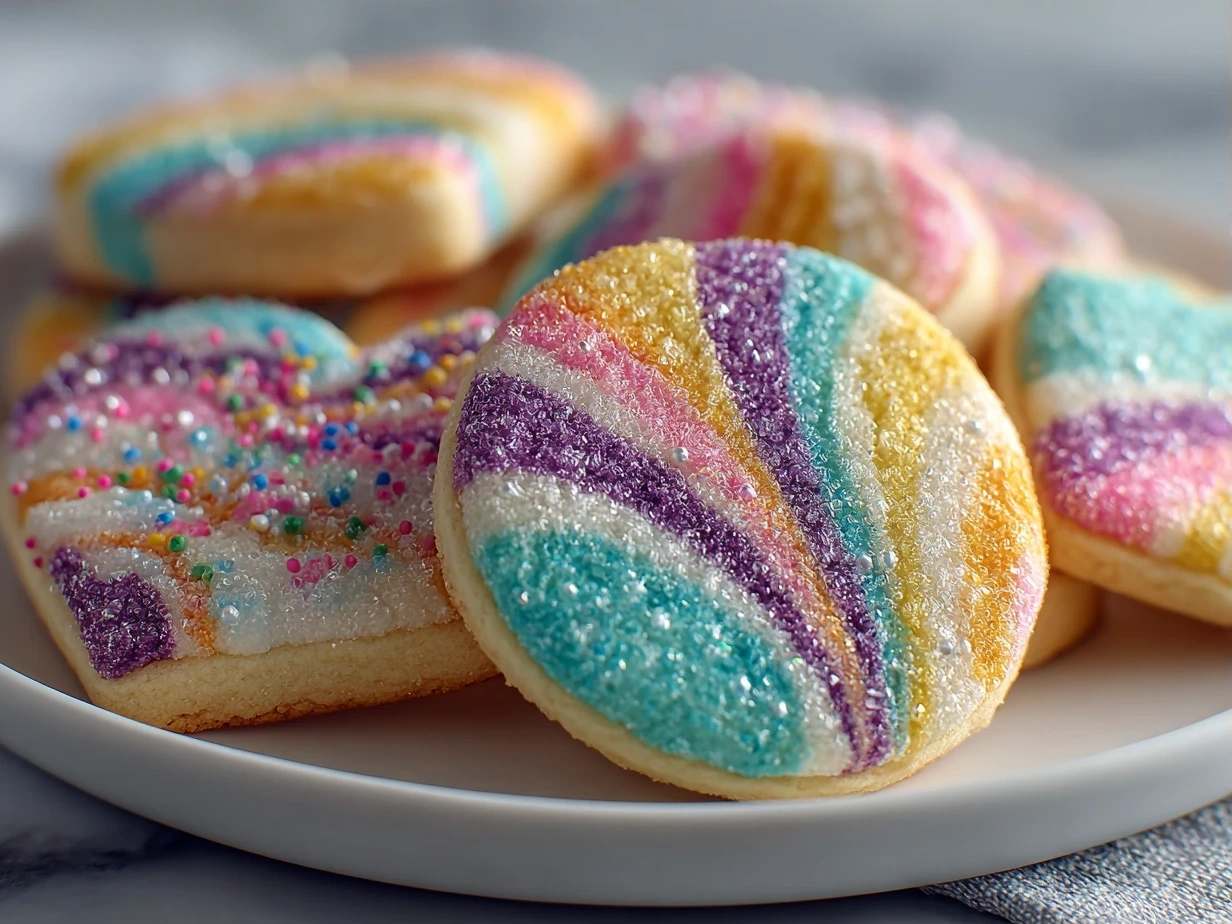
There’s something magical about Colorful Marbled Sugar Cookies that instantly transports me back to my childhood kitchen, where my mom and I would spend Saturday afternoons baking. The aroma of sweet vanilla and buttery dough filling the house, the gentle whirling of the mixer, and those vibrant splashes of color swirling into the dough — it’s pure joy. If you’ve ever wondered how to make decorated sugar cookies that stand out at family gatherings or joyfully top a cookie platter, this recipe for Colorful Marbled Sugar Cookies might just become your new go-to. From the moment I perfected the marbled cookie techniques, this colorful treat quickly became a family favorite, brightening up both ordinary days and special occasions.
One of my earliest cooking memories with Colorful Marbled Sugar Cookies involves a few mishaps trying to figure out how to marble cookie dough just right. I’ll admit, watching those bright food colors swirl into the dough felt like a little science project gone wild at first — uneven patches of color or overmixed dough that lost its texture. But, once I nailed down the perfect marbled cookie techniques, it made the whole process smoother and the cookies came out stunning every single time. What really sold me was how fun and approachable these cookies are to make, especially when balancing a busy family life. I love recipes that bring a pop of color while staying simple enough to whip up on a whim, and these Colorful Marbled Sugar Cookies fit the bill perfectly.
If you want to learn my tried-and-true methods to make Colorful Marbled Sugar Cookies in your own kitchen, you’re in just the right place. We’ll cover everything from choosing ingredients to mastering the swirl of colorful sugar cookie icing and tips on how to marble cookie dough so they look picture-perfect. Plus, I’ll sprinkle in a few personal stories and shortcuts that I’ve picked up along the way — because this isn’t just about sugar cookie recipes, it’s about sharing moments and memories through cooking. Before you know it, you’ll have a batch of stunning decorated sugar cookies that everyone will adore, and I can’t wait to share all of it with you.
By the way, if you’re curious about more sugar cookie fun, I have a whole collection of sugar cookie recipes here on Delilita, including some lovely Valentine Sugar Cookies and other seasonal favorites you might enjoy bundling up with this colorful batch. And for a little extra inspiration on marbling techniques perfect for gifts or celebrations, I highly recommend checking out this Soft Marbled Sugar Cookies with Royal Icing recipe by Chelsweets. Now, let’s dive into what you’ll need to make your own vibrant, delicious Colorful Marbled Sugar Cookies!
What You’ll Need for This Colorful Marbled Sugar Cookies
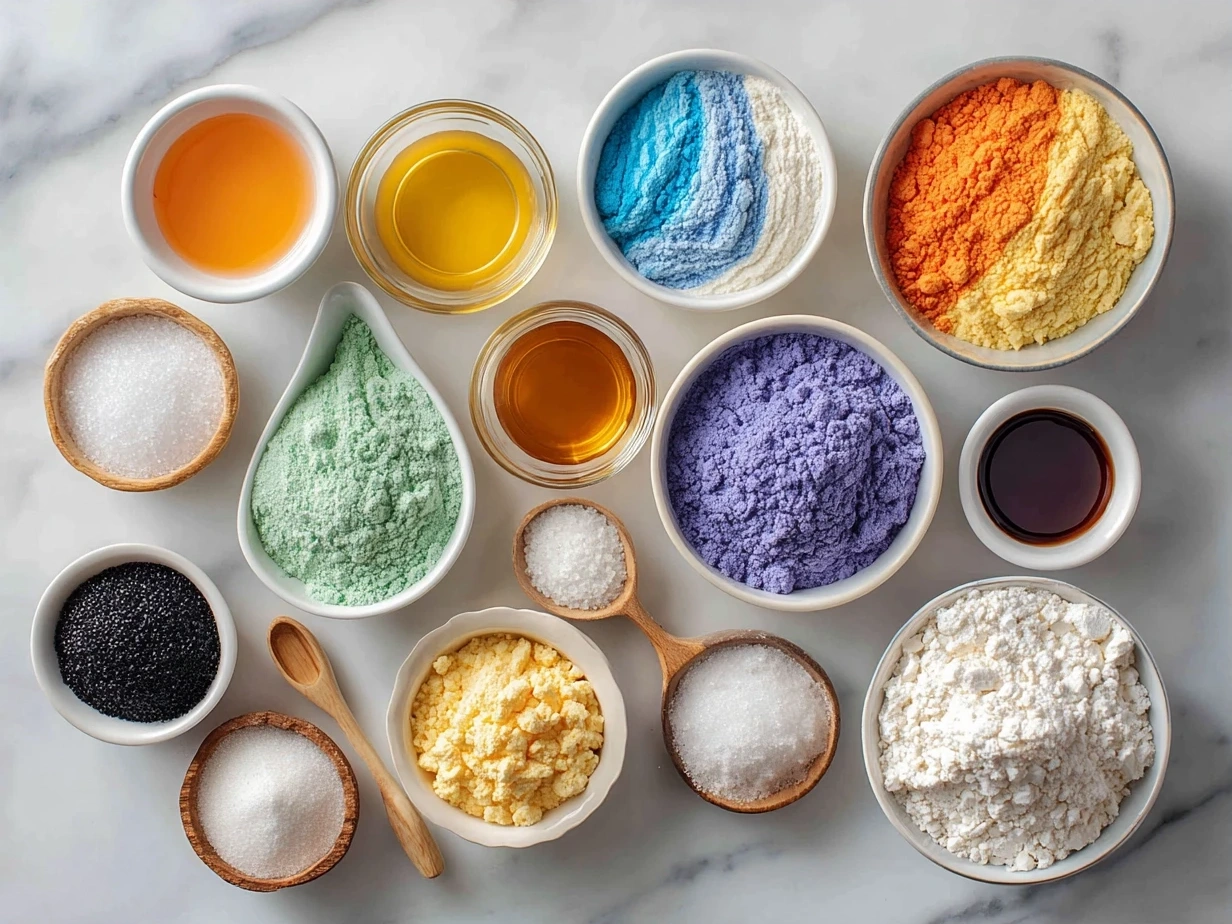
When it comes to making Colorful Marbled Sugar Cookies, choosing your ingredients well makes all the difference in both taste and the vibrant look. I always use real butter for this recipe because it adds that richness and tenderness that margarine or shortening just can’t replicate. And when adding color, I lean towards gel food coloring—it’s perfect for getting those deep hues without messing up the dough’s consistency. Let me walk you through the exact ingredients you’ll want for this recipe:
- 2 1/2 cups all-purpose flour (make sure it’s fresh for the fluffiest texture)
- 1/2 teaspoon baking powder
- 1/4 teaspoon salt
- 3/4 cup unsalted butter, softened
- 1 cup granulated sugar
- 1 large egg
- 1 1/2 teaspoons pure vanilla extract
- Gel food coloring — choose 3-4 colors you love and plan to swirl in the dough
- Optional: confectioners’ sugar for rolling if desired
When making these Colorful Marbled Sugar Cookies, you can find quality gel food coloring right at most grocery stores or online baking supply shops. A little goes a long way, so be careful not to overuse—your dough will thank you! A kitchen trick I learned early on is to soften your butter just enough so it blends easily but isn’t oily—this helps the dough hold its shape better when marbling. And if you want to prep ahead, mixing dry ingredients and storing them in an airtight container works great; then just add your wet ingredients and colors when ready to bake. Oh, and a quick tip to save money on ingredients: buy flour and sugar in bulk, and you’ll never run out for your many sugar cookie recipes — perfect when making batches of these Colorful Marbled Sugar Cookies around the holidays!
Leftover ingredients like butter and eggs are easy to store in the fridge or freezer, so you always have backup for your cookie cravings. Before you start shaping your cookies, be sure to chill the dough a bit, especially since the color swirls will be easier to work with when the dough is firm. For some inspiration on marbling techniques that can elevate your decorated sugar cookies to wow moments, I stumbled upon this Marbling Technique on Sugar Cookies for Wedding Events, which offers fantastic tips beyond the basics.
Let’s Make This Colorful Marbled Sugar Cookies Together
Alright, friend, now that you have your ingredients ready, let’s jump into making these beautiful Colorful Marbled Sugar Cookies side-by-side. Don’t worry if your first batch isn’t museum-perfect — remember, these are homemade treasures, and the imperfections add character! Here’s how I make and marble the dough:
- Mix dry ingredients: Combine flour, baking powder, and salt in a bowl; whisk together and set aside.
- Cream butter and sugar: Using a stand mixer or hand mixer, cream softened butter and granulated sugar on medium speed until light and fluffy (about 2-3 minutes). This step is key to tender cookies.
- Add egg and vanilla: Beat in the egg and vanilla extract until fully combined.
- Incorporate dry ingredients: Slowly add your flour mixture, mixing on low until just combined—don’t overmix to avoid tough cookies.
- Divide and color the dough: Split your dough evenly into separate bowls (depending on how many colors you want), and add a small drop of gel coloring to each. Stir gently until the color is vibrant and evenly mixed.
- Marble the dough: For how to marble cookie dough, I like to gently combine the different colored dough portions in one bowl or on my work surface, folding and twisting just enough to create swirls—be careful not to overblend, or you’ll lose the pattern.
- Chill: Wrap the marbled dough in plastic wrap and chill for 1-2 hours—this step helps the colors set and makes cutting shapes easier.
- Preheat oven to 350°F and prepare your baking sheets with parchment paper.
- Roll and cut cookies: Lightly flour the surface and roll out the dough to about 1/4 inch thickness. Use cookie cutters to shape your marbled sugar cookies.
- Bake & cool: Bake the cookies for 8-10 minutes or until edges just start to turn golden. They should smell lightly sweet and buttery. Cool on baking racks.
While the Colorful Marbled Sugar Cookies bake, I usually tidy up the kitchen and prepare to make the colorful sugar cookie icing — which adds that delightful finishing touch. A little note from my own kitchen trials: I learned the hard way with Colorful Marbled Sugar Cookies that overbaking makes them dry and crumbly. Keep a close eye, and take them out just before the edges brown fully for that perfect soft bite.
If you want to see some step-by-step marbled cookie techniques in action, check out this helpful guide for Marble colored heart sugar cookie dough recipe, which inspired some of my own tries and errors. After baking, decorate or serve simply — your Colorful Marbled Sugar Cookies will be the star, bursting with those joyful swirls of color!
How I Love to Serve This Colorful Marbled Sugar Cookies
Okay, now that we have these gorgeous Colorful Marbled Sugar Cookies in hand, let me share how my family and I savor them. My kids always get excited when these colorful treats appear, often dunking them in a cold glass of milk or even a cup of hot cocoa on chilly evenings. I find that the sweet swirls pair beautifully with simple, creamy sides like cream cheese frosting or lightly drizzled glazed icing—think of it as a gentle accent that doesn’t overpower the marbled sugar cookie’s vibrant colors.
For casual family snacks or holiday celebrations, I like to plate these alongside warm spiced drinks or a fresh fruit platter. This Colorful Marbled Sugar Cookies is perfect for birthday parties, weekend baking with kids, or even festive cookie exchanges. Presentation-wise, I’ve found that stacking a small tower of these cookies on a decorative plate, wrapped in a clear cellophane bag tied with a pastel ribbon, makes a charming gift that friends always rave about!
If you find yourself with extra Colorful Marbled Sugar Cookies, I have a few fun ideas for you. Crumble leftover cookies over ice cream for an extra crunch or transform them into cookie sandwiches with a dollop of frosting or jam in between. For seasonal variations, adding pumpkin spice or peppermint to the dough creates lovely twists—something I enjoyed trying last fall alongside these pumpkin cinnamon sugar donuts I posted about here. Trust me, these variations keep the cookie excitement fresh throughout the year.
Friends always ask for this Colorful Marbled Sugar Cookies recipe after parties, especially when they see how easy it is to create such decorated sugar cookies bursting with life and flavor. If you want to pair your baking with other colorful favorites, I recommend checking out my full collection of decorated sugar cookie inspiration on Delilita’s sugar cookie recipes page or these charming Valentine Sugar Cookies that share a wonderful colorful elegance too.
Your Colorful Marbled Sugar Cookies Questions Answered
I get so many sweet questions about Colorful Marbled Sugar Cookies from readers, and I love chatting about them like we’re baking neighbors sharing kitchen secrets. Here’s a handful of the most common questions and my honest experiences:
Q1: How do I prevent the colors from turning muddy when marbling dough?
You know what I do when my Colorful Marbled Sugar Cookies start blending too much? I remind myself to fold gently and resist overmixing the colors. Using gel food coloring helps keep colors vivid, and chilling the dough before cutting shapes keeps the marbling from smudging.Q2: Can I use regular liquid food coloring instead of gel?
I tried this once, and the dough got way too sticky. Gel food coloring is concentrated and doesn’t add extra moisture, which is ideal for these marbled cookie techniques. So I definitely recommend sticking to gel for the best results.Q3: How thick should I roll out my dough for these cookies?
For Colorful Marbled Sugar Cookies, I roll about 1/4 inch thick. It gives a good balance between sturdy decorated sugar cookies and softness. Thicker dough can change bake times, so watch closely.Q4: Can these cookies be frozen before or after baking?
Absolutely! I freeze the dough wrapped tightly, then thaw it before rolling and cutting. You can also freeze baked cookies in airtight containers. It keeps them fresh and ready for last-minute treats.Q5: What’s your secret for colorful sugar cookie icing that complements these cookies?
I keep my icing smooth and slightly runny, adding gel colors just as I do for the dough. A good powdered sugar base with a splash of milk or lemon juice works wonders.Q6: How do I keep decorated sugar cookies looking fresh for days?
Storing in an airtight container at room temperature works best. Avoid stacking if the icing is wet—use parchment sheets to separate. This keeps your Colorful Marbled Sugar Cookies looking delightful for visits.Q7: Any quick fixes if the dough feels too soft or sticky?
Add a tablespoon of flour at a time and chill for 15-20 minutes. This helps the dough firm up without losing the marbled effect.
For even more tips on marbled cookie techniques and icing ideas, this Marbling Technique on Sugar Cookies for Wedding Events is a gem. And if you want to browse through other readers’ questions and inspirations, jump over to my sugar cookie recipes page here on Delilita. I’m always thrilled to see how everyone puts their spin on these colorful treats!
My Final Thoughts on This Colorful Marbled Sugar Cookies
If you’ve stuck with me this far, thank you! This Colorful Marbled Sugar Cookies recipe genuinely holds a special place in my heart because it’s more than just a cookie—it’s about those moments spent swirling colors, baking side-by-side with loved ones, and sharing sweetness in every bite. The joyful marbled cookie techniques bring a playful magic to traditional sugar cookie recipes, making them perfect for both busy days and celebrations.
Colorful Marbled Sugar Cookies pro tips:
- Chill the dough before cutting to maintain vibrant swirls and easy handling.
- Use gel food coloring sparingly—too much can affect dough texture.
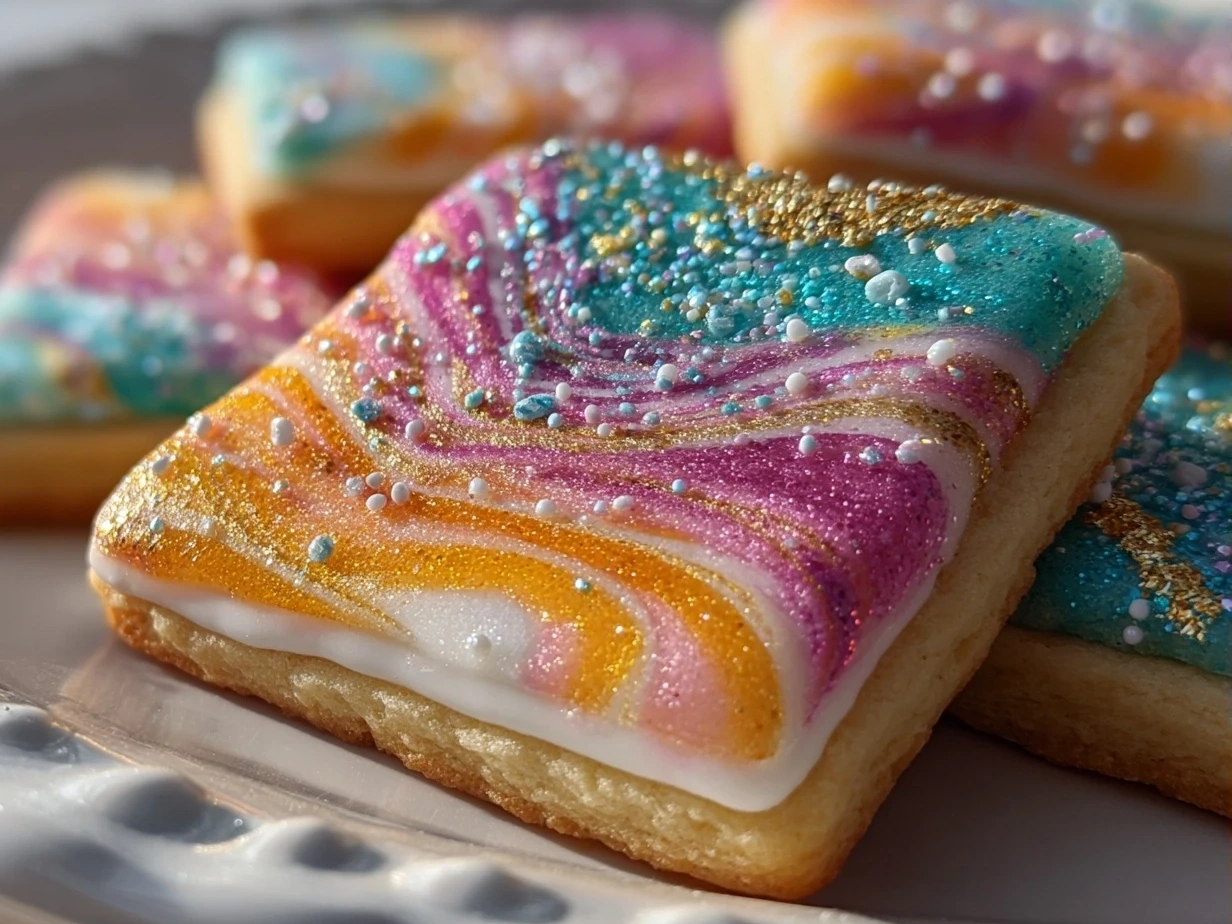
- Finish with simple colorful sugar cookie icing washes to really make the colors pop.
Over the years, my family has enjoyed countless variations: adding citrus zest to brighten flavors, peppering in holiday spices for festive versions, or even swirling in edible glitter for extra sparkle. My youngest loves the pink and purple marbled version, while my husband leans toward the classic red and blue combo. It’s fun to make the recipe your own, mixing colors and tweaks that make your family smile.
If you’re looking for more ideas to keep your cookie game fresh, be sure to check out my other sugar cookie recipes and decorated sugar cookies on Delilita, like the ever-charming Valentine Sugar Cookies. I also think you’ll have a blast with this pumpkin cinnamon sugar donuts recipe for a cozy twist.
I hope your time making these Colorful Marbled Sugar Cookies is filled with joy, little kitchen triumphs, and plenty of laughter. Whether you’re baking for family, friends, or just to treat yourself, these cookies are a reminder that sharing sweetness colors life in the brightest ways. Thanks for baking along with me — now, go have some fun swirling those colors, and trust me, your Colorful Marbled Sugar Cookies will be as stunning as they are delicious!
Colorful Marbled Sugar Cookies

Delight in these vibrant colorful marbled sugar cookies that combine a soft, buttery texture with a visually stunning swirl of hues, perfect for any festive occasion.
- Prep Time: 15 minutes
- Cook Time: 12 minutes
- Total Time: 27 minutes
- Yield: 24 cookies
- Category: Dessert
- Method: Baked
- Cuisine: American
Ingredients
- 2 ¾ cups all-purpose flour
- 1 teaspoon baking soda
- ½ teaspoon baking powder
- 1 cup unsalted butter, softened
- 1 ½ cups granulated sugar
- 1 egg
- 1 teaspoon vanilla extract
- ¼ cup sour cream
- Food coloring gels (various colors)
- Optional: sprinkles for decoration
Instructions
- Preheat the oven to 350°F (175°C) and line baking sheets with parchment paper.
- In a medium bowl, whisk together the flour, baking soda, and baking powder; set aside.
- In a large bowl, cream together the softened butter and sugar until light and fluffy.
- Beat in the egg, vanilla extract, and sour cream until fully combined.
- Gradually add the dry ingredients to the wet mixture, mixing until just incorporated.
- Divide the dough evenly into separate bowls, depending on how many colors you want to use.
- Add several drops of different food coloring gels to each bowl and gently fold until the dough is evenly colored.
- On a clean surface, combine small portions of each colored dough by gently pressing and twisting to create a marbled effect; avoid overmixing to keep the colors distinct.
- Roll the marbled dough into 1-inch balls and place them on the prepared baking sheets about 2 inches apart.
- Optionally, sprinkle cookies with decorative sprinkles.
- Bake for 10-12 minutes or until the edges are lightly golden.
- Allow cookies to cool on the baking sheet for 5 minutes before transferring to a wire rack to cool completely.
Notes
For an extra festive touch, drizzle the cooled cookies with white chocolate or add edible glitter on top before serving.