
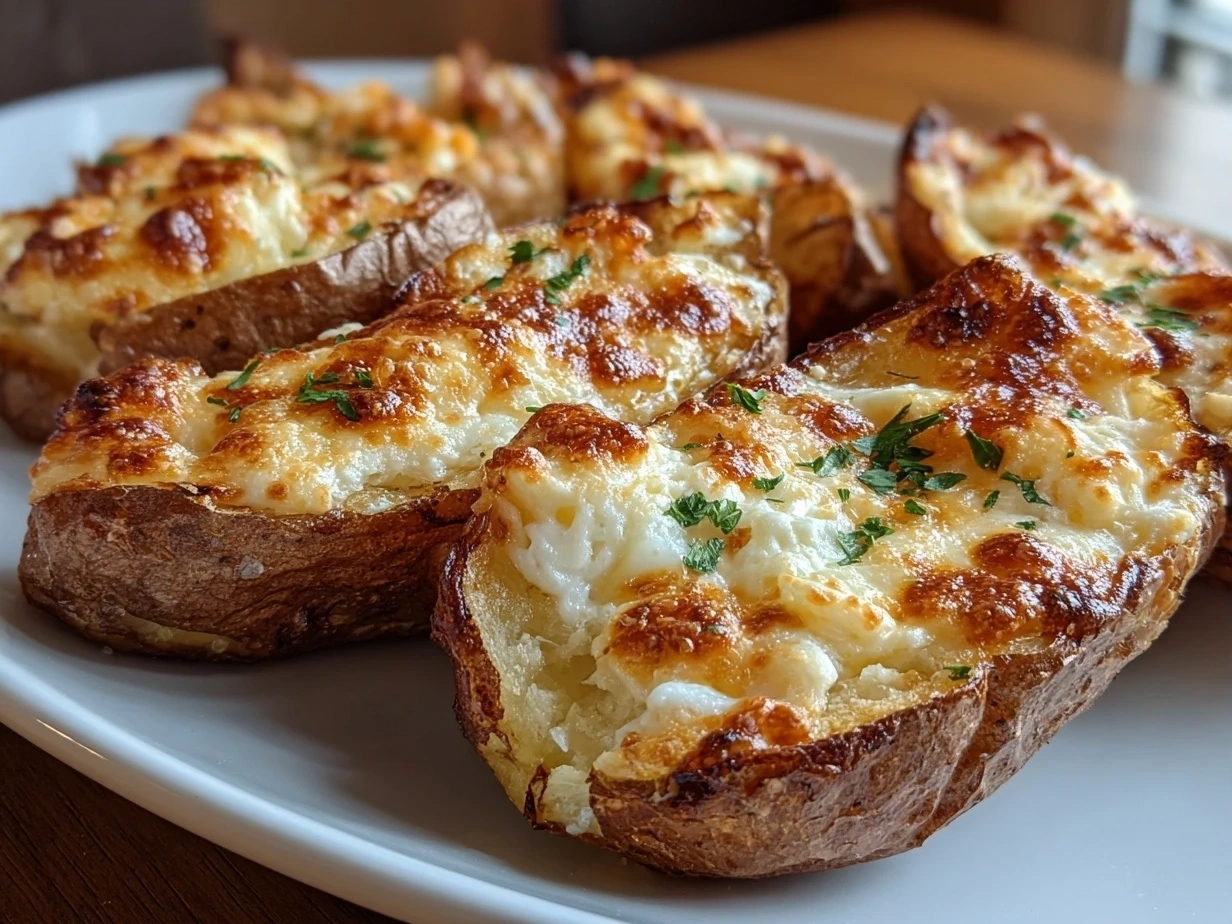
Alright, come on in, grab a cup of coffee, and let’s chat! Today, we’re diving headfirst into a family favorite, a total crowd-pleaser, and something I can whip up even on the craziest weeknights: Cheesy Potato Skins!
I remember the first time I made Cheesy Potato Skins for a potluck. I was so nervous! I envisioned these perfect, crispy shells overflowing with cheese and toppings, but reality hit hard. The first batch came out… well, let’s just say they were less “crispy” and more “soggy disaster.” The cheese was burnt, the potatoes were undercooked, and I nearly threw in the towel. But, being the stubborn cook I am, I refused to give up. I tweaked, I tested, and after a few more trials (and a few choice words muttered under my breath), I finally nailed it. And now? These Cheesy Potato Skins are requested at every party, game night, and even just a regular Tuesday!
What I love most about this Cheesy Potato Skins recipe is how versatile it is. You can really customize it to your family’s tastes. My daughter, Sofia, loves hers with extra bacon (because, bacon!), while my husband, Marco, prefers a little kick with some jalapeños. It’s a meal everyone can agree on, and that’s a win in my book. Plus, it’s such a great way to use up leftover baked potatoes. It’s all about reducing food waste in my kitchen.
Perfecting these Cheesy Potato Skins wasn’t just about the recipe, though. It was about learning the tricks of the trade – like how to properly scoop out the potato without tearing the skin, and the importance of baking them twice to get that perfect crispy texture. I even experimented with different types of cheeses to see which melted the best (spoiler alert: a blend of cheddar and Monterey Jack is the winner!). Now, when I smell that cheesy, potato-y aroma wafting from the oven, I know I’m about to create something special for my family. It’s a sensory overload of pure comfort food, a smell that speaks of family, warmth, and happy memories.
In my busy life as a working mom, I always need easy, quick recipes. Cheesy Potato Skins are a lifesaver! They come together quickly, and they’re always a hit, which is a huge bonus. I first perfected this recipe about ten years ago when I was just starting out as a mom and felt like I was drowning in diapers and sleep deprivation. Having something simple and satisfying that everyone loved was a godsend. My cooking philosophy is simple: make delicious food that nourishes the body and soul, and don’t be afraid to experiment. Now, come on, let’s get cooking! You’ll be amazed at how simple it is to make these at home. You can do it, I promise!
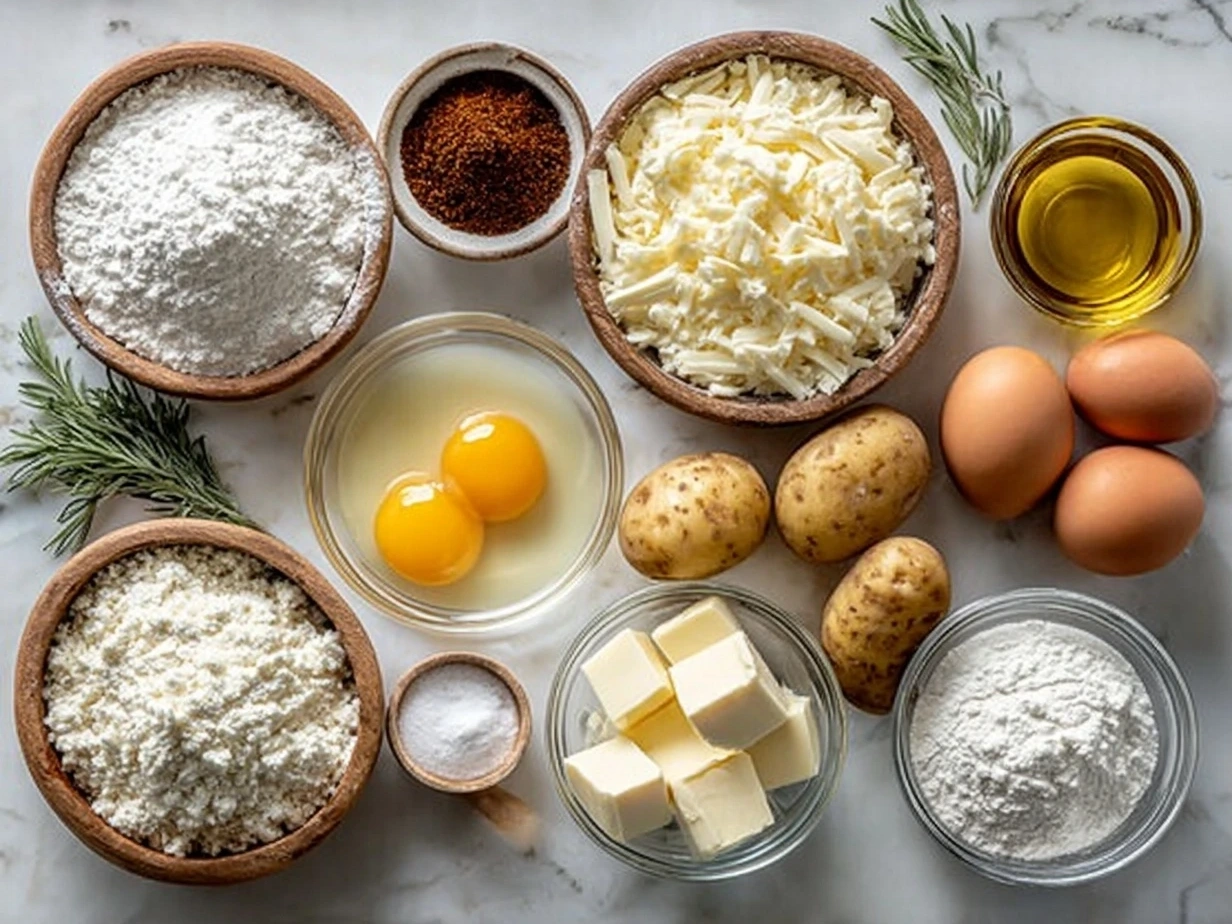
What You’ll Need for This Cheesy Potato Skins
Alright, let’s gather our ingredients! Here’s what you’ll need to make these amazing Cheesy Potato Skins.
- 4 large russet potatoes: These are the best for Cheesy Potato Skins because they have a thick skin that crisps up nicely.
- 2 tablespoons olive oil: I always use extra virgin olive oil for my Cheesy Potato Skins. It adds a lovely flavor and helps the skins get nice and golden brown.
- 1 teaspoon salt: We need salt to season those potatoes!
- ½ teaspoon black pepper: Freshly ground black pepper adds a nice bit of spice to the Cheesy Potato Skins.
- 1 cup shredded cheddar cheese: I prefer sharp cheddar, but you can use your favorite. When making Cheesy Potato Skins, you can find a good quality cheddar at most grocery stores.
- ½ cup shredded Monterey Jack cheese: This adds a creamy, melty element to the Cheesy Potato Skins.
- ½ cup cooked and crumbled bacon: Because everything is better with bacon, right?
- ¼ cup sour cream: A dollop of sour cream adds a cool, tangy contrast to the richness of the Cheesy Potato Skins.
- ¼ cup chopped green onions: These add a fresh, vibrant flavor and a pop of color.
- Optional: Jalapeños: If you want to add a little heat, feel free to include some diced jalapeños.
Here’s a Cheesy Potato Skins trick I learned: Prick the potatoes all over with a fork before baking. This allows steam to escape and prevents them from exploding in the oven. Trust me, I’ve been there! For busy families, you can even bake the potatoes ahead of time and store them in the fridge until you’re ready to assemble the loaded potato skins.
As for cost-saving tips, keep an eye out for sales on potatoes and cheese. Bacon can be a bit pricey, so you can always substitute with bacon bits if you’re on a budget. For storing leftover Cheesy Potato Skins ingredients, keep the cheese and bacon in separate airtight containers in the fridge. The green onions should also be stored in the fridge, wrapped in a damp paper towel. And speaking of potatoes, if you have leftover baked potatoes, consider trying this Cheesy Hamburger Potato Soup.
Let’s Make This Cheesy Potato Skins Together
Okay, are you ready to get started? Let’s make these Cheesy Potato Skins together! Don’t worry if this is your first time; I’ll guide you through every step.
- Preheat your oven to 400°F (200°C). While the oven is heating, wash the potatoes thoroughly and pat them dry.
- Prick each potato several times with a fork. As I mentioned before, this prevents explosions! Now, rub each potato with olive oil, then sprinkle with salt and pepper.
- Bake the potatoes for 45-60 minutes, or until they are easily pierced with a fork. In my kitchen, Cheesy Potato Skins usually takes around 50 minutes, but every oven is different.
- Remove the potatoes from the oven and let them cool slightly. Once they are cool enough to handle, cut them in half lengthwise.
- Carefully scoop out the potato flesh, leaving about ¼ inch of potato attached to the skin. Don’t worry if your Cheesy Potato Skins skins tear a little; we can patch them up later with cheese! Save the scooped-out potato for another use – mashed potatoes, potato salad, or even as a thickener for soup.
- Brush the inside and outside of each potato skin with olive oil and sprinkle with a little more salt and pepper. I learned the hard way with Cheesy Potato Skins that this step is crucial for achieving maximum crispiness.
- Place the potato skins on a baking sheet, skin-side down.
- Bake for 10-15 minutes, or until the skins are crispy and golden brown. While the Cheesy Potato Skins is cooking, I usually tidy up the kitchen or start prepping the toppings.
- Remove the potato skins from the oven and flip them over.
- Fill each potato skin with cheddar cheese, Monterey Jack cheese, and bacon. Don’t be shy with the cheese!
- Return the homemade potato skins to the oven and bake for another 5-10 minutes, or until the cheese is melted and bubbly. Your Cheesy Potato Skins should smell like cheesy, bacony goodness!
- Remove the baked potato skins from the oven and let them cool slightly.
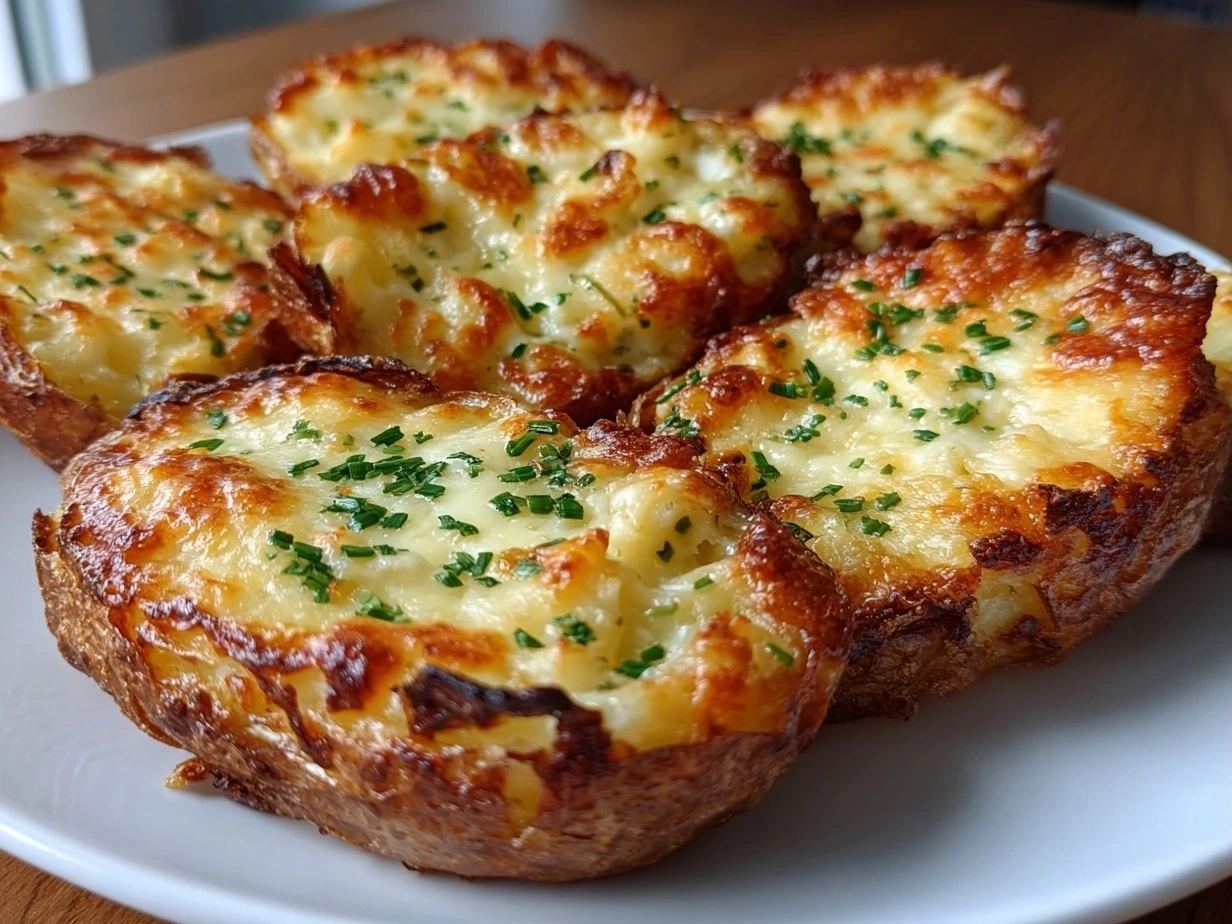
- Top with sour cream and green onions. Serve immediately and enjoy your delicious Cheesy Potato Skins!
Remember, there’s no need to stress if things don’t go perfectly the first time. Cooking is all about experimentation and learning from your mistakes. Just have fun and enjoy the process! Crispy Loaded Potato Skins – The Night Owl Chef offer great tips for achieving the perfect crisp. And if you love this method, this Cheesy Au Gratin Potatoes Recipe is next-level delicious as well!
How I Love to Serve This Cheesy Potato Skins
Now that we’ve made these delicious Cheesy Potato Skins, let’s talk about how to serve them! My family loves this Cheesy Potato Skins when I make a big platter of them for game night. It’s the perfect finger food for watching movies or cheering on our favorite sports team.
One of my go-to side dishes that pair with Cheesy Potato Skins is a simple green salad. The crisp lettuce and light vinaigrette provide a refreshing contrast to the richness of the Cheesy Potato Skins. I also love serving them with a side of chili or soup during the colder months.
These Cheesy Potato Skins are perfect for potlucks, parties, and even as a fun appetizer for a casual dinner. I love to arrange them on a platter with a variety of toppings, like sour cream, salsa, guacamole, and extra cheese. It’s a great way to let everyone customize their own Cheesy Potato Skins.
For presentation tips, try arranging the Cheesy Potato Skins in a circular pattern on a platter, with the toppings in the center. This makes it easy for everyone to grab a Cheesy Potato Skin and add their favorite toppings.
If you have extra Cheesy Potato Skins, they can be stored in the fridge for up to 3 days. Simply reheat them in the oven or microwave until heated through. You can even freeze them for longer storage. Just wrap them individually in plastic wrap and then place them in a freezer bag.
For seasonal Cheesy Potato Skins variations, try adding roasted butternut squash and sage during the fall, or grilled corn and black beans during the summer.
Friends always ask for this Cheesy Potato Skins recipe, especially after they try them with my homemade guacamole. They’re always impressed by how easy they are to make and how delicious they taste. I’ve even had people tell me that my Cheesy Potato Skins are better than the ones they get at restaurants! Homemade Loaded Potato Skins (Easy!) has some great topping ideas too!
Your Cheesy Potato Skins Questions Answered
Alright, let’s tackle some common questions I get about making Cheesy Potato Skins. I’ve been there, made those mistakes, and learned from them, so hopefully, my experiences can help you!
A: Ah, the dreaded soggy potato skin! You know what I do when my Cheesy Potato Skins are threatening to go soggy? The key is to bake them twice. First, bake the whole potatoes until they’re cooked through. Then, after scooping out the flesh, brush the skins with olive oil and bake them again until they’re crispy. Make sure you also don’t overload them with too many wet toppings.
A: While russet potatoes are my go-to for Cheesy Potato Skins because of their thick skin, you can definitely experiment with other varieties. Yukon Gold potatoes have a creamy texture and thin skin, but they might not get as crispy. Red potatoes are another option, but they tend to be smaller, so you’ll need more of them.
A: You know what I do when my cheese isn’t melting right on my Cheesy Potato Skins? A blend of cheddar and Monterey Jack is my favorite for Cheesy Potato Skins. Cheddar has a sharp flavor, while Monterey Jack is mild and creamy. Other good options include mozzarella, Colby Jack, and pepper jack.
A: Absolutely! You can bake the potatoes and scoop out the flesh ahead of time. Then, store the potato skins in the fridge until you’re ready to assemble and bake them with the toppings. I often do this when I’m short on time.
A: No bacon? No problem! You can substitute with cooked sausage, ham, or even veggie bacon. Or, you can simply leave it out altogether. The Cheesy Potato Skins will still be delicious! My family actually prefers the sausage version sometimes.
A: Don’t panic! It happens to the best of us. You can patch up the tears with a little bit of cheese. Just press the cheese into the tear and bake as usual. No one will ever know!
A: Yes, you can freeze Cheesy Potato Skins. Bake them completely, then let them cool. Wrap each one individually in plastic wrap and then place them in a freezer bag. When you’re ready to eat them, thaw them in the fridge and reheat in the oven. I’ve gotten great feedback about this freezing method from my blog readers, too.
My Final Thoughts on This Cheesy Potato Skins
So, there you have it – my go-to recipe for Cheesy Potato Skins. This recipe holds a special place in my heart because it’s a reminder of all the fun times I’ve had cooking with my family and friends. I hope it brings you as much joy as it has brought me.
- Don’t overcrowd the baking sheet: Give the potato skins plenty of room so they can crisp up properly.
- Use a good quality cheese: The better the cheese, the better the flavor!
- Don’t be afraid to experiment with toppings: Get creative and try different combinations of flavors.
- Buffalo Chicken Cheesy Potato Skins: Top with shredded chicken, buffalo sauce, and blue cheese crumbles.
- Pizza Cheesy Potato Skins: Top with marinara sauce, mozzarella cheese, and pepperoni.
- BBQ Pulled Pork Cheesy Potato Skins: Top with BBQ pulled pork, coleslaw, and cheddar cheese.
My daughter, Sofia, loves the pizza version, while my husband, Marco, is a big fan of the buffalo chicken Cheesy Potato Skins.
I hope you’ll give this Cheesy Potato Skins recipe a try and make it your own. Add your favorite toppings, experiment with different cheeses, and most importantly, have fun in the kitchen! Don’t be afraid to tweak things to your liking; cooking is all about creativity! Remember those soggy potato skins I made that first time? Learning from those mistakes made me the cook I am today, and hopefully, I’ve saved you some of those same struggles.
I truly hope you love these Cheesy Potato Skins as much as my family does. This Sausage Sweet Potato Kale Soup is another great option for a comforting, flavorful dish. Happy cooking!
\n \n Print
Cheesy Potato Skins
These cheesy potato skins are the perfect appetizer or game-day snack! Crispy on the outside and loaded with melted cheese, bacon, and sour cream, they’re sure to be a crowd-pleaser.
- Prep Time: 15 minutes
- Cook Time: 55 minutes
- Total Time: 70 minutes
- Yield: 8 servings
- Category: Appetizer
- Method: Baked
- Cuisine: American
Ingredients
- 4 large russet potatoes
- 2 tablespoons olive oil
- 1/2 teaspoon salt
- 1/4 teaspoon black pepper
- 1 cup shredded cheddar cheese
- 1/2 cup cooked and crumbled bacon
- 1/4 cup sour cream
- 2 tablespoons chopped green onions
Instructions
- Preheat oven to 400°F (200°C).
- Scrub potatoes and pierce each several times with a fork.
- Rub potatoes with olive oil, salt, and pepper.
- Bake for 45-60 minutes, or until potatoes are tender.
- Let potatoes cool slightly. Cut each potato in half lengthwise.
- Scoop out the potato flesh, leaving a 1/4-inch border. Save the potato flesh for another use (e.g., mashed potatoes).
- Place potato skins on a baking sheet.
- Sprinkle each potato skin with cheddar cheese and bacon.
- Bake for 5-10 minutes, or until cheese is melted and bubbly.
- Top with sour cream and green onions before serving.
Notes
For extra flavor, add a sprinkle of garlic powder or onion powder to the potato skins before baking. Serve with your favorite dipping sauce.