
Oh, hello there! Come on in, grab a cup of coffee – I just brewed a fresh pot. Today, we’re diving headfirst into a decadent dream: my family’s absolute favorite, the one and only, Triple Chocolate Pie. Just the name makes my mouth water! I remember the first time I made this pie. I was attempting to impress my mother-in-law, and let’s just say, things got a little… melty. I didn’t let the chocolate cool enough before adding it to the crust, and it turned into a chocolate soup situation! But hey, we all have our kitchen mishaps, right? The taste was still incredible, though, and from that day on, I was determined to perfect my Triple Chocolate Pie recipe.
Now, this isn’t just any chocolate pie recipe; it’s a labor of love, a symphony of rich, creamy, intensely chocolatey goodness. This Triple Chocolate Pie is the perfect dessert for holidays, special occasions, or honestly, a Tuesday night when you just need a little (or a lot) of chocolate in your life. Life gets hectic, especially with the kids, but knowing I can whip up this showstopper of a Triple Chocolate Pie always makes me feel like I’ve got something special up my sleeve. It became my go-to dessert for potlucks, birthday parties, and any family gathering where I wanted to bring a smile to everyone’s face. After lots of tweaking and taste-testing, I finally landed on the perfect combination of flavors and textures. So, pull up a chair, and let’s get baking! I promise, even if you’ve never made a pie before, I’ll guide you through every step. Ready to create a Triple Chocolate Pie that will have everyone begging for seconds? Let’s get started! This reminds me of the first time I tried making caramel – so many lessons learned! You know what? If you like caramel you should try my Caramel Apple Slices with Chocolate Drizzle.
What You’ll Need for This Triple Chocolate Pie
Alright, before we get our aprons on, let’s gather all the ingredients. Trust me, having everything ready beforehand makes the whole process smoother. And who doesn’t love a smooth baking experience? This is what you will need for this Triple Chocolate Pie.
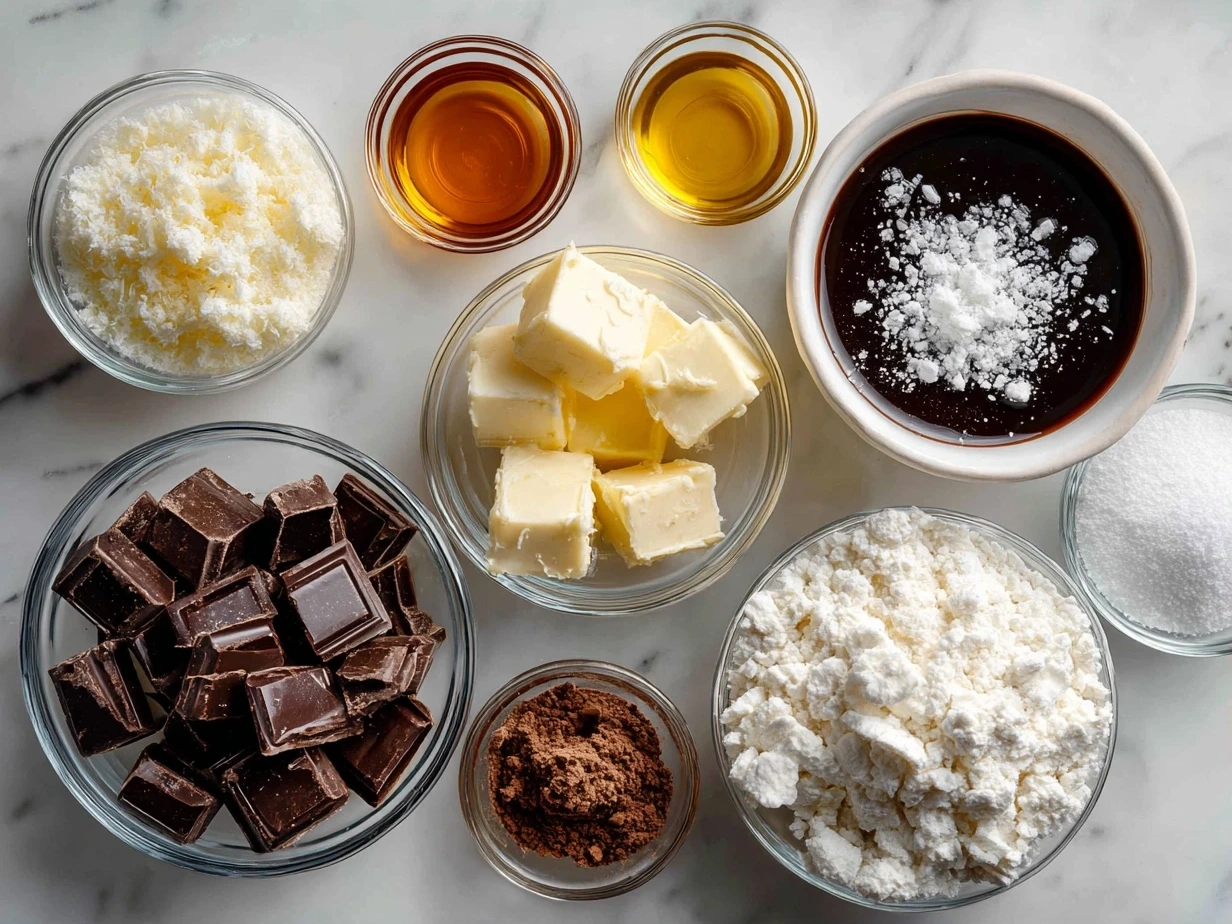
- 1 pre-made graham cracker crust (9-inch): Now, I know some people are all about making their own crust, and I admire that! But for a quick and easy chocolate pie, a pre-made crust works wonders. I always get mine from the local grocery store; they’re surprisingly good! If you’re feeling adventurous, you can try a chocolate cookie crust for an even richer flavor.
- 8 ounces bittersweet chocolate: I always use a good quality bittersweet chocolate (around 70% cacao) for the base of my Triple Chocolate Pie. It adds that deep, intense chocolate flavor that I just love. You can find it in the baking aisle of most grocery stores. If you prefer a sweeter pie, you can use semi-sweet chocolate instead.
- 8 ounces milk chocolate: For the milk chocolate layer, I usually go with a standard milk chocolate bar. It adds a lovely creamy sweetness to the Triple Chocolate Pie. Just make sure it’s a brand you enjoy eating on its own!
- 4 ounces white chocolate: This is where the “triple” comes in! The white chocolate adds a beautiful contrast in flavor and color to the Triple Chocolate Pie. I prefer using white chocolate baking bars, as they tend to melt more smoothly than white chocolate chips.
- 1 ½ cups heavy cream: Heavy cream is essential for that silky smooth texture. Don’t skimp on this! I always use the highest fat content I can find.
- ¼ cup granulated sugar: A little sugar helps balance the bitterness of the dark chocolate and enhances the overall sweetness.
- 2 tablespoons unsalted butter: This adds richness and shine to the chocolate filling. I always use unsalted butter so I can control the amount of salt in the pie.
- 1 teaspoon vanilla extract: A touch of vanilla enhances all the chocolate flavors. I always use pure vanilla extract; it makes a difference!
- Pinch of salt: Salt helps balance the sweetness and brings out the chocolate flavor.
- Optional toppings: Whipped cream, chocolate shavings, fresh berries – get creative!
Let’s Make This Triple Chocolate Pie Together
- Melt the bittersweet chocolate: In a heatproof bowl set over a simmering pot of water (or in a double boiler), melt the bittersweet chocolate, butter, and ¼ cup of heavy cream together. Stir occasionally until smooth and glossy. Be careful not to let any water get into the chocolate, or it will seize up!
- Pour into the crust: Pour the melted bittersweet chocolate mixture into the prepared graham cracker crust. Spread evenly and refrigerate for at least 30 minutes to allow it to set. This will give you a nice, solid base for the next layer. I learned the hard way with Triple Chocolate Pie that rushing this step leads to a messy pie!
- Melt the milk chocolate: In a clean heatproof bowl, melt the milk chocolate with another ¼ cup of heavy cream. Stir until smooth.
- Pour over the bittersweet layer: Once the bittersweet layer is set, gently pour the melted milk chocolate mixture over it. Spread evenly and refrigerate for another 30 minutes. I usually use this time to clean up the kitchen a bit.
- Melt the white chocolate: In a third clean heatproof bowl, melt the white chocolate with the remaining 1 cup of heavy cream, sugar, vanilla extract, and a pinch of salt. Stir until smooth and creamy. The salt really helps balance the sweetness of the white chocolate.
- Pour over the milk chocolate layer: Once the milk chocolate layer is set, pour the melted white chocolate mixture over it. Spread evenly and refrigerate for at least 2 hours, or preferably overnight. This allows all the layers to set properly and the flavors to meld together beautifully.
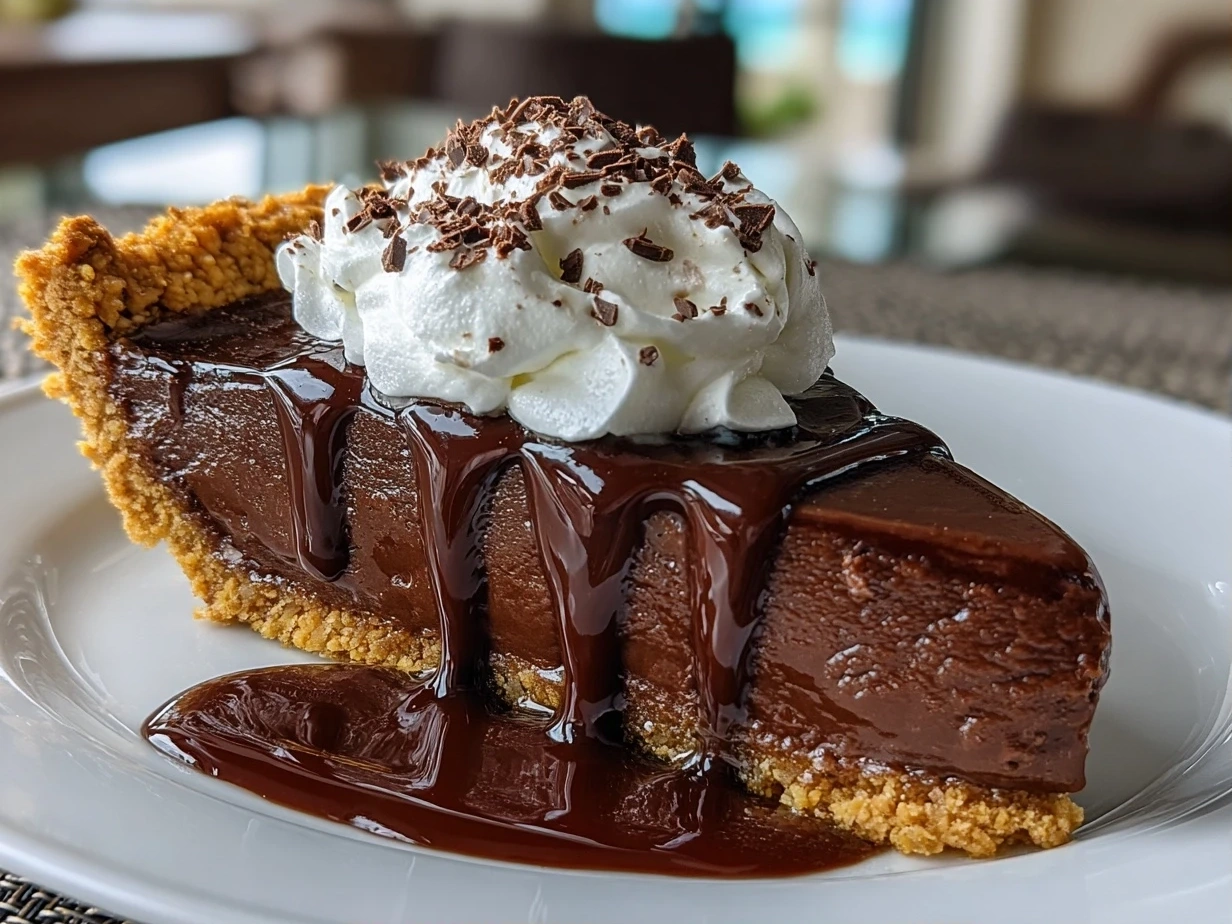
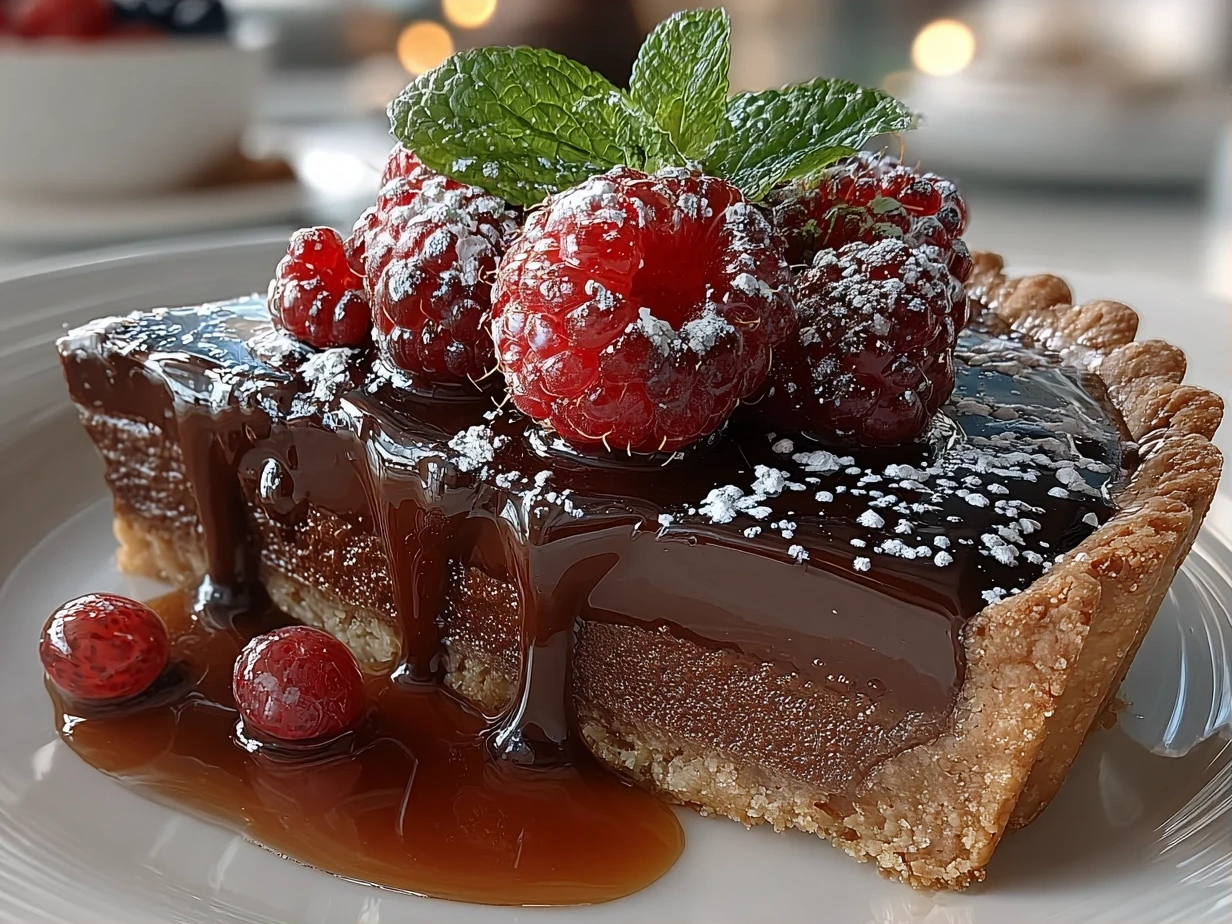
- Garnish and serve: Before serving, garnish the Triple Chocolate Pie with whipped cream, chocolate shavings, fresh berries, or whatever your heart desires! Slice and enjoy this Dark Chocolate Pie!
How I Love to Serve This Triple Chocolate Pie
Your Triple Chocolate Pie Questions Answered
- “My chocolate seized up when I was melting it. What did I do wrong?” Oh, we’ve all been there! Seized chocolate is the bane of every baker’s existence. The most common cause is moisture. Make sure your bowls and utensils are completely dry before you start melting the chocolate. Also, avoid overheating the chocolate. Melt it slowly and gently over low heat, stirring frequently. If your chocolate does seize up, try adding a teaspoon of vegetable oil or shortening and stirring vigorously. It might help loosen it up.
- “Can I use chocolate chips instead of baking bars?” You can, but I don’t recommend it. Chocolate chips contain stabilizers that prevent them from melting as smoothly as baking bars. This can result in a grainy or lumpy filling. If you must use chocolate chips, add a tablespoon of shortening or butter to help them melt more smoothly.
- “My crust got soggy. How can I prevent that?” A soggy crust is no fun! To prevent a soggy crust, you can pre-bake the crust for a few minutes before adding the filling. This will help it crisp up and create a barrier against the moisture. You can also brush the bottom of the crust with melted chocolate or butter before adding the filling. This will create a waterproof layer.
- “Can I make this pie ahead of time?” Absolutely! This Easy Chocolate Pie is actually better when made ahead of time. It allows the flavors to meld together and the layers to set properly. You can make it up to 2 days in advance and store it in the refrigerator. Just be sure to cover it tightly to prevent it from drying out.
- “Can I freeze this pie?” Yes, you can freeze this Triple Chocolate Pie, but the texture may change slightly. The chocolate can become a bit grainy after thawing. To freeze it, wrap it tightly in plastic wrap and then in aluminum foil. Freeze for up to 2 months. Thaw it in the refrigerator overnight before serving.
- “Can I use a different type of crust?” Of course! If you’re not a fan of graham cracker crust, you can use a chocolate cookie crust, an Oreo crust, or even a pastry crust. Just be sure to adjust the baking time accordingly. My family prefers the graham cracker crust.
- “My white chocolate layer is too sweet. How can I balance the sweetness?” White chocolate can be very sweet, so it’s important to balance it with other flavors. That’s why I add a pinch of salt to the white chocolate layer. You can also add a tablespoon of lemon juice or orange zest to cut through the sweetness.
- “What can I use to top this pie?” The sky’s the limit! Whipped cream, chocolate shavings, fresh berries, chopped nuts, caramel sauce – the possibilities are endless. Get creative and use whatever you have on hand!
My Final Thoughts on This Triple Chocolate Pie
- Use high-quality chocolate: The better the chocolate, the better the pie.
- Don’t overbake the crust: A slightly underbaked crust is better than a burnt one.
- Be patient: Allow each layer to set properly before adding the next.
\n \n Print
Triple Chocolate Pie
Indulge in the ultimate chocolate experience with this Triple Chocolate Pie. A rich chocolate crust, creamy chocolate filling, and decadent chocolate ganache topping create a dessert that’s perfect for any chocolate lover.
- Prep Time: 30 minutes
- Cook Time: 35 minutes
- Total Time: 65 minutes
- Yield: 8 servings
- Category: Dessert
- Method: Baked
- Cuisine: American
Ingredients
- For the Crust:
- 1 ½ cups chocolate cookie crumbs
- 5 tablespoons unsalted butter, melted
- 2 tablespoons granulated sugar
- For the Filling:
- 12 ounces semi-sweet chocolate, chopped
- 1 cup heavy cream
- 4 large egg yolks
- ¼ cup granulated sugar
- 1 teaspoon vanilla extract
- Pinch of salt
- For the Ganache Topping:
- 4 ounces milk chocolate, chopped
- ½ cup heavy cream
- 1 tablespoon butter
Instructions
- Make the Crust: Preheat oven to 350°F (175°C). In a medium bowl, combine chocolate cookie crumbs, melted butter, and sugar. Press into the bottom and up the sides of a 9-inch pie plate.
- Bake for 10-12 minutes, or until set. Let cool completely.
- Make the Filling: Place chopped semi-sweet chocolate in a heatproof bowl.
- In a saucepan, heat heavy cream, sugar, and salt over medium heat until simmering.
- Pour hot cream mixture over the chocolate and let stand for 1 minute. Whisk until smooth.
- Whisk in egg yolks and vanilla extract until well combined.
- Pour the chocolate filling into the cooled crust.
- Bake: Bake for 20-25 minutes, or until the filling is set but still slightly jiggly in the center.
- Let cool completely at room temperature, then refrigerate for at least 2 hours to set.
- Make the Ganache Topping: Place chopped milk chocolate in a heatproof bowl.
- In a saucepan, heat heavy cream until simmering. Pour over the chocolate and let stand for 1 minute.
- Add butter and whisk until smooth.
- Pour the ganache over the chilled pie and spread evenly.
- Refrigerate for at least 30 minutes to allow the ganache to set.
- Serve chilled.
Notes
For an extra touch, garnish with chocolate shavings or fresh berries before serving.