

Oh, you know how sometimes a smell just transports you? For me, the aroma of baking dough mingling with garlic always takes me right back to my Nonna’s kitchen. She made the most incredible Garlic Bread Rolls; they were always soft, fluffy, and slathered in so much garlicky butter they practically glistened. I remember standing on a stool, trying to help her brush the melted garlic butter on top – and usually making more of a mess than anything else!
Those Garlic Bread Rolls were a staple at every family gathering. Birthdays, holidays, even just a regular Sunday supper – Nonna’s rolls were always there. When I first tried to recreate them myself, let’s just say the results were… less than stellar. My first batch was hard as rocks! I almost gave up, but I was determined to capture that taste of home. It took a few tries (and a lot of burnt garlic!), but eventually, I managed to develop a recipe that even my Nonna would be proud of. Now, these Garlic Bread Rolls are a constant in my own family’s life too!
Life gets busy, doesn’t it? Between school runs, soccer practice, and trying to squeeze in some time for myself, cooking needs to be both delicious and manageable. That’s why I love these rolls so much – they are relatively easy to put together. Plus, the joy on my kids’ faces when they see a basket of warm Garlic Bread Rolls on the table? Priceless. I discovered this recipe after many years of making traditional bread, and decided I wanted something a little different. I am always on the lookout for new ways to give classic recipes a little twist.
My cooking philosophy is all about creating food that nourishes both the body and the soul. I want to share recipes that are accessible, joyful, and, most importantly, shareable. So, grab your apron, and let’s get started! I promise, these Garlic Bread Rolls will be a hit with your family, too. You’ll be surprised at how simple it is to whip up these flavorful rolls!
What You’ll Need for This Garlic Bread Rolls
Okay, friend, let’s talk ingredients. Nothing too fancy here, just good quality basics. These rolls are all about creating that perfect balance of soft bread and intense garlic flavor.
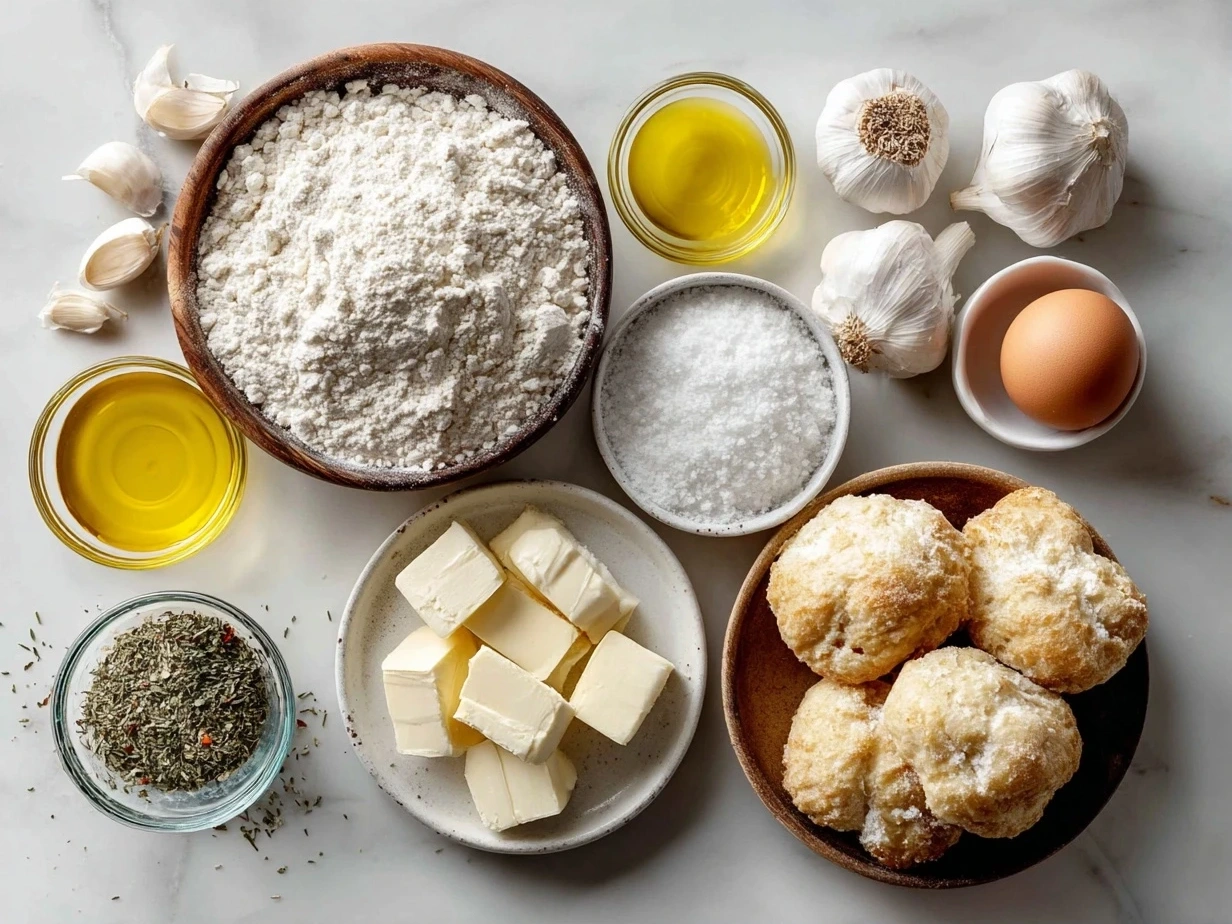
- All-Purpose Flour: 3 ½ cups. I always use unbleached all-purpose flour for my Garlic Bread Rolls. I find it gives the dough a slightly better texture. When making Garlic Bread Rolls, be sure you don’t use self-rising flour, or the rolls will be too fluffy!
- Instant Yeast: 2 ¼ teaspoons (one packet). Make sure it’s fresh! Old yeast will leave you with dense, sad little Garlic Bread Rolls.
- Sugar: 2 tablespoons. Just a touch to help the yeast do its thing.
- Salt: 1 teaspoon. Salt is key to balance the flavors and enhance the yeast.
- Warm Milk: 1 cup. I prefer whole milk for richness, but 2% works just fine. It needs to be warm (around 110°F) to activate the yeast.
- Water: ½ cup. Also, warm.
- Egg: 1 large. It adds moisture and richness.
- Butter: ½ cup (1 stick), melted. I like to use unsalted butter so I can control the saltiness.
- Garlic: 6-8 cloves, minced. Don’t skimp on the garlic! This is what makes these Garlic Bread Rolls so irresistible. When making these Garlic Bread Rolls, you can find pre-minced garlic at the store.
- Fresh Parsley: ¼ cup, chopped. Adds a pop of freshness and color. I always try to have some on hand, but dried parsley works in a pinch, too.
- Olive Oil: 2 tablespoons. This is just to grease the bowl for the dough to rise. Here’s a Garlic Bread Rolls trick I learned: don’t skip this step, or the dough will stick!
Let’s Make This Garlic Bread Rolls Together
- Activate the Yeast: In a large bowl, combine the warm milk, warm water, sugar, and yeast. Let it sit for 5-10 minutes until foamy. This means the yeast is active and ready to go!
- Combine Wet & Dry Ingredients: Add the melted butter and egg to the yeast mixture. Whisk to combine. In a separate bowl, whisk together the flour and salt. Gradually add the dry ingredients to the wet ingredients, mixing until a dough forms. The dough should be slightly sticky.
- Knead the Dough: Turn the dough out onto a lightly floured surface and knead for 5-7 minutes, until smooth and elastic. Don’t worry if your Garlic Bread Rolls dough seems a bit sticky at first; it will come together as you knead it.
- First Rise: Place the dough in a lightly oiled bowl, turning to coat. Cover with plastic wrap or a clean kitchen towel and let rise in a warm place for about 1 hour, or until doubled in size. I learned the hard way with Garlic Bread Rolls that a warm place is key – I once tried to let it rise in a cool kitchen, and it took nearly three hours!
- Prepare the Garlic Butter: While the dough is rising, melt the remaining butter in a small saucepan. Add the minced garlic and cook over low heat for 2-3 minutes, until fragrant. Be careful not to burn the garlic! Stir in the chopped parsley. The smell alone will drive you crazy with anticipation for your Garlic Bread Rolls.
- Shape the Rolls: Punch down the risen dough and turn it out onto a lightly floured surface. Divide the dough into 12 equal pieces. Roll each piece into a rope about 6-8 inches long. Tie each rope into a knot and tuck the ends underneath. Place the Garlic knots on a baking sheet lined with parchment paper.
- Second Rise: Cover the shaped rolls with plastic wrap or a clean kitchen towel and let rise for another 30 minutes. This is important for that light and airy texture.
- Bake: Preheat your oven to 375°F (190°C). Brush the Garlic herb rolls with the garlic butter mixture. Bake for 15-20 minutes, or until golden brown. In my kitchen, Garlic Bread Rolls usually take about 18 minutes to get that perfect golden color.
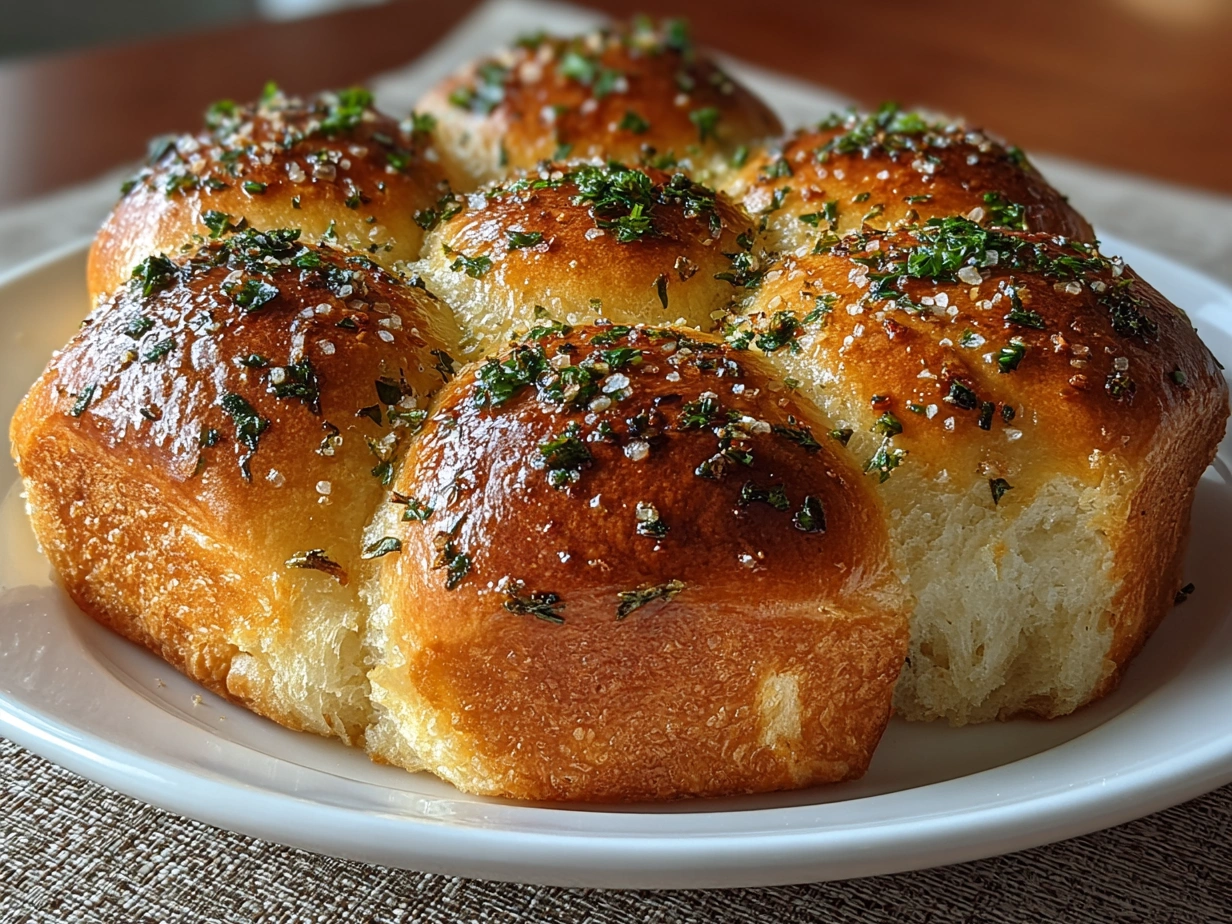
- Cool & Serve: Let the rolls cool on a wire rack for a few minutes before serving. Brush with any remaining garlic butter. Your Garlic Bread Rolls should smell like heaven!
How I Love to Serve This Garlic Bread Rolls
- Roasted Garlic Potato Soup: The creamy soup combined with the Garlic Bread Rolls is pure comfort food. You can find my recipe here: https://delilita.com/roasted-garlic-potato-soup
- Simple Green Salad: A light and refreshing salad balances the richness of the rolls.
- Italian Wedding Soup: Warm and hearty, this soup is a perfect match for Garlic Bread Rolls.
- Weeknight Dinners: They’re quick and easy to make, perfect for a busy weeknight.
- Potlucks: They’re always a crowd-pleaser and easy to transport.
- Holiday Gatherings: A basket of warm Garlic Bread Rolls is always a welcome addition to any holiday table.
Your Garlic Bread Rolls Questions Answered
My Final Thoughts on This Garlic Bread Rolls
- Don’t overbake: Overbaked rolls will be dry and hard. Keep a close eye on them in the oven.
- Use good quality butter: The flavor of the butter really shines through in this recipe, so use the best you can find.
- Don’t be afraid of garlic: The more garlic, the better!
- Cheesy Garlic Bread Rolls: Add shredded mozzarella or parmesan cheese to the garlic butter before baking.
- Spicy Garlic Bread Rolls: Add a pinch of red pepper flakes to the garlic butter.
- Garlic Herb Rolls: Add other herbs like rosemary, thyme, or oregano to the garlic butter.
Garlic Bread Rolls
These soft and fluffy garlic bread rolls are perfect as a side dish or a snack. Infused with garlic and herbs, they’re easy to make and irresistible when served warm.
- Prep Time: 15 minutes
- Cook Time: 25 minutes
- Total Time: 40 minutes
- Yield: 12 rolls
- Category: Side Dish
- Method: Baked
- Cuisine: American
Ingredients
- 1 pound bread dough, store-bought or homemade
- 4 tablespoons butter, melted
- 4 cloves garlic, minced
- 2 tablespoons fresh parsley, chopped
- 1 teaspoon dried oregano
- 1/4 teaspoon salt
- 1/4 teaspoon black pepper
- Grated Parmesan cheese, for topping (optional)
Instructions
- Preheat oven to 375°F (190°C).
- In a small bowl, combine melted butter, minced garlic, parsley, oregano, salt, and pepper.
- Divide the bread dough into 12 equal portions. Roll each portion into a ball.
- Dip each dough ball into the garlic butter mixture, ensuring it’s well coated.
- Place the coated dough balls in a greased 9×13 inch baking pan.
- Sprinkle with grated Parmesan cheese, if desired.
- Bake for 20-25 minutes, or until golden brown.
- Let cool slightly before serving.
Notes
For extra flavor, brush the baked rolls with additional garlic butter before serving. Serve warm with your favorite pasta dish or soup.