
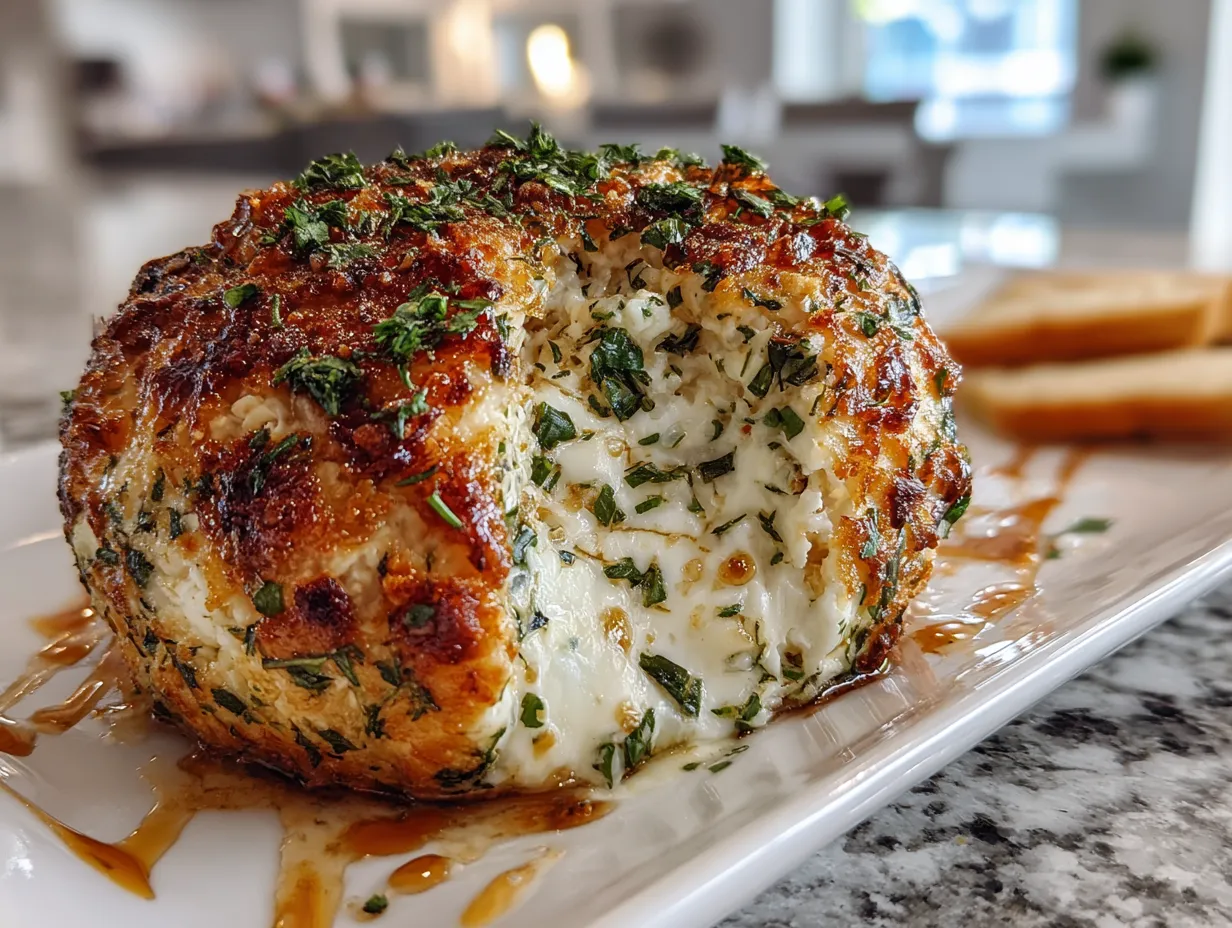
Okay, friend, let’s get cozy in the kitchen and talk about one of my all-time favorite things to whip up – my family’s famous Garlic Herb Cheeseball! I can almost smell it now, can’t you? That savory aroma of garlic mingling with fresh herbs… mmm! There’s just something so comforting and festive about it. The very first time I made this Garlic Herb Cheeseball, I used way too much garlic and it was potent! My family affectionately nicknamed it “The Garlic Bomb”! But hey, even mistakes can be delicious, right? Now it’s become such a staple, a guaranteed crowd-pleaser, and honestly, one of the easiest appetizers you can make.
You know how life gets – kids, work, errands… it’s a constant juggle. This Garlic Herb Cheeseball recipe is perfect because I can prep it ahead of time, even a day or two before a party. That’s a huge win in my book! I actually discovered this gem while flipping through an old community cookbook when my kids were little. I tweaked it over the years until it was just perfect – a balance of creamy, savory, and oh-so-addictive. It is now the quintessential holiday cheeseball.
My cooking philosophy is pretty simple: make good food that brings people together. I truly believe that the best memories are made around the table, sharing a meal and a laugh. And this Garlic Herb Cheeseball? It’s the perfect starting point for those moments. So, grab your ingredients, and let’s get started! Don’t be intimidated – I promise, it’s easier than you think. I’m here to guide you every step of the way.
What You’ll Need for This Garlic Herb Cheeseball
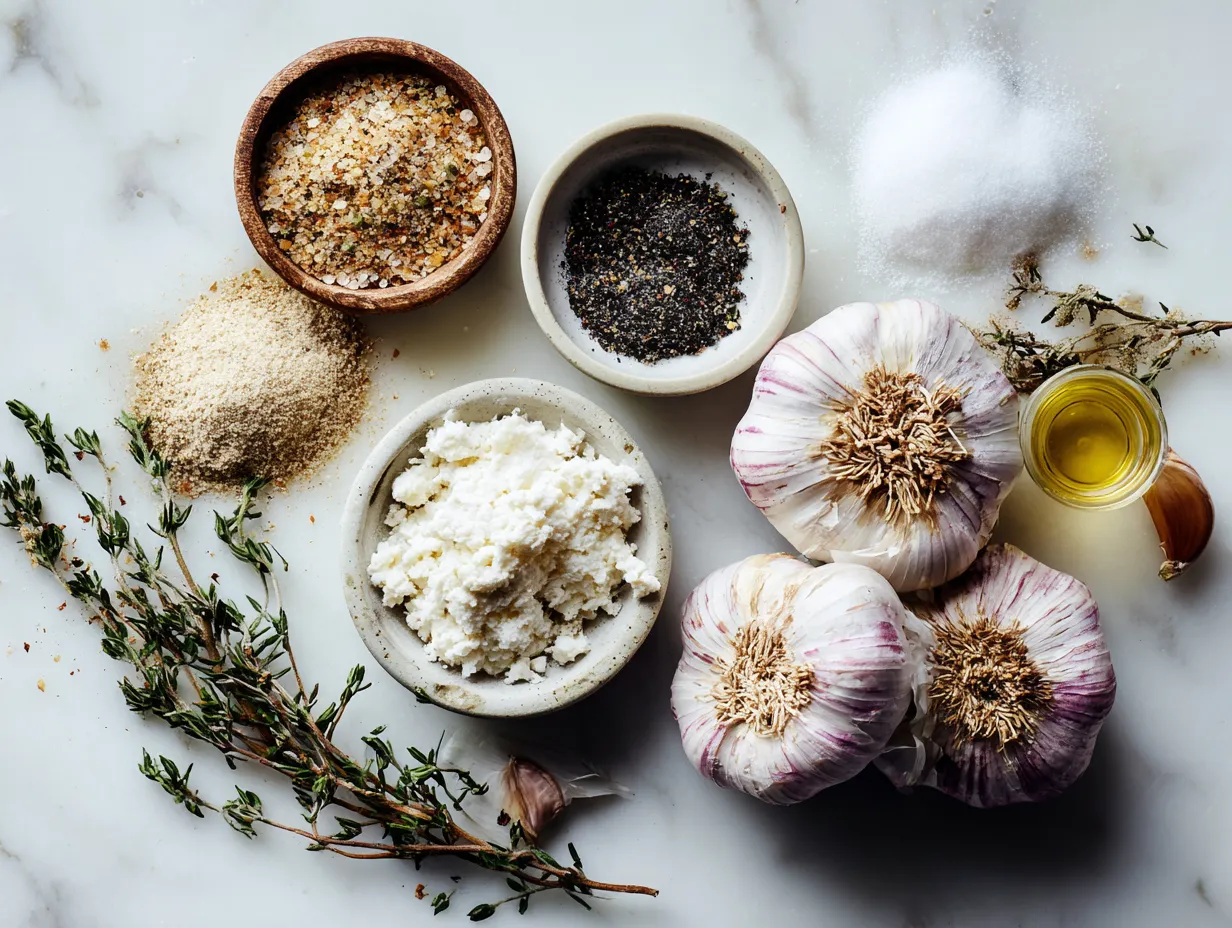
Okay, let’s gather our troops! Here’s what you’ll need to make this amazing herb cheeseball. Trust me, using good quality ingredients makes all the difference.
- Two 8-ounce packages of cream cheese, softened: I always use full-fat cream cheese for my Garlic Herb Cheeseball. It gives it that extra-creamy texture that everyone loves. Lower-fat options will work, but the texture won’t be quite as rich.
- 4 ounces of crumbled goat cheese: This adds a tangy depth that balances the richness of the cream cheese. You can find goat cheese in most supermarkets, usually near the specialty cheeses.
- ½ cup of softened butter: Unsalted butter is best so you can control the overall saltiness of the cheeseball recipe.
- 4 cloves garlic, minced: Freshly minced garlic is key! Don’t even think about using the jarred stuff for this Garlic Herb Cheeseball. It just doesn’t have the same punch.
- ¼ cup fresh parsley, chopped: I always use flat-leaf parsley. It has a milder flavor than curly parsley and blends beautifully into the Garlic Herb Cheeseball.
- 2 tablespoons fresh chives, chopped: These add a subtle oniony flavor that complements the garlic perfectly.
- 1 tablespoon fresh thyme leaves: Thyme adds a lovely earthy note to the Garlic Herb Cheeseball.
- ½ teaspoon garlic powder: For an extra boost of that garlic flavor. Check out Garlic Herb Cheeseball | Trop Rockin Recipes for different variations.
- Salt and freshly ground black pepper to taste: Don’t be shy with the seasoning! It really brings out the flavors of the herbs and garlic.
- 1 cup chopped pecans or walnuts: For rolling the cheeseball in. This adds a nice crunch and nutty flavor. I like to toast them lightly in a dry skillet for a few minutes to really bring out their flavor. You can also find a great recipe that also focuses on Garlic Herb Cheeseball – HealthyHappyLife.com.
- Crackers, baguette slices, or vegetables for serving: Whatever you like to dip with!
When making Garlic Herb Cheeseball, I usually grab my herbs from my little container garden on my porch, but if you’re buying them, look for bright green bunches that aren’t wilted. Here’s a Garlic Herb Cheeseball trick I learned: to keep herbs fresh longer, wrap them in a damp paper towel and store them in a plastic bag in the fridge. You can find pecans and walnuts in the baking aisle of most grocery stores, and sometimes you can find them already chopped, which is a great time-saver! Here is another way to boost your Garlic Herb Cheeseball, try adding roasted garlic! For a recipe, try my Roasted Garlic Potato Soup.
Let’s Make This Garlic Herb Cheeseball Together
Alright, let’s get our hands dirty and make this holiday cheeseball! Don’t worry if you’re a beginner – this is super easy, I promise!
- Combine the cheeses and butter: In a large bowl, beat together the softened cream cheese, goat cheese, and butter with an electric mixer until smooth and creamy. This is the foundation of our Garlic Herb Cheeseball, so make sure everything is well combined.
- Add the garlic, herbs, and seasonings: Add the minced garlic, parsley, chives, thyme, garlic powder, salt, and pepper to the cheese mixture. Mix until everything is evenly distributed. I learned the hard way with this Garlic Herb Cheeseball that if you don’t mix it well enough, you’ll end up with clumps of herbs in some bites and none in others!
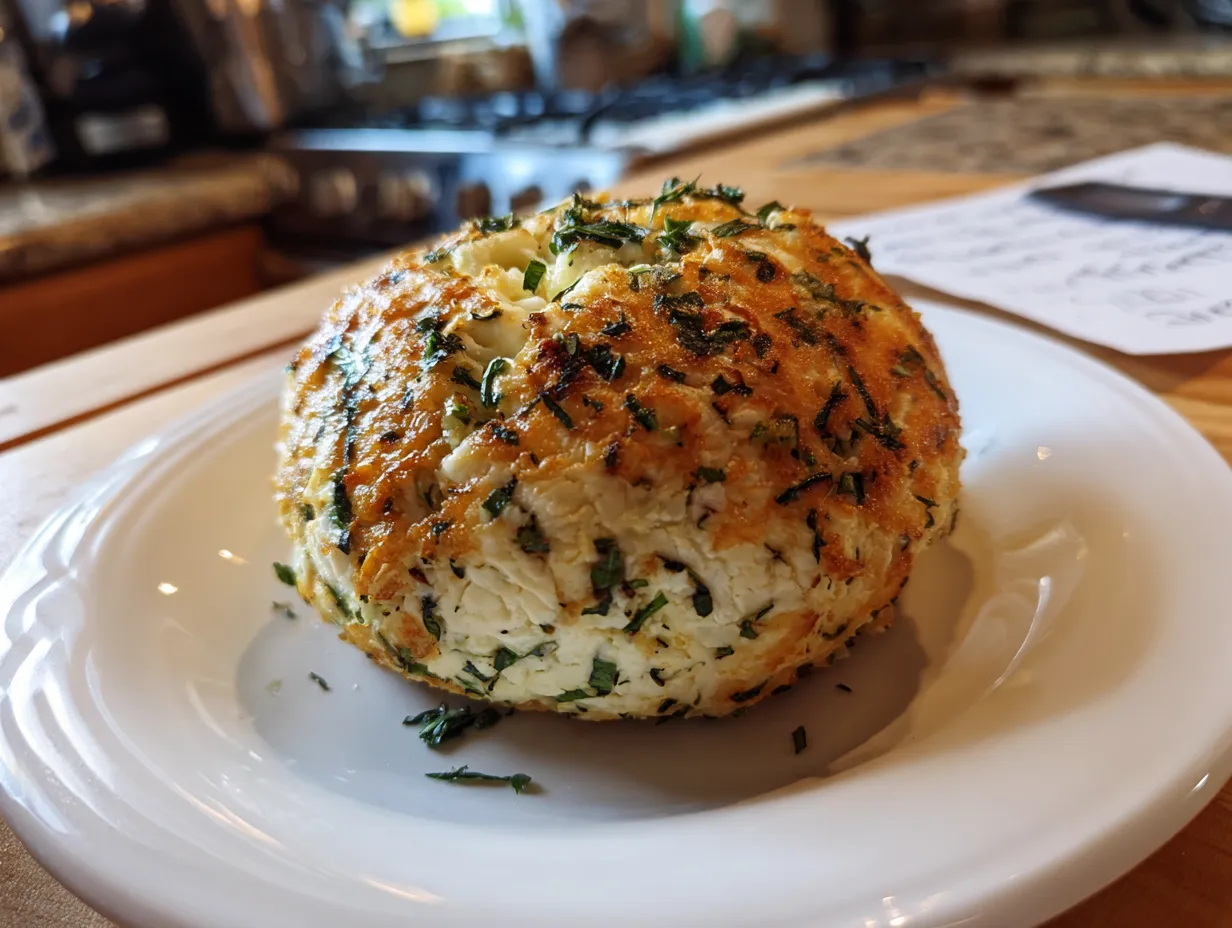
- Shape the cheeseball: Scoop the cheese mixture onto a large piece of plastic wrap. Gently shape it into a ball. Wrap the plastic wrap tightly around the Garlic Herb Cheeseball and refrigerate for at least 2 hours, or preferably overnight. This allows the flavors to meld together and the cheeseball to firm up. This ensures that the cream cheese ball forms properly.
- Prepare the nut coating: Place the chopped pecans or walnuts in a shallow dish. If you are looking for a shortcut, try buying your nuts pre-chopped.
- Coat the cheeseball: Remove the cheeseball from the refrigerator and unwrap it. Roll the Garlic Herb Cheeseball in the chopped nuts, pressing gently so the nuts adhere to the cheese. Make sure to get the whole herb cheeseball! This is the fun part!
- Serve and enjoy: Place the Garlic Herb Cheeseball on a serving platter and surround it with crackers, baguette slices, or vegetables. I like to add a sprig of fresh thyme or parsley for a pop of color. This holiday cheeseball looks amazing on a festive platter!
In my kitchen, Garlic Herb Cheeseball usually takes about 15 minutes to prep, plus the chilling time. While the Garlic Herb Cheeseball is chilling, I usually clean up the kitchen and get the rest of my appetizers ready. Don’t worry if your Garlic Herb Cheeseball isn’t perfectly round – it will still taste amazing! Also, be sure to let the cheese get to room temperature as this step will become easier. Your Garlic Herb Cheeseball should smell like a garlicky, herbaceous dream! I usually make a double batch for parties because it disappears so fast. It always is a success.
How I Love to Serve This Garlic Herb Cheeseball
Now, for the best part – serving and enjoying this delicious Garlic Herb Cheeseball! My family loves this creamy herb cheeseball when I set it out as part of a larger appetizer spread for game nights or holiday gatherings. It’s always the first thing to disappear!
Some of my go-to side dishes that pair with Garlic Herb Cheeseball include:
- Crackers: Simple and classic. I like to offer a variety of crackers, such as Ritz, Wheat Thins, and water crackers.
- Baguette slices: Toasted baguette slices add a nice crunch and are perfect for scooping up the creamy cheeseball.
- Vegetables: Fresh veggies like carrot sticks, celery sticks, cucumber slices, and bell pepper strips provide a healthy and refreshing contrast to the richness of the cheese.
- Pretzels: Salty pretzels offer a fun and unexpected pairing.
- Fruit: Sliced apples or pears can add a touch of sweetness that complements the savory flavors of the Garlic Herb Cheeseball.
This Garlic Herb Cheeseball is perfect for any occasion, from casual get-togethers to more formal holiday parties. It’s especially festive during the holidays! For Garlic Herb Cheeseball presentation tips, I like to use a pretty serving platter and arrange the dippers around the Garlic Herb Cheeseball in an appealing way. I also like to add a few sprigs of fresh herbs for a pop of color and to give people a hint of what’s inside.
If you have extra Garlic Herb Cheeseball, you can store it in the refrigerator for up to a week. Just wrap it tightly in plastic wrap to prevent it from drying out. You can even crumble it over salads or use it as a spread for sandwiches.
I’ve tried a few seasonal Garlic Herb Cheeseball variations over the years. One of my favorites is adding dried cranberries and orange zest during the holidays. It adds a festive touch and a burst of flavor! Friends always ask for this Garlic Herb Cheeseball recipe, and I’m always happy to share it. It’s just one of those things that everyone loves! Do you enjoy garlic cheddar? Try this Garlic Cheddar Potato Soup.
Your Garlic Herb Cheeseball Questions Answered
Alright, let’s tackle some of the most common questions I get about this Garlic Herb Cheeseball. I’ve been there, I’ve made the mistakes, and I’ve learned from them!
Q: Can I make this Garlic Herb Cheeseball ahead of time?
A: Absolutely! In fact, I highly recommend it. The flavors meld together even more when it sits in the fridge overnight. Just make sure to wrap it tightly in plastic wrap to prevent it from drying out. The perfect easy appetizer!
Q: What if my cream cheese isn’t soft enough?
A: You know what I do when my Garlic Herb Cheeseball needs some softening? If you’re in a hurry, you can microwave it for a few seconds at a time, but be careful not to melt it! It should be soft enough to easily beat with a mixer.
Q: Can I substitute dried herbs for fresh herbs in this cream cheese ball?
A: While fresh herbs are always best, you can substitute dried herbs in a pinch. Use about 1 teaspoon of dried herbs for every tablespoon of fresh herbs. Just keep in mind that the flavor won’t be quite as vibrant.
Q: What kind of crackers go best with this herb cheeseball?
A: That’s really a matter of personal preference! I like to offer a variety of crackers, such as Ritz, Wheat Thins, and water crackers. Baguette slices and vegetables are also great options. Some people even like to serve it with pretzels for a salty and crunchy contrast. Try my Garlic Parmesan Cheeseburger Bombs, for some other flavor variations.
Q: Can I use different types of nuts for the coating of the Garlic Herb Cheeseball?
A: Definitely! Pecans and walnuts are my go-to choices, but you can use any nuts you like. Almonds, cashews, or even pistachios would be delicious. You can also use a combination of different nuts.
Q: What if my herb cheeseball is too soft to roll in the nuts?
A: If your Garlic Herb Cheeseball is too soft, simply pop it back in the refrigerator for a little while longer to firm up. Make sure it’s well-chilled before you try to roll it in the nuts. Also, be certain that your cream cheese ball isn’t too warm to begin with.
Q: Can I freeze this Garlic Herb Cheeseball?
A: I don’t recommend freezing this cream cheese ball, as the texture of the cream cheese can change when it’s frozen and thawed. It’s best to make it fresh and enjoy it within a week. Have you seen My version of a Christmas cheeseball. I just mix all the ingredients …
My Final Thoughts on This Garlic Herb Cheeseball
This Garlic Herb Cheeseball recipe holds a special place in my heart because it’s so simple, yet so delicious. It’s a crowd-pleaser that always brings people together, and it’s perfect for any occasion. Plus, it reminds me of all the wonderful memories I’ve made with my family over the years, gathered around the table, sharing a meal and a laugh.
My Garlic Herb Cheeseball Pro Tips:
- Use good quality ingredients: It really makes a difference in the flavor and texture of the Garlic Herb Cheeseball.
- Don’t be afraid to experiment with different herbs and seasonings: Get creative and make the cream cheese ball your own!
- Make it ahead of time: This allows the flavors to meld together and the cheeseball to firm up.
Here are a few Garlic Herb Cheeseball variations I’ve tried with my family:
- Spicy: Add a pinch of red pepper flakes or a dash of hot sauce to the cheese mixture for a little kick.
- Mediterranean: Add chopped sun-dried tomatoes, Kalamata olives, and feta cheese to the cheese mixture.
- Sweet and Savory: Add dried cranberries and orange zest to the cheese mixture for a festive holiday twist.
My son loves the spicy version, while my daughter prefers the classic Garlic Herb Cheeseball. As for me, I’m a fan of them all!
I truly hope you try this Garlic Herb Cheeseball recipe and make it your own. Don’t be afraid to experiment and have fun with it! I’m certain that the holiday cheeseball will be a success. I hope that this Garlic Herb Cheeseball brings you and your loved ones as much joy as it has brought my family. Happy cooking, my friend!
Garlic Herb Cheeseball
This Garlic Herb Cheeseball is an easy and impressive appetizer perfect for parties and gatherings. Creamy, savory, and packed with fresh herbs, it’s sure to be a crowd-pleaser!
- Prep Time: 15 minutes
- Cook Time: 0 minutes
- Total Time: 135 minutes
- Yield: 8 servings
- Category: Appetizer
- Method: No-Cook
- Cuisine: American
Ingredients
- 8 ounces cream cheese, softened
- 4 ounces goat cheese, softened
- 1/4 cup fresh parsley, chopped
- 2 tablespoons fresh chives, chopped
- 2 cloves garlic, minced
- 1/4 teaspoon garlic powder
- 1/4 teaspoon onion powder
- 1/4 teaspoon dried oregano
- 1/4 teaspoon dried basil
- Salt and pepper to taste
- Optional: Chopped nuts (walnuts, pecans), everything bagel seasoning, or additional herbs for coating
- Crackers, vegetables, or bread for serving
Instructions
- In a large bowl, combine the softened cream cheese and goat cheese. Beat with an electric mixer until smooth and creamy.
- Add the fresh parsley, chives, minced garlic, garlic powder, onion powder, oregano, and basil to the bowl. Mix well to combine.
- Season with salt and pepper to taste.
- Place a large piece of plastic wrap on a flat surface. Spoon the cheese mixture onto the plastic wrap.
- Gently shape the cheese mixture into a ball using the plastic wrap. Wrap tightly and refrigerate for at least 2 hours to allow the flavors to meld and the cheeseball to firm up.
- Before serving, unwrap the cheeseball and roll it in chopped nuts, everything bagel seasoning, or additional herbs, if desired.
- Serve with crackers, vegetables, or bread.
Notes
For a spicier kick, add a pinch of red pepper flakes to the cheese mixture. You can also make this cheeseball a day or two in advance and store it in the refrigerator until ready to serve.